
0 - Introduction
Have you ever wanted an app like One Drive or Google Drive that instead of saving your files to god knows where, would save them to one of your trusted computers or servers? Then Owncloud is for you, it let’s you easely sync files in wherever device you need to.
Another HUGE feature of Owncloud is their plugin support. With a simple plugin you can add things like an alternative to Office 365, PFD viewers, gallery manegement (like Google Photos), synced callendar for your familly and friends, notetaking and much, much more.
1 - Installing Owncloud
Like in most of our articles, we will be using docker to host Owncloud. You can learn how to install docker in this article. After installing docker, create a folder that will contain the data generated by Owncloud and, inside it, create a file named ‘docker-compose.yml’ and copy the following options changing every line that has a 🚨:
services:
    owncloud:
        image: owncloud/server:latest
        container_name: owncloud
        restart: unless-stopped
        ports:
            - "10200:8080" # 🚨 change if needed
        depends_on:
            - mariadb
            - redis
        environment:
            - OWNCLOUD_DOMAIN=machineaddress:10200 # 🚨
            - OWNCLOUD_DB_TYPE=mysql
            - OWNCLOUD_DB_NAME=owncloud
            - OWNCLOUD_DB_USERNAME=owncloud
            - OWNCLOUD_DB_PASSWORD=owncloud # 🚨
            - OWNCLOUD_DB_HOST=mariadb

            # 🚨 these are the credentials of your admin account
            - OWNCLOUD_ADMIN_USERNAME=user # 🚨
            - OWNCLOUD_ADMIN_PASSWORD=password # 🚨

            - OWNCLOUD_MYSQL_UTF8MB4=true
            - OWNCLOUD_REDIS_ENABLED=true
            - OWNCLOUD_REDIS_HOST=redis
        healthcheck:
            test: ["CMD", "/usr/bin/healthcheck"]
            interval: 30s
            timeout: 10s
            retries: 5
        volumes:
            - ./data/owncloud:/mnt/data

    mariadb:
        image: mariadb:latest
        container_name: owncloud-db
        restart: unless-stopped
        environment:
            - MYSQL_ROOT_PASSWORD=owncloud
            - MYSQL_USER=owncloud
            - MYSQL_PASSWORD=owncloud # 🚨
            - MYSQL_DATABASE=owncloud
            - MARIADB_AUTO_UPGRADE=1
        command: ["--max-allowed-packet=128M", "--innodb-log-file-size=64M"]
        healthcheck: # 🚨 if you changed your password, change it here too
            test: ["CMD", "mysqladmin", "ping", "-u", "root", "--password=owncloud"]
            interval: 10s
            timeout: 5s
            retries: 5
        volumes:
            - ./data/mysql:/var/lib/mysql

    redis:
        image: redis:latest
        container_name: owncloud-redis
        restart: unless-stopped
        command: ["--databases", "1"]
        healthcheck:
            test: ["CMD", "redis-cli", "ping"]
            interval: 10s
            timeout: 5s
            retries: 5
        volumes:
            - ./data/redis:/data
After changing the ‘docker-compose.yml’ file, according to your preferences, you can run following to start the server.
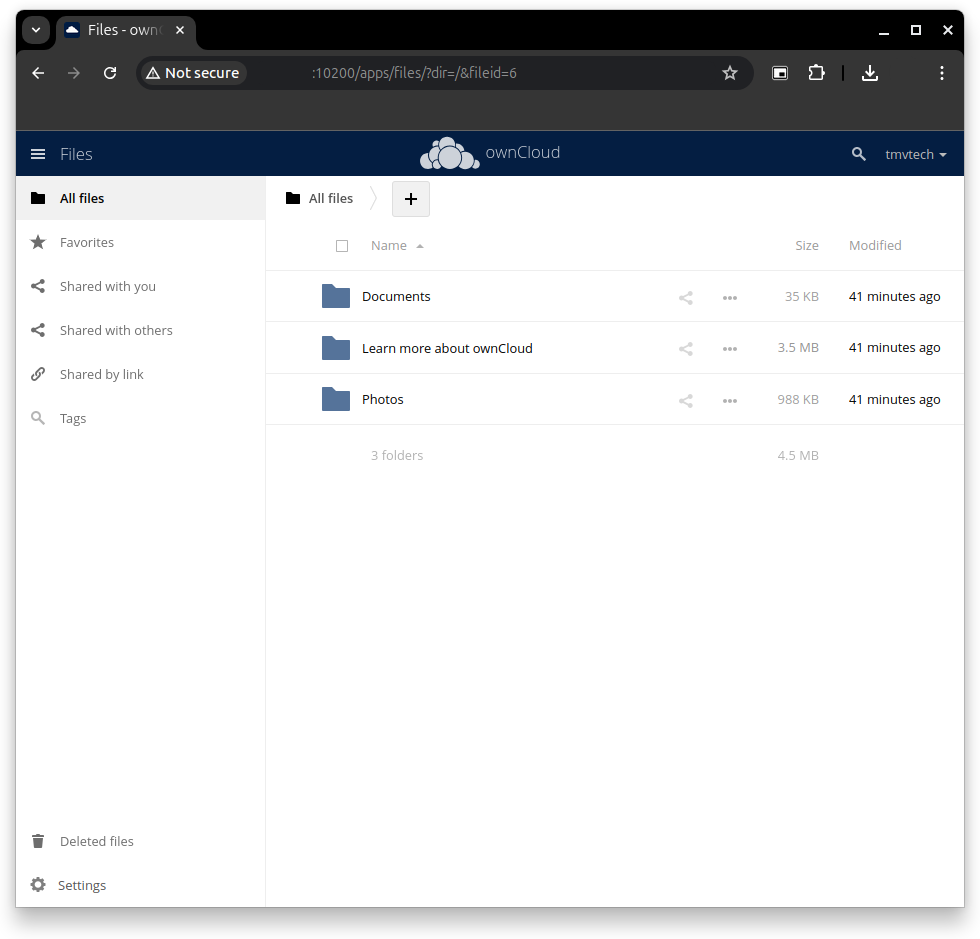
docker compose upAnd that’s it, you can now use Owncloud with your devices! Don’t forget that to use this service outside your network, you will need to port forward.
With this service, if you are thinking of exposing it to the public, I really recommend you install Nginx Proxy Manager alongside it. You can learn how to install and setup Nginx Proxy Manager in this article.
And as always, thanks for reading and stay tuned for more tech insights and tutorials. Until next time, and keep exploring the world of tech!