
0 - Introduction
If you are a developer of an application or a person who needs to use older software it is very probable that you need a virtual machine at least once. In Linux (Ubuntu in our case) there are a couple ways of making virtual machines, one being Virtual Box, which is also really good especially if you plan on having various OS’s as hosts (for example ubuntu, windows and mac) that way you will have a very similar experience between hosts, but if you only need one host and that host happens to be running Ubuntu, then you are on the right article.
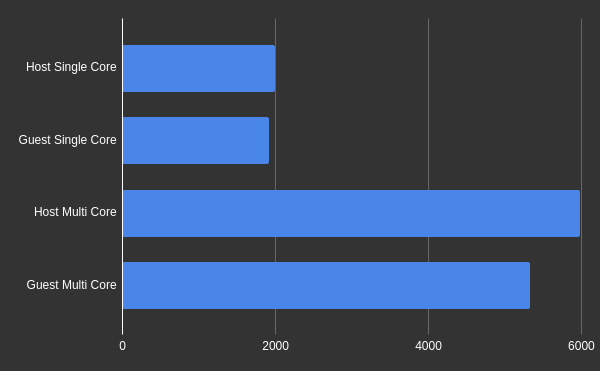
One of the biggest reasons for choosing KVM over other VM hosts is performance, and because of that i went ahead and ran a Geekbench6 benchmark on my cheap laptop both on host, and on a VM, both running Ubuntu 24.04.
In this graph, you can see the results:
In single core, the host got 1994 and guest 1913 and, in multi core, host got 5975 and guest 5323. The VM got this incredible result even though it only had access to 3 cores, 6 threads instead of 4 cores, 8 threads and 4Gbs of ram instead of the 16Gbs that my laptop has!
Now that you know what KVM is and how good it is, let’s see how you can set it up on your own Ubuntu machine. But first, let’s update the system:
sudo apt update
sudo apt upgrade
1 - Check if it is supported
Before installing all the dependencies and programs that we will use, let’s first check if your pc does support KVM accelaration, you can do that by installing ‘cpu-checker’ and running ‘kvm-ok’:
sudo apt install cpu-checker
kvm-ok
If your machine supports KVM, you sould expect something like:
INFO: /dev/kvm exists
KVM acceleration can be used
2 - Installing
KVM has some dependencies that you need to install and we can do that with:
sudo apt -y install bridge-utils libvirt-clients libvirt-daemon qemu-kvmNow we need the Virtual Machine Manager, so that we can control our virtual machines with a GUI application, and we can install it with this command:
sudo apt install virt-manager
virt-manager
With the manager installed open it. If you get an error like the one in this image, try running it in a terminal with sudo.
sudo virt-manager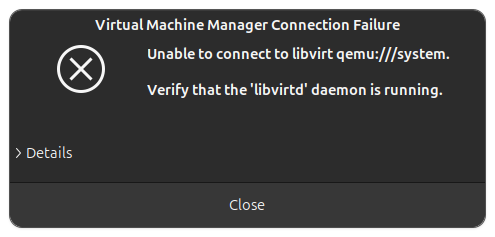
3 - Creating a Ubuntu VM
When you open virt-manager you will be greated with a list of your VM’s, if it is the first time you are using it, then you will be greated with an empty list.
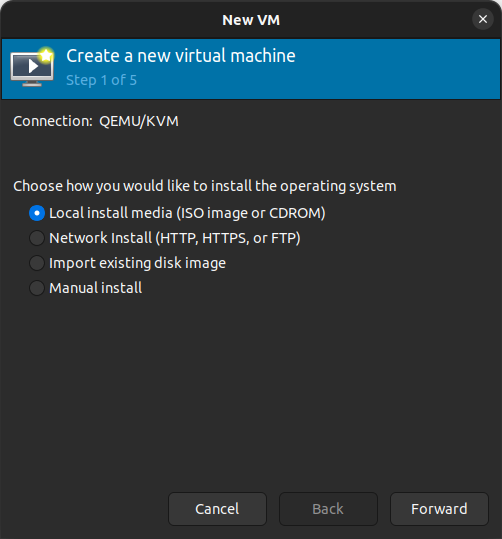
You can create a VM by pressing the icon on the top left, the same as this image (monitor with a flash/sun).
After opening this menu you will have to choose how you want to install the OS on the virtual machine. Usually you will use the first option (‘Local install media’) and use an ISO file.
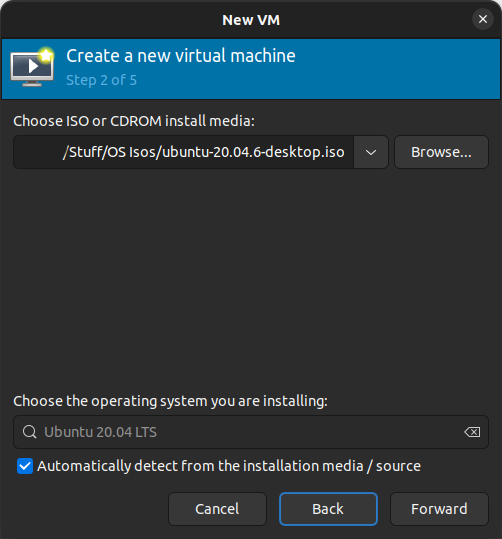
After pressing ‘forward’, you can click ‘browse’ and after that click ‘Browse Local’ and choose your ISO’s folder.
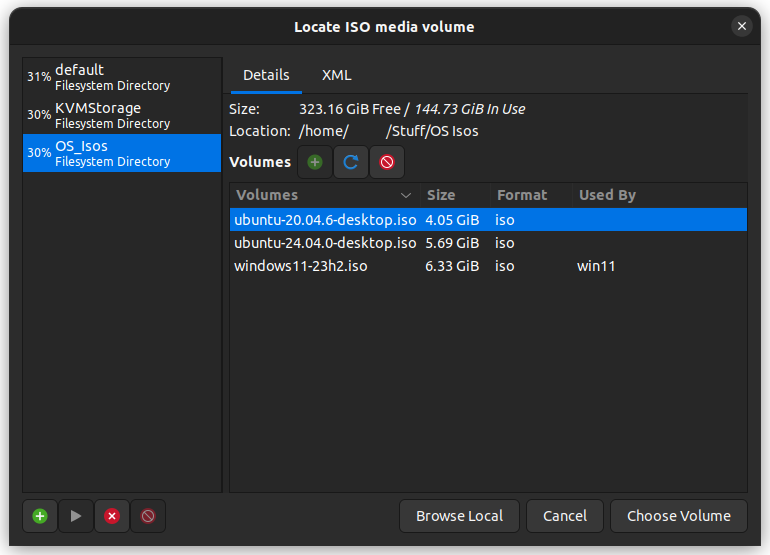
You will notice that after choosing your ISO’s folder, you will have the option to choose the ISO that your vm will boot into.
After you press ‘forward’ again, you will have the option to choose the system resources you want to give to the vm. In my testing, as long as you have a medium-bad to good pc, the defaults are good enough, for example, if you have 8GBs of ram and a quad core cpu, the recommended will be 4GBs of ram and 2 vcpus, that is enough for running Ubuntu with ease. In windows i would up the memory a little but it still runs fine. For disk storage, i usually give 32GBs for linux distros to have a little extra space to play around with but windows needs 52GBs to even install, so i usually give 64GBs.
And we are finally on the last page of the ‘New VM’ and here you will have to do two things. Firstly, you need to name your VM, i usually name it like ‘project-osname-osversion’ let’s imgine this tutorial, it would be ‘kvmtut-ubuntu-24.04’.
After naming your VM you can choose the network mode you want, there are two main modes that are interesting to know about:
- In ‘NAT’ mode the VM will act like you had a router in between your pc network and the VM, that means the local stuff like discoveries won’t work, but also means that you are a little protected from bugs that usually come from using network discovery. An example could be SMB 1.0.
- In ‘Bridge Network’ mode the VM will act like it was connected to the same router as you are, in this mode you can use discovery services, for example SMB and game servers like CS and Minecraft, but you are also exposing yourself to the possibility of the VM, if contaminated by a virus, spreading it to your local network.
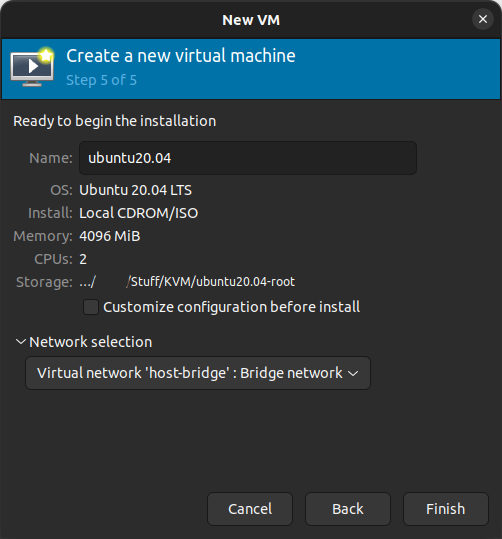
And that’s it. After you click ‘finish’ the VM will open and you can install the OS you selected.

Thanks again for reading and stay tuned for more tech insights and tutorials. Until next time, and keep exploring the world of tech!