0 - Introduction
Do you have a small company or want a way to talk to your friends without anyone spying on you? Then Mattermost is for you. It was made for the business world, with a lot of integrations with other services, you can make text channels, voice calls, share your screen and camera, just like on Discord, mattermost is a very good alternative to it and I will teach you, in this article, how to host a server.
Attention: Mattermost offers 3 licenses, Free, Premium and Enterprise. If you want to use Mattermost like Discord, for group calling, you need the Premium version as the Free one only allows for 1 to 1 calling.
1 - Install
We will be using Docker to host the Mattermost Server, you can learn how to install docker in this article. After installing docker, you need to create a folder for mattermost, and create a file named ‘docker-compose.yml’.
nano docker-compose.ymlAnd now we need to write our compose file, we will also need Postgres alongside Mattermost (in the same compose file):
services:
    postgres:
        image: postgres:latest
        restart: unless-stopped
        security_opt:
            - no-new-privileges:true
        pids_limit: 100
        read_only: true
        tmpfs:
            - /tmp
            - /var/run/postgresql
        volumes:
            - ./data/database:/var/lib/postgresql/data
        environment:
            - TZ=UTC
            - POSTGRES_USER=mmuser
            - POSTGRES_PASSWORD=ultrasecretpasswordtmv
            - POSTGRES_DB=mattermost
    mattermost-chat:
        depends_on:
            - postgres
        image: mattermost/mattermost-team-edition:latest
        restart: unless-stopped
        security_opt:
            - no-new-privileges:true
        pids_limit: 200
        tmpfs:
            - /tmp
        volumes:
            - ./data/app/config:/mattermost/config:rw
            - ./data/app/data:/mattermost/data:rw
            - ./data/app/logs:/mattermost/logs:rw
            - ./data/app/plugins:/mattermost/plugins:rw
            - ./data/app/client-plugins:/mattermost/client/plugins:rw
            - ./data/app/bleve:/mattermost/bleve-indexes:rw
        environment:
            - TZ=UTC
            - MM_SQLSETTINGS_DRIVERNAME=postgres
            - MM_SQLSETTINGS_DATASOURCE=postgres://mmuser:ultrasecretpasswordtmv@postgres:5432/mattermost?sslmode=disable&connect_timeout=10
            - MM_BLEVESETTINGS_INDEXDIR=/mattermost/bleve-indexes
            - MM_SERVICESETTINGS_SITEURL=https://mmtest.tmvtech.org
        ports:
            - "8000:8065" # need to change only left side
            - "8001:8001" # must be the same on both sides
            - "8002:8002" # must be the same on both sides
Now save the file (in nano CTRL+O, enter, CTRL+X) and, in the terminal, write:
docker compose upYou might get errors regarding file access, if you do, you can either go file by file changing permissions, or run this command in the same folder as the docker compose:
sudo chmod -R 777 data2 - Create Admin Account
To start using Mattermost, you first need an Admin account, you can create it by going to the ip of the host machine and the first port you chose in the docker compose file.
http://localhost:8000After going to your website, you will be greeted with the user creation form. Choose your email, username and password and click ‘Create Account’:

Now you need to name your organization, after that click ‘Continue’:

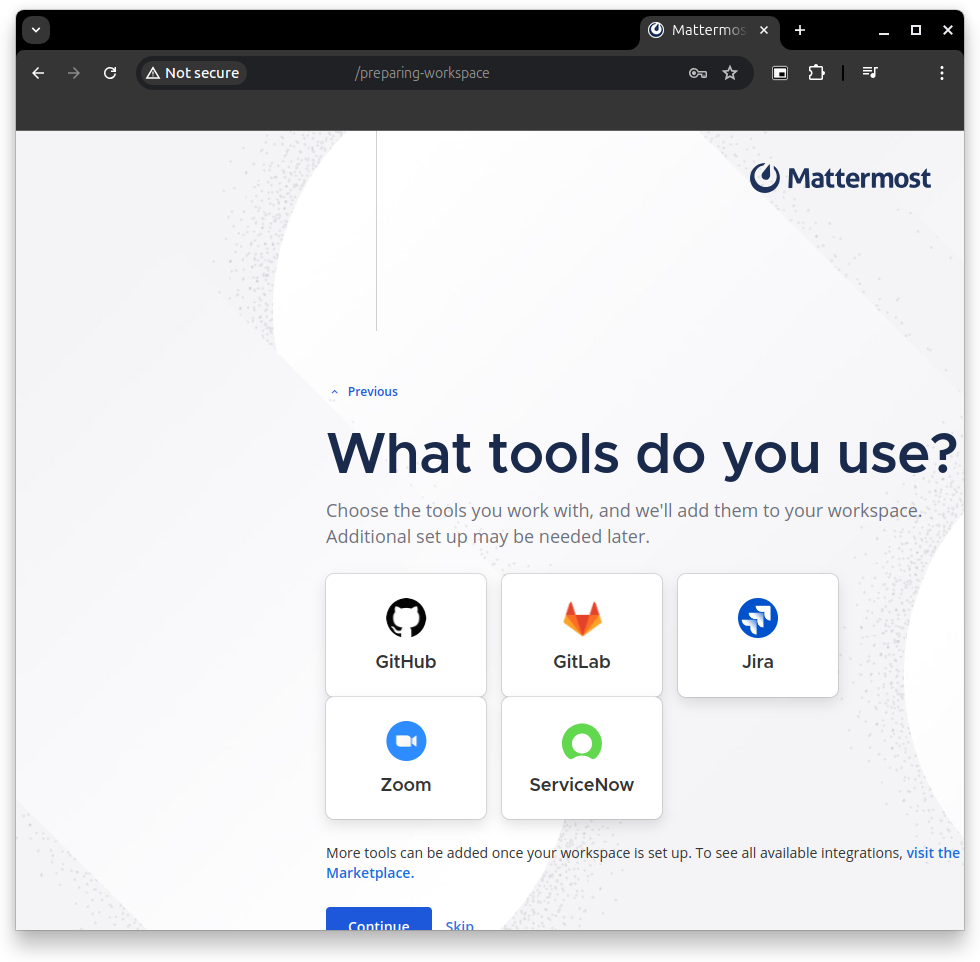
If you use any of the following apps, do their setup, otherwise click ‘Skip’:
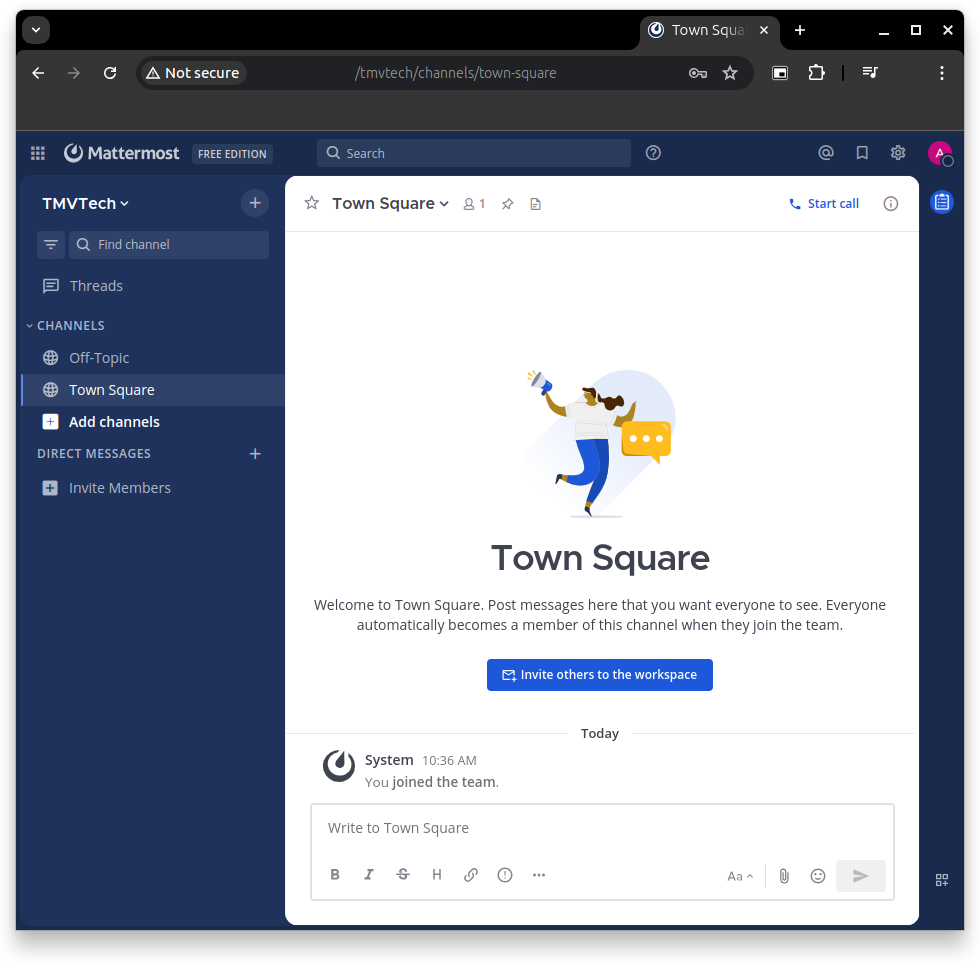
Lastly, you will be given an invite link, save it and send it to your friends:

And that’s it, Mattermost Chat is ready for use!
3 - Fixing calls
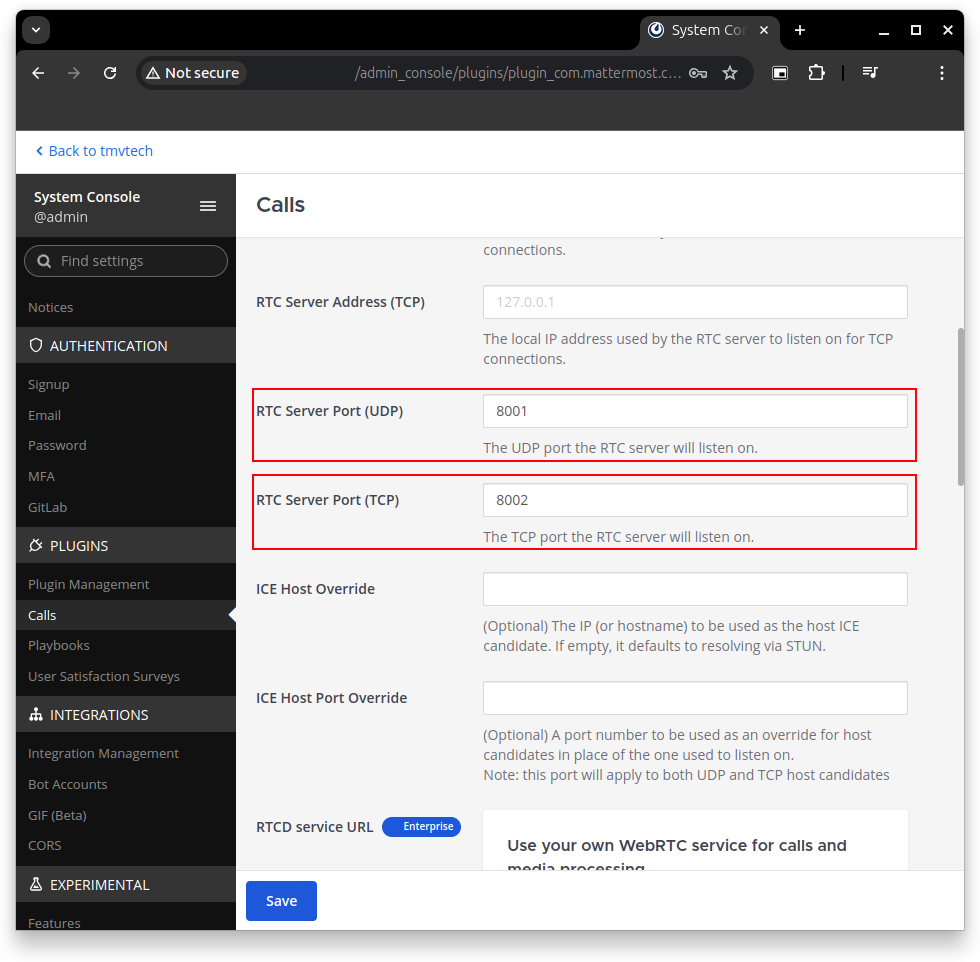
If you use only your browser, you might not notice this, but with our current setup, calls on the app do not work, that is because we did not change the call ports, it is easy to do though and that’s what we will do now.
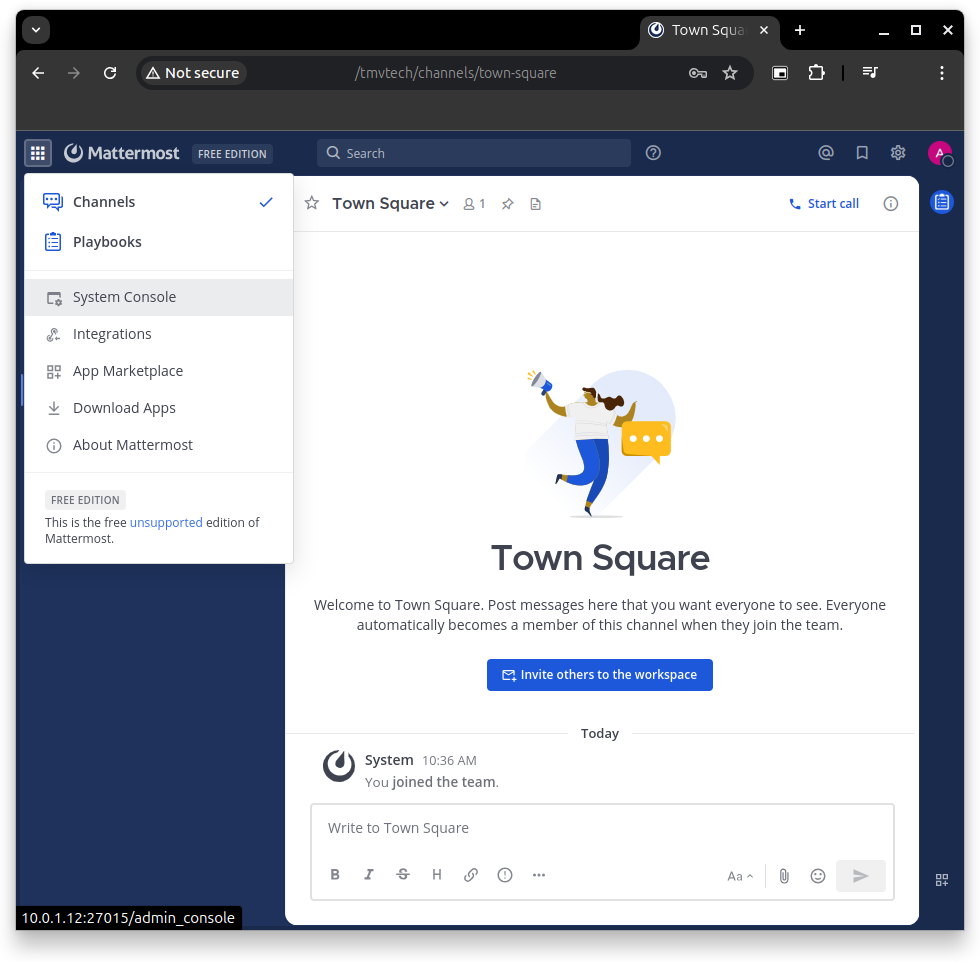
On the top left, click on the 9 squares, then ‘System Console’, in the settings, look for ‘Calls’ in the ‘Plugins’ tab and change your ‘RTC Server Port’s, both UDP and TCP, you can either use the same for both, or use one for each, but use the ones you specified in the docker compose file.
Bonus - Changing theme
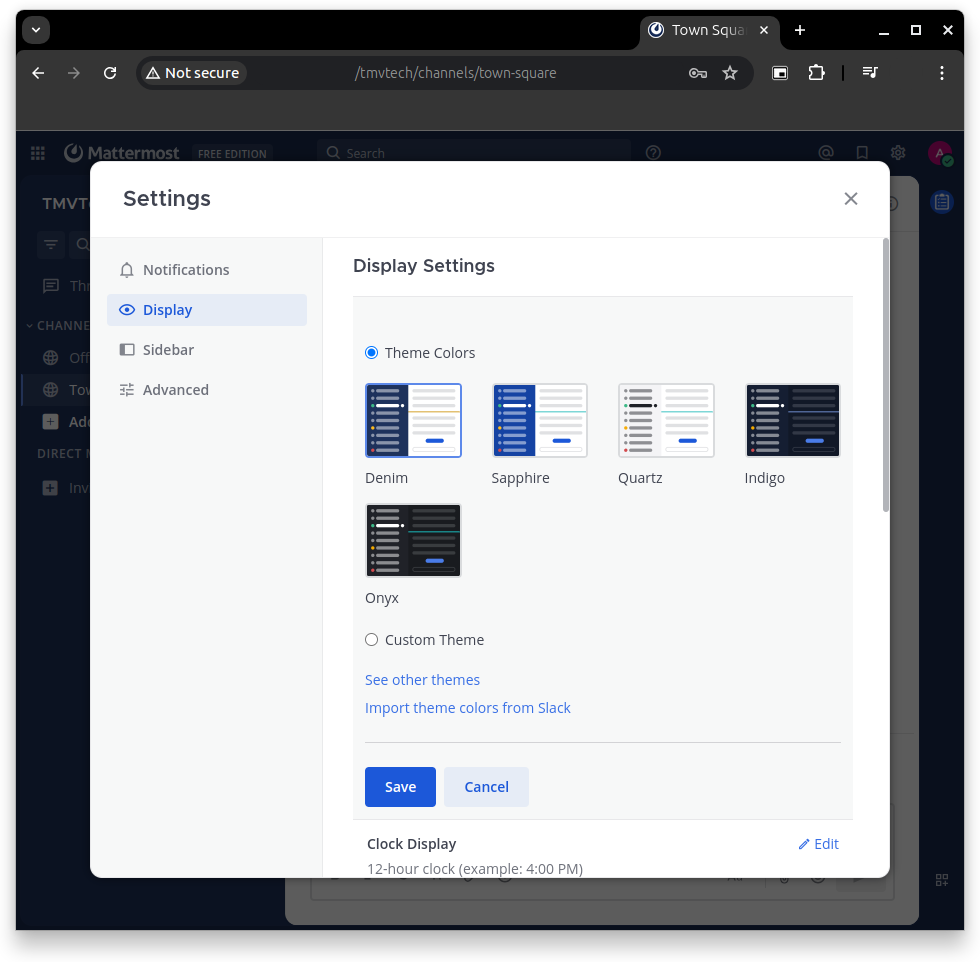
On the top right you will see a cog symbol, click it and go to ‘Display’, in there you can change your theme.
You can also customize other things about how Mattermost looks, take a look in there to learn which settings you might want to change.
And that’s it, you should now be able to chat and make calls with your friends and colleagues. I would also suggest you to take a look at Nginx Proxy Manager and getting a domain for your host location.
Thanks for reading and stay tuned for more tech insights and tutorials. Until next time, keep exploring the world of tech!
