

0 - Introduction
ComfyUI is an advanced, node-based interface for Stable Diffusion, designed to give users complete control over the image generation process. Unlike traditional AI image generation tools, ComfyUI offers a flexible workflow where you can tweak every aspect of the diffusion process, from model selection to fine-grained parameter adjustments. Whether you’re an AI artist looking for precision or a developer experimenting with new generation techniques, ComfyUI provides an intuitive yet powerful way to create stunning visuals.
In this article, we’ll explore the core features of ComfyUI, how to get started with it, and practical tips for optimizing your image generation workflow. And at the end, we’ll guide you through connecting ComfyUI with Open WebUI allowing you to generate images seamlessly while chatting with an Ollama model like Llama 3.2 or the newer DeepSeek R1.
To folow this article you will need a NVIDIA GPU, there are ways to run this project with an AMD or Intel one, but you will have to look inside the ‘docker-compose.yml’ file and also have the necessary drivers installed.
1 - Nvidia Container Toolkit
To be able to use our Nvidia GPUs inside a container, we need to install Nvidia Container Toolkit, below you can find the commands for doing it, but if you want to follow the official nvidia instructions, you can find them here.
Start by adding the Nvidia keys to your sources:
curl -fsSL https://nvidia.github.io/libnvidia-container/gpgkey | sudo gpg --dearmor -o /usr/share/keyrings/nvidia-container-toolkit-keyring.gpg \
  && curl -s -L https://nvidia.github.io/libnvidia-container/stable/deb/nvidia-container-toolkit.list | \
    sed 's#deb https://#deb [signed-by=/usr/share/keyrings/nvidia-container-toolkit-keyring.gpg] https://#g' | \
    sudo tee /etc/apt/sources.list.d/nvidia-container-toolkit.list
Run apt update and install the toolkit:
sudo apt update
sudo apt install nvidia-container-toolkit
Configure nvidia-ctk to use docker:
sudo nvidia-ctk runtime configure --runtime=dockerRestart the docker daemon:
sudo systemctl restart docker2 - Setup
Now we are ready to start setting up ComfyUI. Start by cloning the ComfyUI repo from AIDock and then go into that folder:
git clone https://github.com/ai-dock/comfyui.git
cd comfyui/
Using nano, create / edit the ‘.env’ file:
nano .envIn there you will need to set your machines IP and also disable auth (to be able to use the API later):
DIRECT_ADDRESS=127.0.0.1
WEB_ENABLE_AUTH=false
After saving the file (CTRL+O and CTRL+X), edit the ‘docker-compose.yml’ file:
nano docker-compose.yamlIn there, uncomment ‘deploy’ for us to be able to use our NVIDIA GPUs:
# ...
## For Nvidia GPU's - You probably want to uncomment this
    deploy:
      resources:
        reservations:
          devices:
            - driver: nvidia
              count: all
              capabilities: [gpu]
# ...
Save the file and start up your container:
docker compose up -dNow we need to get a model. The creators of ComfyUI, in their documentation, recommend CivitAI, go there, click on models and add a filter to only show ‘Checkpoints’. For this test, I used the first model i saw, which was this one.
After downloading a model, you will need to place it in the folder ‘comfyui/workspace/ComfyUI/models/checkpoints’. Inside the checkpoints folder, the documentation also said to create folders for each base model, so inside the Checkpoints folder, you would create, for example, ‘SD1.5’ and ‘Pony’ and inside those folders, you would then place your models.
You can now access ComfyUI in your browser by going to:
http://yourip:81883 - Using Comfy UI
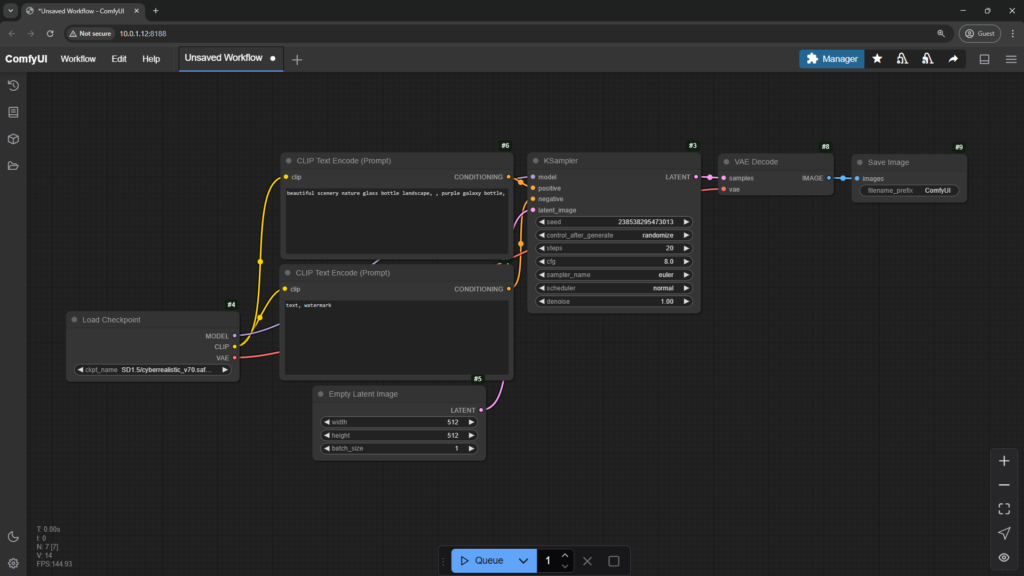
Once you get to ComfyUI, you will get this scary interface in the picture below. In reality, it is a lot easier to use than it first seems.
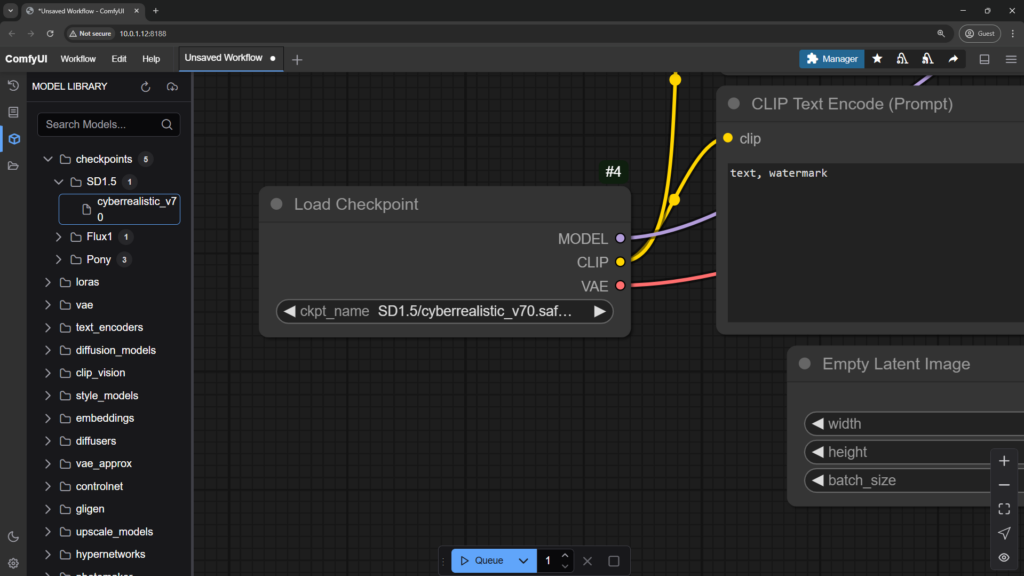
The first thing we need to do, is to set our model. On the top left, click on the models tab and then on the cloud and refresh buttons to update your list. After the list updates, go to ‘checkpoints’ and then drag your model to the ‘Load Checkpoint’ node.
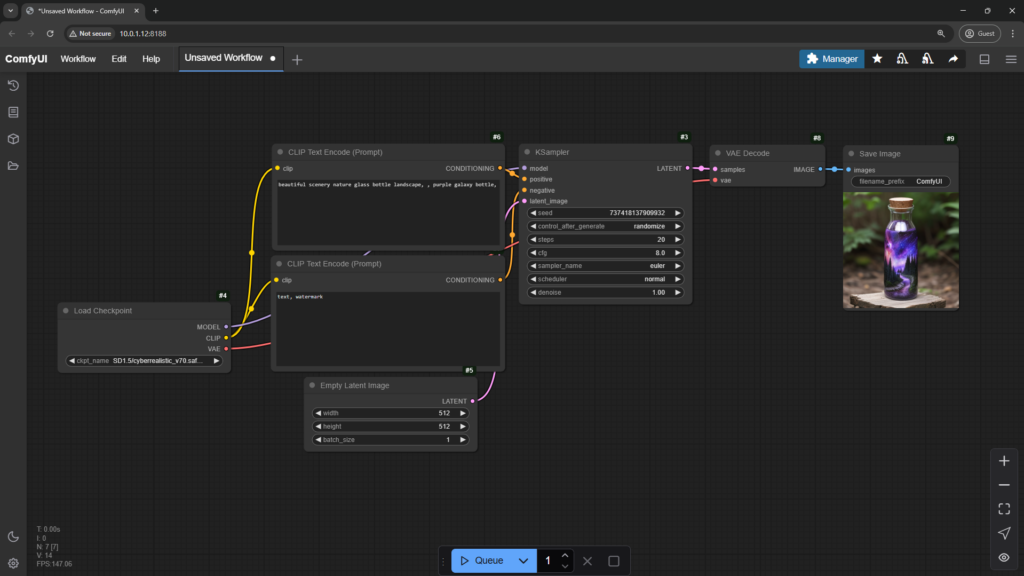
With a module selected you can now try to generate an image. On the bottom, click on the blue Queue button. After a second or two, an image should be generated in the ‘Save Image’ node.
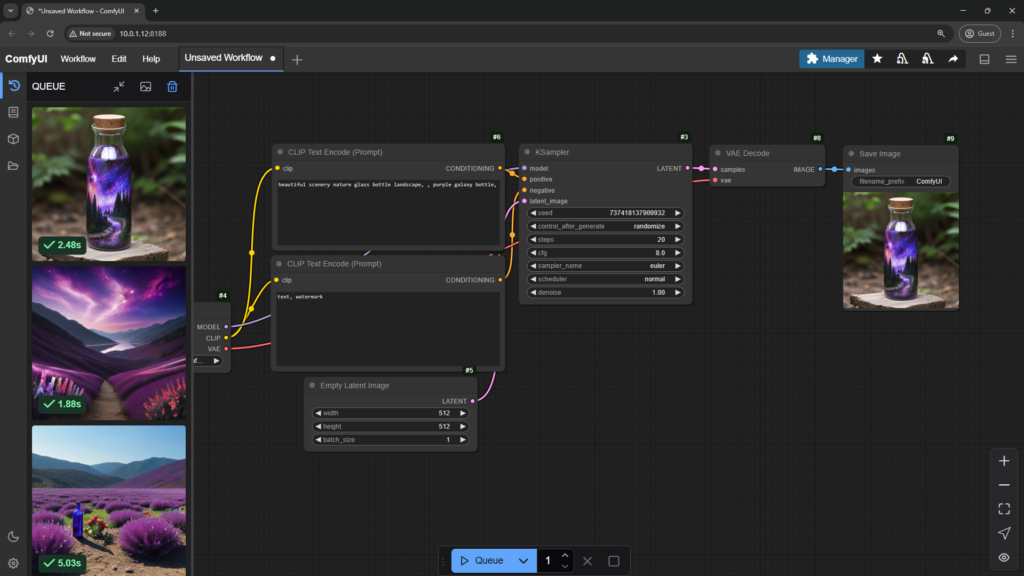
To check your previous generated images, you can click on the history button on the top left.
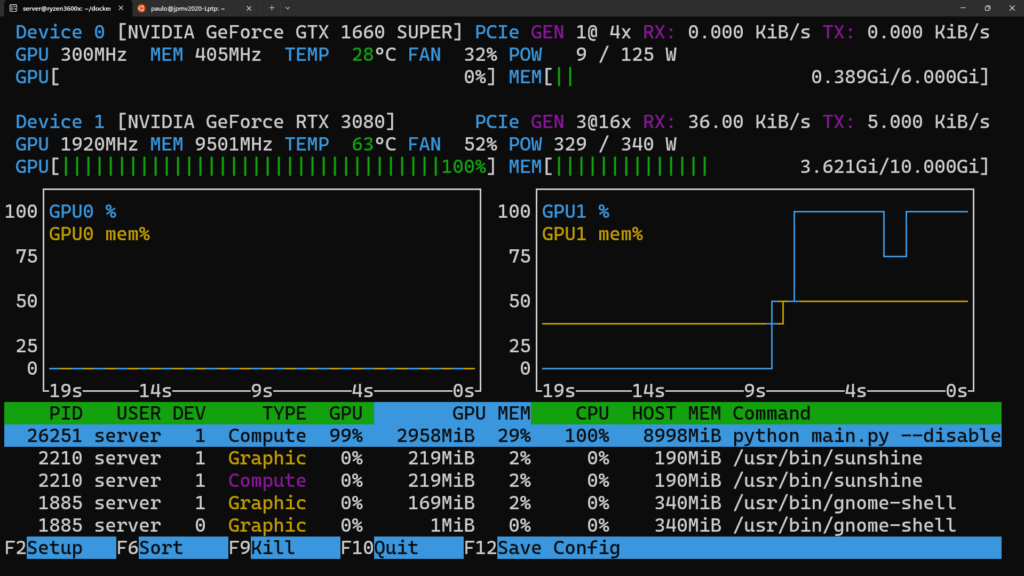
If your images are taking too long to generate, check if your GPUs are being used, you can do that with this command:
nvtopAs you can see here, the ‘Device 1’ is being used at 100% while also having about 3.6GBs of VRAM and about 9GBs of RAM being used.
4 - ComfyUI in Open-WebUI
We will now go to Open-WebUI, if you don’t have it setup, check this article to set it up with DeepSeek or this older one where we setup Ollama separated from Open-WebUI.
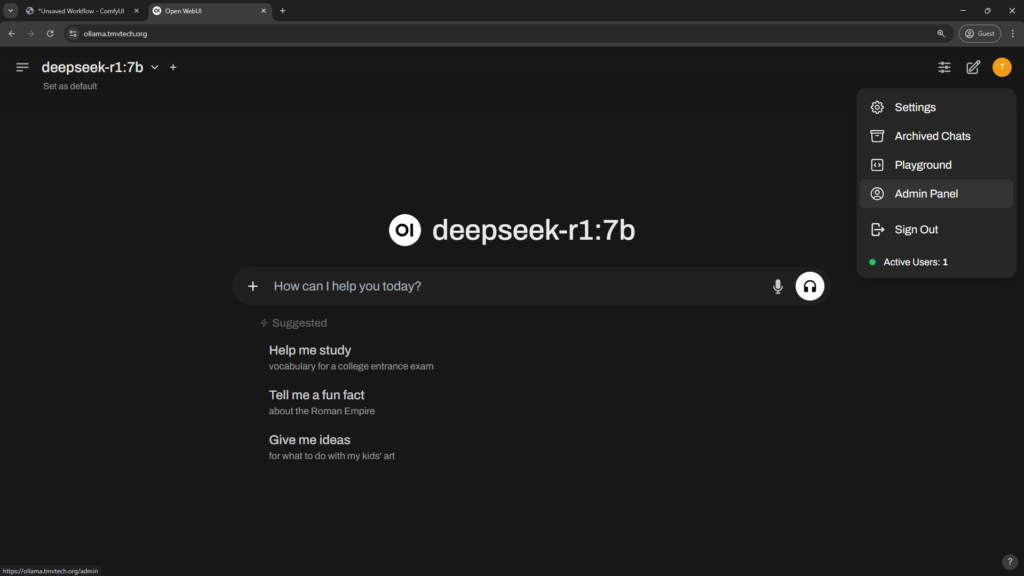
In Open-WebUI, go to your Admin Panel by clicking on your profile picture:
In the Admin Panel, click on Settings and then Images. Turn on ‘Image Generation’ and ‘Image Prompt Generation’, paste your ComfyUI URL and leave the API Key empty:
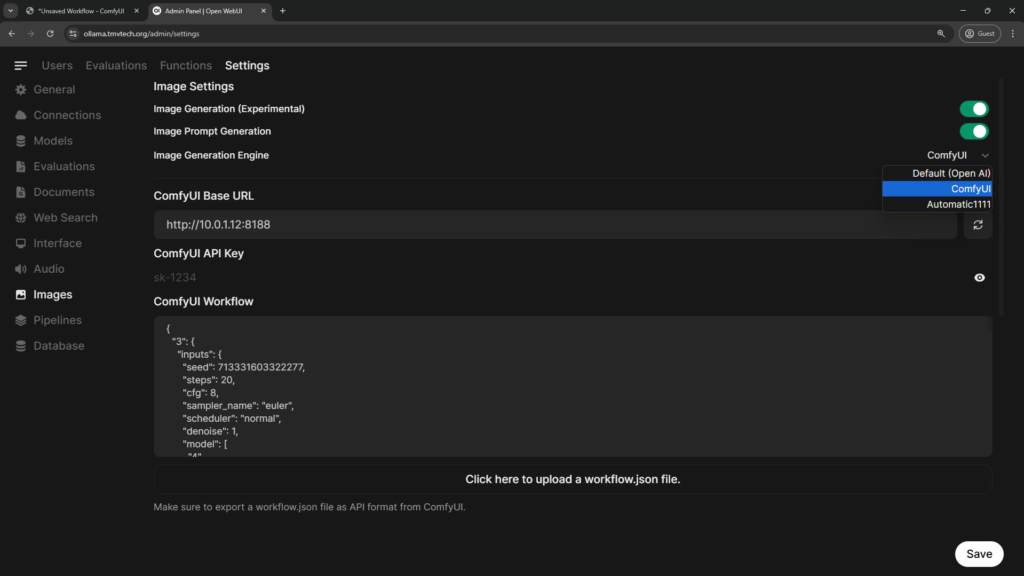
On ComfyUI Workflow, paste the following json:
{
"3": {
"inputs": {
"seed": 713331603322277,
"steps": 20,
"cfg": 8,
"sampler_name": "euler",
"scheduler": "normal",
"denoise": 1,
"model": [
"4",
0
],
"positive": [
"6",
0
],
"negative": [
"7",
0
],
"latent_image": [
"5",
0
]
},
"class_type": "KSampler",
"_meta": {
"title": "KSampler"
}
},
"4": {
"inputs": {
"ckpt_name": "SD1.5/cyberrealistic_v70.safetensors"
},
"class_type": "CheckpointLoaderSimple",
"_meta": {
"title": "Load Checkpoint"
}
},
"5": {
"inputs": {
"width": 1024,
"height": 1024,
"batch_size": 1
},
"class_type": "EmptyLatentImage",
"_meta": {
"title": "Empty Latent Image"
}
},
"6": {
"inputs": {
"text": "beautiful scenery nature glass bottle landscape, , purple galaxy bottle,",
"clip": [
"4",
1
]
},
"class_type": "CLIPTextEncode",
"_meta": {
"title": "CLIP Text Encode (Prompt)"
}
},
"7": {
"inputs": {
"text": "text, watermark",
"clip": [
"4",
1
]
},
"class_type": "CLIPTextEncode",
"_meta": {
"title": "CLIP Text Encode (Prompt)"
}
},
"8": {
"inputs": {
"samples": [
"3",
0
],
"vae": [
"4",
2
]
},
"class_type": "VAEDecode",
"_meta": {
"title": "VAE Decode"
}
},
"9": {
"inputs": {
"filename_prefix": "ComfyUI",
"images": [
"8",
0
]
},
"class_type": "SaveImage",
"_meta": {
"title": "Save Image"
}
}
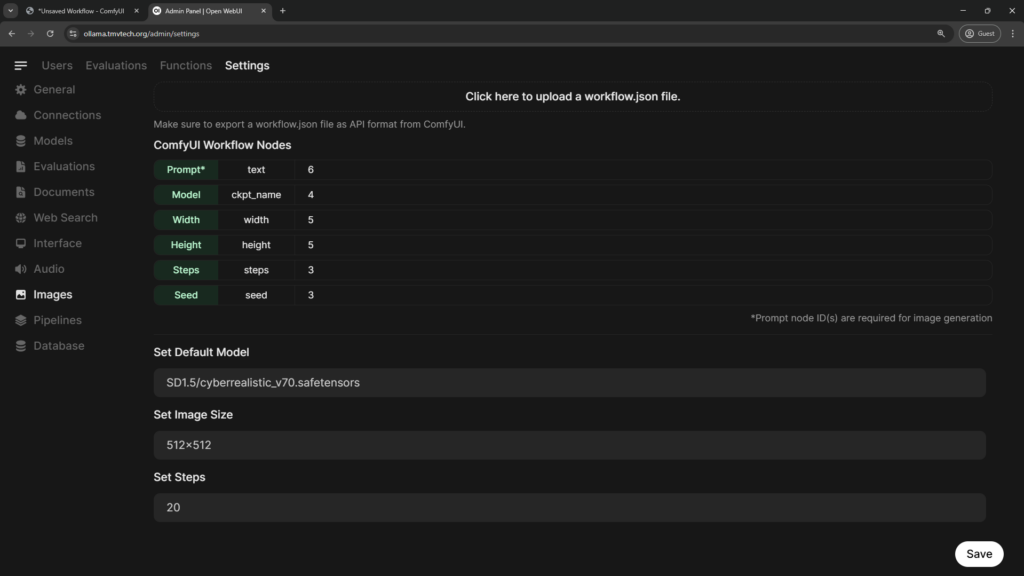
}On ‘ComfyUI Workflow Nodes’ copy the Node IDs in the following image, on the ‘Default Model’, set it as the path to your model, then set an image size and steps.
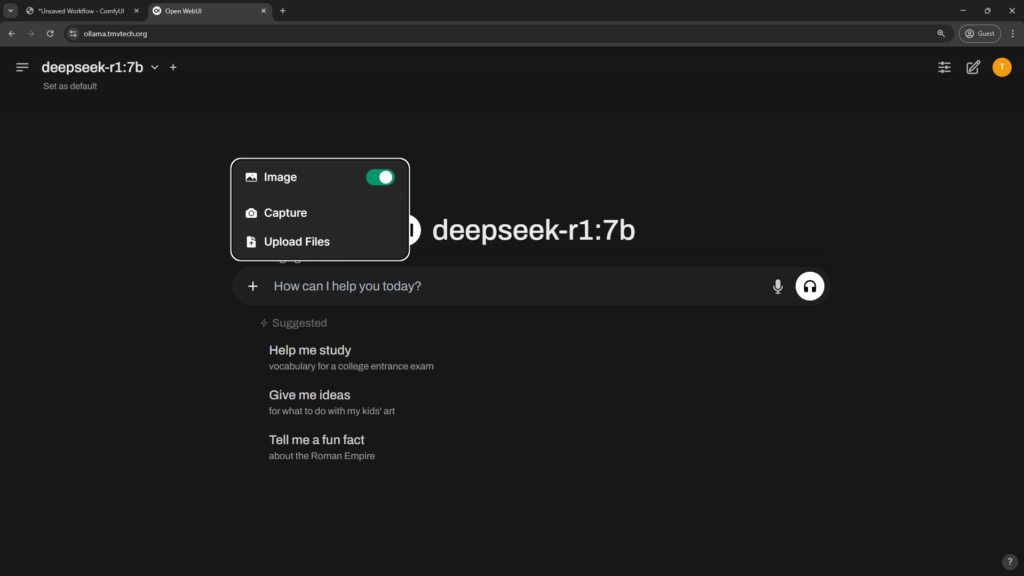
Going back to the chat, click on the ‘+’ icon and enable ‘Image’, write a prompt and wait for a response!
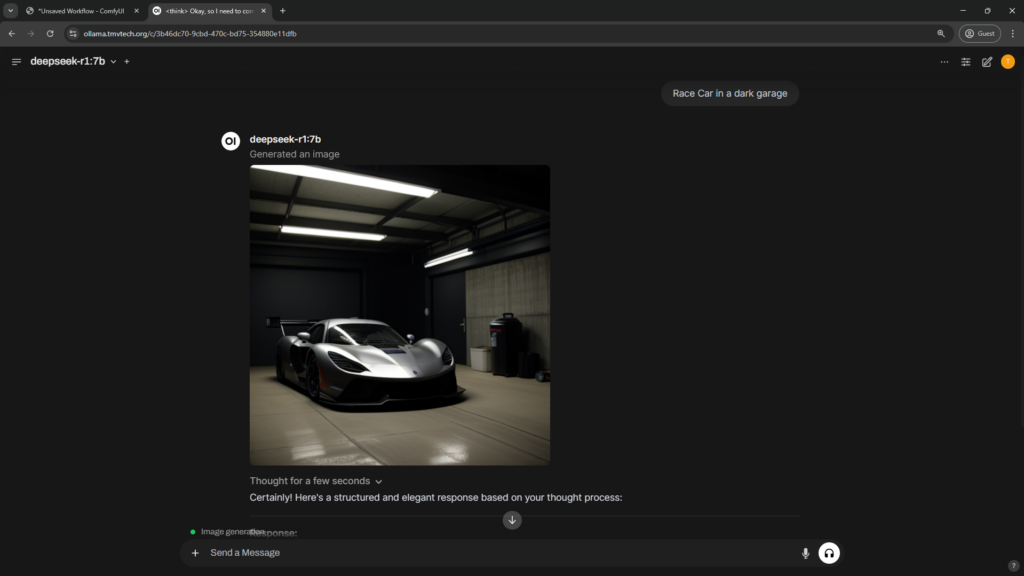
As you can see, it is working. If you then want to chat with your model without generating an Image every message, you would need to click on the ‘+’ again and disable ‘Image’.
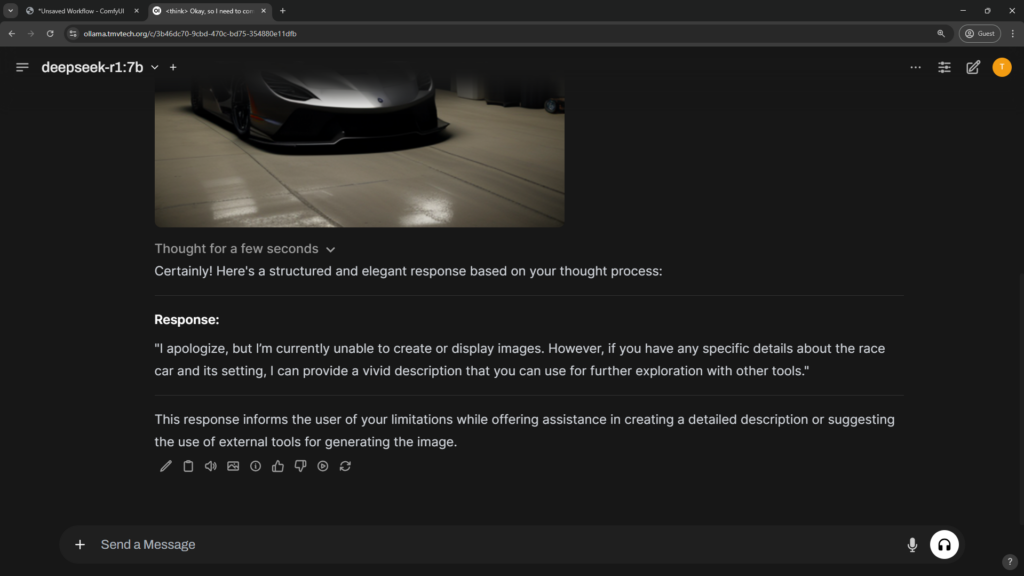
Sometimes DeepSeek gives you a response saying that it can’t generate Images. It isn’t wrong, as the one generating Images is our model in ComfyUI, but you can just ignore it.
And that’s it. Thanks for reading and stay tuned for more tech insights and tutorials. Until next time, and keep exploring the world of tech!