Ubuntu Tutorial: Change DNS

0 - Introduction

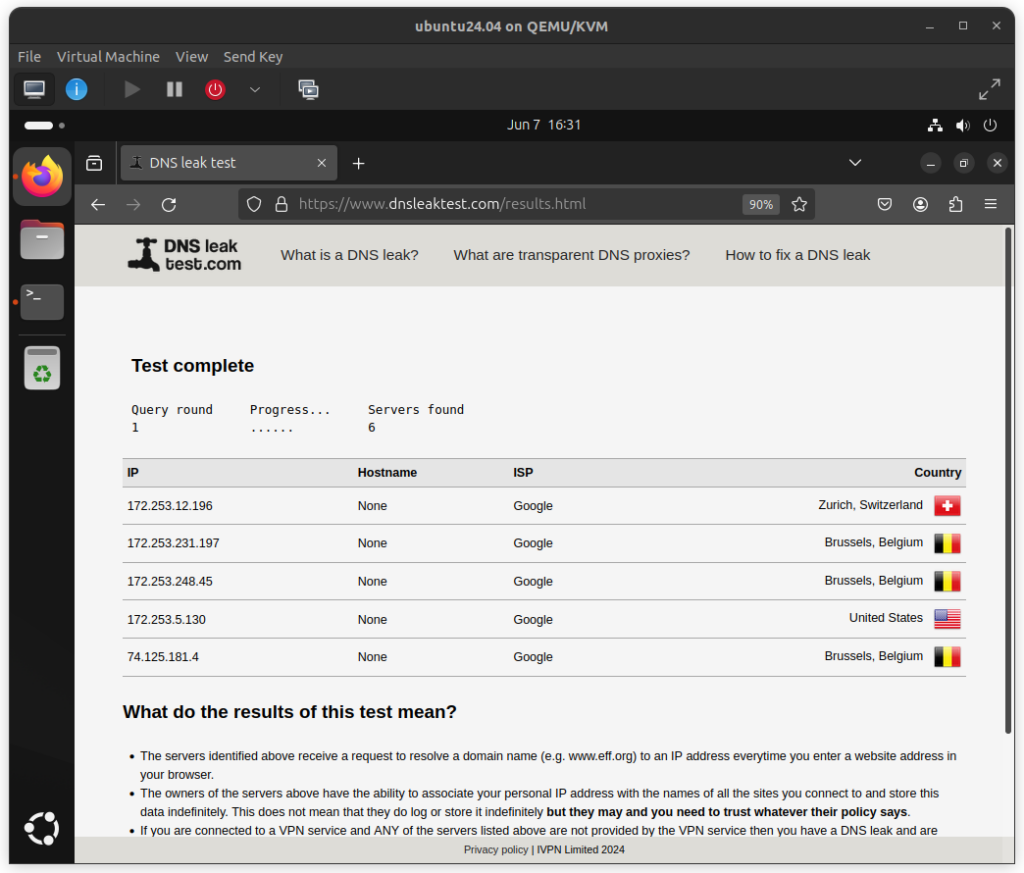
Changing your DNS server can often help reduce ads and improve speed and security, for that reason we will teach you the easiest way to change it on Ubuntu. But before we do that, be 100% sure you trust the server you chose!!

1 - Change DNS

Let’s start by creating the config folder and file:

sudo mkdir /etc/systemd/resolved.conf.d/
sudo nano /etc/systemd/resolved.conf.d/dns_servers.conf

Now we can add the following config to it:

[Resolve]
DNS=mainip altip

An example using google for main  and cloudflare for alt:

[Resolve]
DNS=8.8.8.8 1.1.1.1

And finally, we restart the ‘systemd-resolved’ service:

sudo systemctl restart systemd-resolved

By going to dnsleaktest.com you can check if your dns servers are still from your ISP or not. In this example i used 8.8.8.8 from google:

And that’s it, you are now using your chosen server to provide DNS records.

Thanks for reading and stay tuned for more tech insights and tutorials. Until next time, and keep exploring the world of tech!