
0 - Introduction
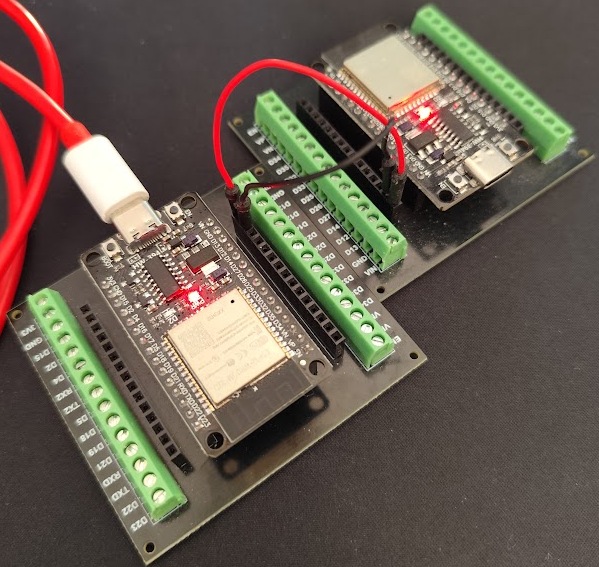
In this article we will be using two of the Esp32 boards we reviewed, to send and receive a message using ESP-NOW.
Hardware needed:
- 2x Esp32 (like this one)
- 1x Usb Cable (type a to type c in our case)
- Any computer with VsCode and platformIO
1 - Code
To setup espnow we need to, first setup WiFi then init espnow and finally add a peer. In this example we will be broadcasting packets without worrying about who receives them, so we will use the station mode for WiFi, that means each esp32 will act as a wireless point.
#include <Arduino.h>
#include <WiFi.h>
#include <esp_now.h>

// FF:FF:FF:FF:FF:FF is the broadcast address
uint8_t broadcastAddr[] = { 0xFF, 0xFF, 0xFF, 0xFF, 0xFF, 0xFF };
esp_now_peer_info_t broadcastPeer;

void setup()
{
    // init serial
    Serial.begin(115200);

    // init wifi
    WiFi.mode(WIFI_STA);

    // init espnow
    if (esp_now_init() != ESP_OK)
    {
        Serial.println("Can't start espnow, rebooting");
        vTaskDelay(5000 / portTICK_PERIOD_MS);
        ESP.restart();
    }

    // populate peer info
    broadcastPeer.channel = 0; // 0 = any
    broadcastPeer.encrypt = false; // can't encrypt when broadcasting
    memcpy(broadcastPeer.peer_addr, broadcastAddr, 6); // copy broadcast address

    // register peer
    if (esp_now_add_peer(&broadcastPeer) != ESP_OK)
    {
        Serial.println("Can't register espnow broadcast peer, rebooting");
        vTaskDelay(5000 / portTICK_PERIOD_MS);
        ESP.restart();
    }
}
Now we need to be able to send and receive messages from other esps, for that we will create a struct that contains some variables you want to transmit:
typedef struct
{
    int a;
    float b;
    char c;
} mymsg;
Now that we know what to send (and receive), let’s populate it with random stuff and send it every 5 seconds on the loop:
void loop()
{
    // wait 5secs
    vTaskDelay(5000 / portTICK_PERIOD_MS);

    // populate message with random number
    mymsg msg;
    msg.a = random(10, 100);
    msg.b = msg.a / 10.0;
    msg.c = (msg.a % 26) + 'a';

    // send message
    esp_now_send(broadcastAddr, (uint8_t*)&msg, sizeof(msg));
}
And, to receive data, we need to register a receive callback (we will go ahead and also register a send callback to know if a message was successfully sent). At the end of ‘setup()’ add:
// Register callbacks
esp_now_register_send_cb(OnDataSent);
esp_now_register_recv_cb(OnDataRecv);
When receiving, we need to check for the message length, if it matches, we can cast the ‘data’ pointer to a pointer to ‘mymsg’ to read it’s contents:
void OnDataRecv(const uint8_t* mac, const uint8_t* data, int len)
{
    // Check message length
    if (len != sizeof(mymsg))
    {
        Serial.println("Received invalid msg");
        return; // return if invalid
    }

    // Get mac string from uint array
    char macstr[32];
    snprintf(macstr, 31, "%02X:%02X:%02X:%02X:%02X:%02X", mac[0], mac[1], mac[2], mac[3], mac[4], mac[5]);

    // Cast data to mymsg* and print it's values
    mymsg* msg = (mymsg*)data;
    Serial.printf("[%s] Received: %d, %f, %c\n", macstr, msg->a, msg->b, msg->c);
}
And finally we can get the status of a sent message with this callback function:
void OnDataSent(const uint8_t* mac, esp_now_send_status_t stat)
{
    // Get mac string from uint array (destination)
    char macstr[32];
    snprintf(macstr, 31, "%02X:%02X:%02X:%02X:%02X:%02X", mac[0], mac[1], mac[2], mac[3], mac[4], mac[5]);

    // Log status
    Serial.printf("[%s] Last Packet Sent: %s\n", macstr, stat == ESP_NOW_SEND_SUCCESS ? "Success" : "Fail");
}Attention: Both callbacks need to be pasted before setup!!
And that’s it, we can now upload our code to both esps and see them running in the serial monitor!
[E4:65:B8:AE:24:94] Received: 57, 5.700000, f
[FF:FF:FF:FF:FF:FF] Last Packet Sent: Success
[E4:65:B8:AE:24:94] Received: 75, 7.500000, x
[FF:FF:FF:FF:FF:FF] Last Packet Sent: Success
[E4:65:B8:AE:24:94] Received: 72, 7.200000, u
[FF:FF:FF:FF:FF:FF] Last Packet Sent: Success
[E4:65:B8:AE:24:94] Received: 94, 9.400000, q
[FF:FF:FF:FF:FF:FF] Last Packet Sent: Success
[E4:65:B8:AE:24:94] Received: 10, 1.000000, k
[FF:FF:FF:FF:FF:FF] Last Packet Sent: Success
[E4:65:B8:AE:24:94] Received: 54, 5.400000, c
As you can see, now you have the bases for communicating with Esp-Now, but you have to be careful, because all data sent by this method will be received by ALL devices that use Esp-Now, even ones that don’t belong to you, so make sure you verify that the message received came from a device you own or an application you made and make sure that any information that could cause a security threat is sent either by pairing the devices with encryption ON or by encrypting the data sent in the broadcast, for example with AES or RSA, which the Esp32 supports hardware encryption!
You can find a review of the Esps we used in this article and you can buy them here.
Thanks again for reading and stay tuned for more tech insights and tutorials. Until next time, and keep exploring the world of tech!