0 - Introduction
In a previous article we made an emulator/interpreter for Chip8 in C++ to be ran on Ubuntu, in this article, we will make small changes and new platform specific modules to run that emulator on a Esp32 (using the Arduino IDE).
Before starting, check out our tutorial on how to install and setup Platform IO for development with the Esp32 and, if you don’t have one, you can buy it here.
1 - What will not change?
In this article we won’t touch:
- cpu.h and cpu.cpp do not need changes
- logger.h and logger.cpp can be changed to use ‘Serial.println’ and use faster baudrates but, by default, the cout of the Esp is Serial at a baudrate of 115200, so we won’t change it.
- display.h, keyboard.h and sound.h don’t need any changes.
2 - What will change?
Now that we know what won’t change, we also need to know what will:
- chip8.h and chip8.cpp will get some changes so that the chip8.run() function executes only one cycle instead of running forever.
- cmdLineParser.h and cmdLineParser.cpp won’t be needed and can be removed.
- romLoader.cpp and romLoader.h will get changes to support loading roms from arrays in a header file instead of a file.
- main.cpp and all SDL files will change to Esp versions (these are the platform specific files).
3 - Changes at 'chip8.h' and 'chip8.cpp'
Starting with chip8.h, a variable to store how many cycles have passed is important so that we know when we need to update the timers and the display. That variable can be added as a private member of the class ‘TChip8’:
#ifndef __CHIP8_H__
#define __CHIP8_H__

// ...

class TChip8
{
	// ...

    // Counter used to check when the screen should update
    uint16_t m_tickCounter;

public:
    // ...
};

#endif
On chip8.cpp, we remove the while loop and change the delay functions to the Arduino ones:
// Executes one cycle of the processor
void TChip8::run()
{
    if (!m_emulatorRunning)
        return;

    using clock = std::chrono::high_resolution_clock;
    clock::time_point start = clock::now(), end;

    m_cpu->fetch();
    m_cpu->decode();
    m_cpu->execute();

    m_keyboard->update(m_keys, &m_emulatorRunning);

    if(m_tickCounter >= 20)
    {
        m_tickCounter = 0;
        m_display->draw(m_screen, SCREEN_WIDTH, SCREEN_HEIGHT);
        m_display->update();

        // Update timers ~60Hz
        if(m_delay_timer > 0)
            m_delay_timer--;

        if(m_sound_timer > 0)
        {
            m_sound_timer--;
            m_sound->playTune();
        }
        else
            m_sound->pauseTune();
    }

    m_tickCounter++;
    end = clock::now();

    // Calculate tick time
    int64_t t = std::chrono::duration_cast<std::chrono::microseconds>(end - start).count();
    // if t is less than 1ms, sleep (1000 - t)µs
    int64_t sleepTime = 1000 - t;
    if (sleepTime > 0)
        delayMicroseconds(sleepTime);
}
4 - Changes at 'romLoader.cpp'
While romLoader.h get’s no changes, romLoader.cpp is changed almost completelly. In this new version of it, we will use the first letter of the rom name to determine which rom data to load:
#include "romLoader.h"
#include "chip8.h"
#include "roms.h"

TRomLoader::TRomLoader()
{
    m_logger = TLogger::getInstance();
}

TRomLoader::~TRomLoader()
{

}

void TRomLoader::loadRom(std::string& file_path, uint8_t* mem)
{
    m_logger->log("Loading ROM: " + file_path, ELogLevel::INFO);

    const uint8_t* pointer = nullptr; // rom data
    uint32_t size = 0;                // rom size in bytes
    switch (file_path.c_str()[0]) // use first letter of the name
    {
        // set pointer and size
        case 'm': pointer = rom_Maze1; size = rom_Maze1_size; break;
        case 't': pointer = rom_KeypadTest; size = rom_KeypadTest_size; break;
    }

    // check if pointer was set and size is valid
    if (pointer == nullptr || size == 0 || size > (PROGRAM_END_ADDR - PROGRAM_START_ADDR))
    {
        m_logger->log("Can't load ROM", ELogLevel::ERROR);
        exit(1);
        return;
    }

    // load rom to ram
    memcpy(mem, pointer, size);
    m_logger->log("Rom loaded successfully", ELogLevel::INFO);
}
If you copied the code above, you got some errors due to roms.h not existing, that’s what we will create next. With the help of this tool, i converted some roms to byte arrays, which you can then add to the ‘switch’ in the code above:
#ifndef __roms_h__
#define __roms_h__

#include <Arduino.h>

// https://notisrac.github.io/FileToCArray/

// Draws a Maze - Did not find the author
static const uint8_t rom_Maze1[] PROGMEM = {
    0x60, 0x00, 0x61, 0x00, 0xa2, 0x22, 0xc2, 0x01, 0x32, 0x01, 0xa2, 0x1e, 0xd0, 0x14, 0x70, 0x04,
    0x30, 0x40, 0x12, 0x04, 0x60, 0x00, 0x71, 0x04, 0x31, 0x20, 0x12, 0x04, 0x12, 0x1c, 0x80, 0x40,
    0x20, 0x10, 0x20, 0x40, 0x80, 0x10};
static const uint16_t rom_Maze1_size = sizeof(rom_Maze1);

// Keypad Test - by hap, 15-02-06
static const uint8_t rom_KeypadTest[] PROGMEM = {
    0x12, 0x4e, 0x08, 0x19, 0x01, 0x01, 0x08, 0x01, 0x0f, 0x01, 0x01, 0x09, 0x08, 0x09, 0x0f, 0x09,
    0x01, 0x11, 0x08, 0x11, 0x0f, 0x11, 0x01, 0x19, 0x0f, 0x19, 0x16, 0x01, 0x16, 0x09, 0x16, 0x11,
    0x16, 0x19, 0xfc, 0xfc, 0xfc, 0xfc, 0xfc, 0xfc, 0xfc, 0x00, 0xa2, 0x02, 0x82, 0x0e, 0xf2, 0x1e,
    0x82, 0x06, 0xf1, 0x65, 0x00, 0xee, 0xa2, 0x02, 0x82, 0x0e, 0xf2, 0x1e, 0x82, 0x06, 0xf1, 0x55,
    0x00, 0xee, 0x6f, 0x10, 0xff, 0x15, 0xff, 0x07, 0x3f, 0x00, 0x12, 0x46, 0x00, 0xee, 0x00, 0xe0,
    0x62, 0x00, 0x22, 0x2a, 0xf2, 0x29, 0xd0, 0x15, 0x70, 0xff, 0x71, 0xff, 0x22, 0x36, 0x72, 0x01,
    0x32, 0x10, 0x12, 0x52, 0xf2, 0x0a, 0x22, 0x2a, 0xa2, 0x22, 0xd0, 0x17, 0x22, 0x42, 0xd0, 0x17,
    0x12, 0x64};
static const uint16_t rom_KeypadTest_size = sizeof(rom_KeypadTest);

#endif
5 - Platform Specific modules
In the following steps we will create modules that are specific for the Esp32, but that can also work on some Arduinos.
5.1 - 'espsound.h' and 'espsound.cpp'
Let’s start by creating the module for the speaker, as it is the easiest one to implement. The following code, is the espsound.h file, it inherits the TSound class and also has some variables to hold the pin, channel and frequency for the speaker:
#ifndef __ESPSOUND_H__
#define __ESPSOUND_H__

#include "logger.h"
#include "sound.h"

class EspSound : public TSound
{
    uint16_t m_pin, m_channel, m_freq;
    // Logging
    std::shared_ptr<TLogger> m_logger;

public:
    EspSound(uint16_t pin, uint8_t channel, uint32_t freq);

    virtual void init() override;
    virtual void playTune() override;
    virtual void pauseTune() override;
    virtual void deinit() override;
};

#endif
Moving on to espsound.cpp, on the constructor, assign the variables and get the logger, on init set the speaker’s pin to output and log a ‘Ready’ message, deinit will be empty, on playTune, attatch the speaker pin and write a tone to it using the ledc functions and finally, on pauseTune, detatch the pin:
#include "Arduino.h"
#include "espsound.h"

EspSound::EspSound(uint16_t pin, uint8_t channel, uint32_t freq)
{
    m_pin = pin;
    m_channel = channel;
    m_freq = freq;
    m_logger = TLogger::getInstance();
}

void EspSound::init()
{
    pinMode(m_pin, OUTPUT);
    m_logger->log("Sound ready", ELogLevel::INFO);
}

void EspSound::deinit() {}

void EspSound::playTune()
{
    ledcAttachPin(m_pin, m_channel);
    ledcWriteTone(m_channel, m_freq);
}

void EspSound::pauseTune()
{
    ledcDetachPin(m_pin);
}
5.2 - 'espkeyboard.h' and 'espkeyboard.cpp'
We can’t play games without buttons, and in the Chip8 there are 16, so keyboard is not an incorrect name to it, in this module we will write the ‘driver’ for a 4×4 keyboard like this one.
Let’s start with the header file, my keyboard uses 8 pins, from which the first 4 are the rows and the other 4 are the columns, besides the logger, we will need an array to store the pins and a define for the pin count and half of it (to separate the outputs from the inputs):
#ifndef __ESPKEYBOARD_H__
#define __ESPKEYBOARD_H__

#include <cstdint>

#include "keyboard.h"
#include "logger.h"

#define EspKB_PinCount 8
#define EspKB_PinHalf (EspKB_PinCount / 2)

class EspKeyboard : public TKeyboard
{
    // Logging
    std::shared_ptr<TLogger> m_logger;
    uint16_t m_pins[8];

public:
    EspKeyboard(uint16_t pins[8]);
    virtual void init() override;
    virtual void update(uint8_t* key_map, bool* running) override;
    virtual void deinit() override;
};

#endif
On the cpp file start by creating a 2D array that will help us map physical buttons to an emulator button. On the constructor, get the logger and save the pins we will be using. On init, set the first four pins as output and the other four to input pullup (if disconnected, will read HIGH). Finally, on update, for each row, set it’s pin to LOW and, for each column, set the correct emulator button as pressed if LOW is read on it’s pin, finally set the row pin as HIGH again, and you are done.
#include "espkeyboard.h"
#include "Arduino.h"

// converts a physical button to an emulator button
uint8_t EspKB_PinsToKey[4][4] =
{
    {0x1, 0x2, 0x3, 0xC},
    {0x4, 0x5, 0x6, 0xD},
    {0x7, 0x8, 0x9, 0xE},
    {0xA, 0x0, 0xB, 0xF}
};

EspKeyboard::EspKeyboard(uint16_t pins[8])
{
    m_logger = TLogger::getInstance();
    // store pins
    for (uint8_t i = 0; i < EspKB_PinCount; i++)
        m_pins[i] = pins[i];
}

void EspKeyboard::init()
{
    // First 4 = output pins
    for (uint8_t i = 0; i < EspKB_PinHalf; i++)
        pinMode(m_pins[i], OUTPUT);
    // Other 4 = input pins
    for (uint8_t i = 0; i < EspKB_PinHalf; i++)
        pinMode(m_pins[EspKB_PinHalf + i], INPUT_PULLUP);
    m_logger->log("Keyboard ready", ELogLevel::INFO);
}

void EspKeyboard::update(uint8_t* key_map, bool* running)
{
    // For each row
    for (int y = 0; y < EspKB_PinHalf; y++)
    {
        // Set row pin as low
        digitalWrite(m_pins[y], LOW);
        // Set button as pressed if collumn pin is low
        for (int x = 0; x < EspKB_PinHalf; x++)
            key_map[EspKB_PinsToKey[x][y]] = !digitalRead(m_pins[EspKB_PinHalf + x]);
        // Set row as high
        digitalWrite(m_pins[y], HIGH);
    }
}

void EspKeyboard::deinit() {}
5.3 - 'espdisplay.h' and 'espdisplay.cpp'
For the display’s header file, you will only need access to the logger and a pointer to the display driver:
#ifndef __ESPDISPLAY_H__
#define __ESPDISPLAY_H__

#include <cstdint>
#include "display.h"
#include "logger.h"
#include "U8g2lib.h"

class EspDisplay: public TDisplay
{
    U8G2* oled;
    std::shared_ptr<TLogger> logger;

public:
    EspDisplay(U8G2* oled);
    virtual void init() override;
    virtual void draw(uint8_t framebuffer[][64], uint16_t width, uint16_t height) override;
    virtual void update() override;
    virtual void deinit() override;
};

#endif
As for the cpp file, on the constructor, get the logger and save the driver pointer. On init, begin and clear the display. Deinit will be empty. On draw, loop through the buffer and draw a 2 by 2 box if the pixel is set (my oled display has double the resolution (128×64) of Chip8’s screen(64×32)). Finally, on update, send the current buffer, and clear it, to be used on the next frame:
#include "espdisplay.h"
#include "chip8.h"

EspDisplay::EspDisplay(U8G2* oled)
{
    logger = TLogger::getInstance();
    this->oled = oled;
}

void EspDisplay::init()
{
    oled->begin();
    oled->clearDisplay();
    logger->log("Display ready", ELogLevel::INFO);
}

void EspDisplay::deinit() { }

void EspDisplay::draw(uint8_t framebuffer[][64], uint16_t width, uint16_t height)
{
    for (int y = 0; y < SCREEN_HEIGHT; y++)
        for (int x = 0; x < SCREEN_WIDTH; x++)
            if (framebuffer[y][x])
                oled->drawBox(x * 2, y * 2, 2, 2); // 1 chip8 pixel is 2*2 pixels in oled
}

void EspDisplay::update()
{
    oled->sendBuffer();
    oled->clearBuffer();
}
6 - 'main.cpp'
Now we reach the last step of this article, in here, we will intialize all modules and run the emulator.
Let’s start by checking the includes we will use:
#include <Arduino.h> // for arduino functions
#include <memory> // for shared pointer

#include "logger.h" // logging
#include "chip8.h"  // emulator

#include "espdisplay.h" // display module
#include "espkeyboard.h" // keyboard module
#include "espsound.h" // speaker module

// the pin of the button that changes the game/rom when pressed
#define BTN_NEXT_ROM_PIN GPIO_NUM_12
After the includes and defines, we will need to create the emulator object, along with it’s modules and variables.
Start by creating a logger instance then, the emulator, followed by the display driver and it’s module, then the keyboard pins and it’s module and finally, the sound module:
// Create logger
std::shared_ptr<TLogger> logger = TLogger::getInstance();
// Create emulator
TChip8 emulator;
// U8g2 driver for the oled display
U8G2_SH1106_128X64_NONAME_F_4W_HW_SPI oled(U8G2_R0, 2, 4, 5);
// Create display module
EspDisplay display(&oled);
// Pins for the keyboard, first 4 are output, other 4 are input
uint16_t kbpins[] = { GPIO_NUM_32, GPIO_NUM_33, GPIO_NUM_25, GPIO_NUM_26,
                     GPIO_NUM_36, GPIO_NUM_39, GPIO_NUM_34, GPIO_NUM_35 };
// Create keyboard module
EspKeyboard keyboard(kbpins);
// Create speaker module by passing the pin, channel and note
EspSound sound(GPIO_NUM_15, 4, 500);
On setup, set the next rom’s button pin to input pullup, set the log level to info, set the modules and initialize the emulator with the first rom:
void setup()
{
    // Set next rom's button pin as input
    pinMode(BTN_NEXT_ROM_PIN, INPUT_PULLUP);

    // Set log level as info (emulator runs slow in debug)
    logger->setLogLevel(ELogLevel::INFO);
    // Set modules
    emulator.setDisplay(&display);
    emulator.setKeyboard(&keyboard);
    emulator.setSound(&sound);
    // Initialize the emulator with the first rom
    emulator.init(roms[0]);
}
After setup, you will need the function that changes the rom, but first, create two variables, one for the rom names and one to store the current rom index. In the ‘nextRom’ function, increase the current rom index, log that you are switching to a new rom, deinit the emulator and initialize it with the new rom:
// Rom names
std::string roms[] = {"t", "b", "p", "m"};
// Current rom
uint8_t curr_rom = 0;
// Load next rom
void nextRom()
{
    curr_rom++;
    if (curr_rom > sizeof(roms) / sizeof(*roms))
        curr_rom = 0;
    logger->log("Switching to rom " + roms[curr_rom], ELogLevel::WARN);
    emulator.deinit();
    emulator.init(roms[curr_rom]);
}
On loop, check if you should switch to the next rom and run the emulator:
void loop()
{
    // Check if next rom button is pressed
    if (!digitalRead(BTN_NEXT_ROM_PIN))
        nextRom();

    // Run emulator cycle
    emulator.run();
}
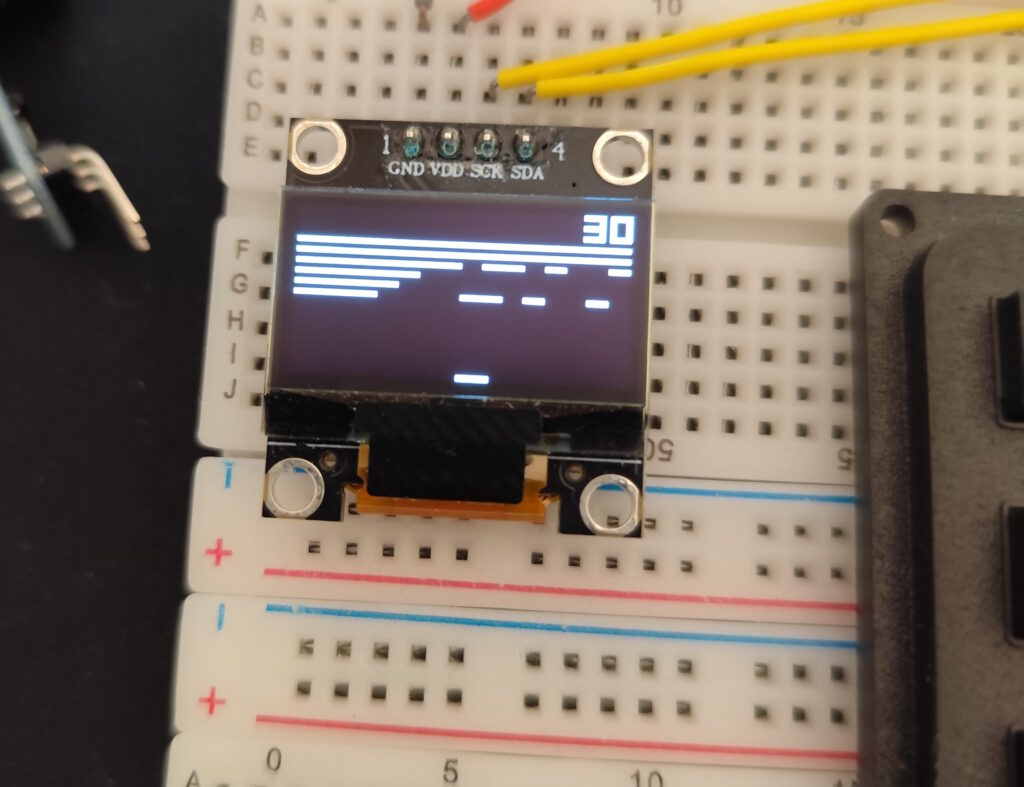
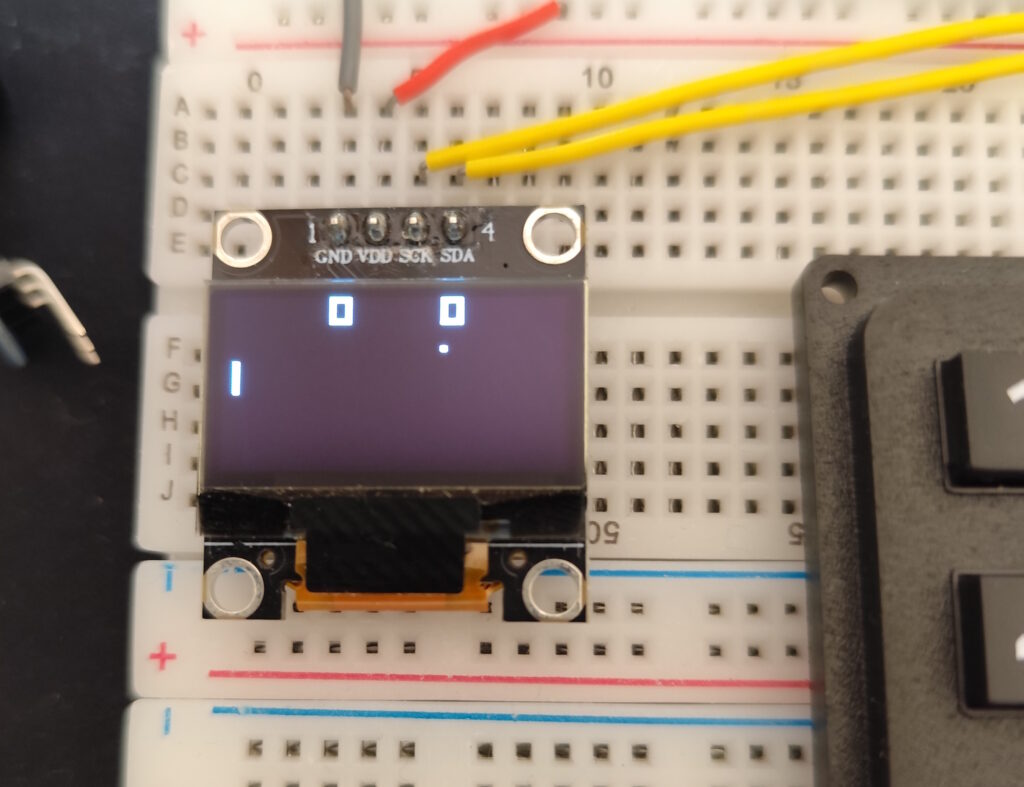
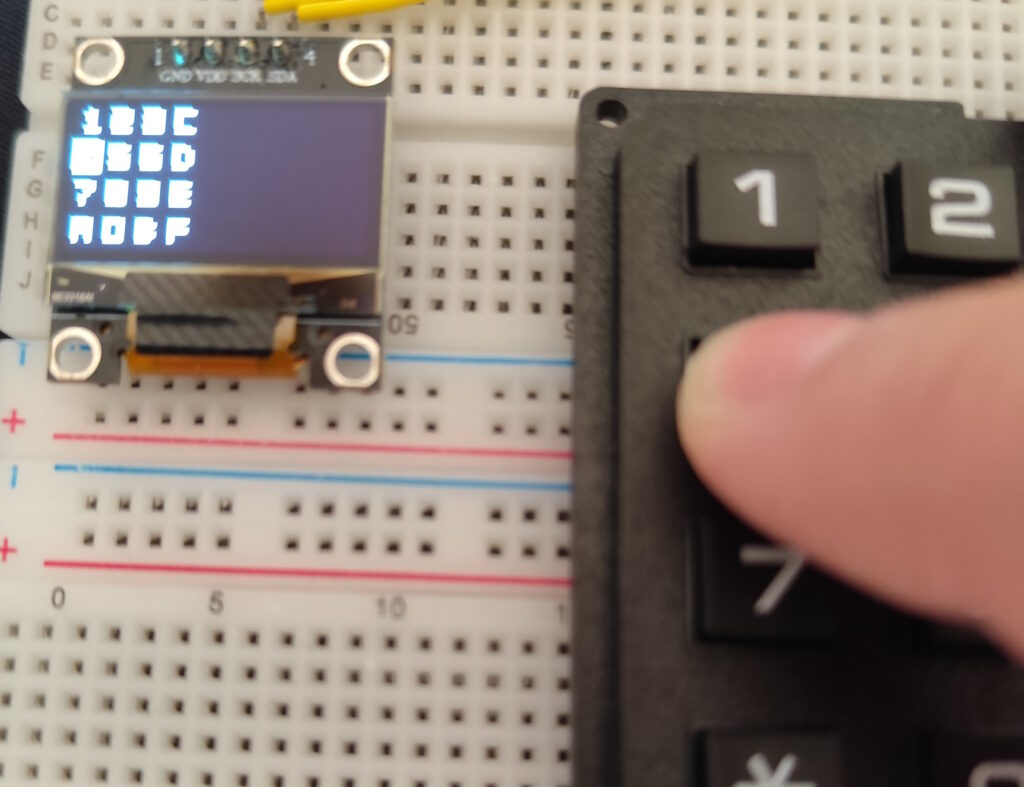
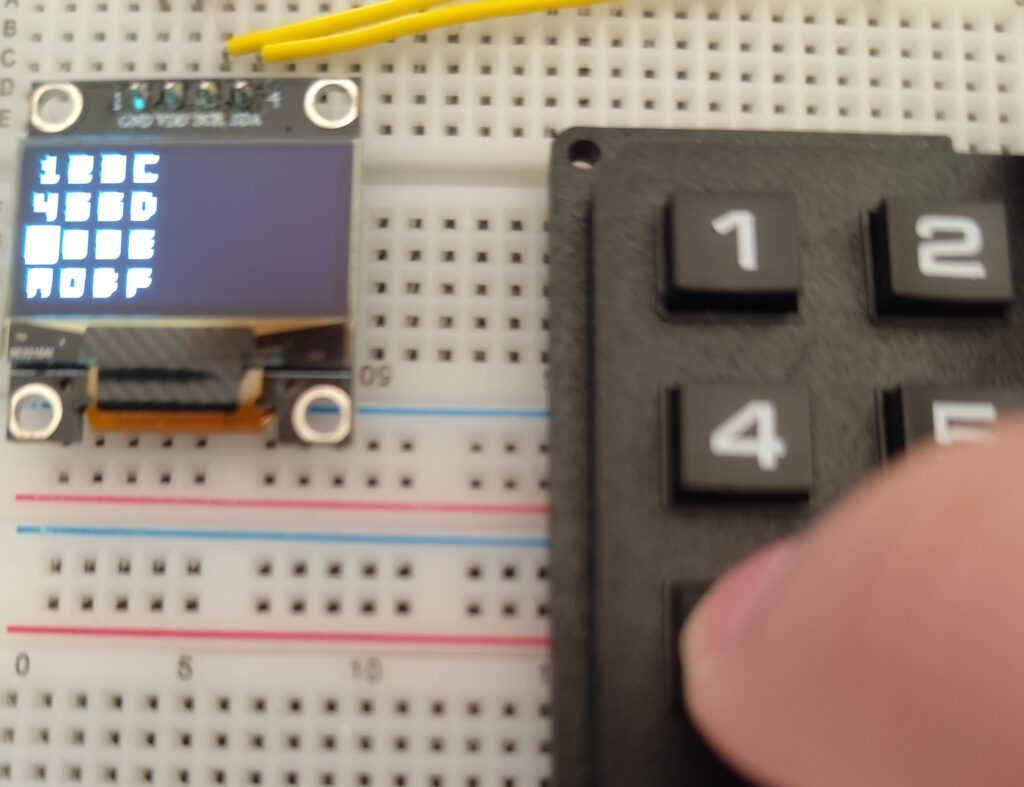
And that’s it. You should now be able to upload the code to your esp and play Chip8 games!
As always, thanks for reading and stay tuned for more tech insights and tutorials. Until next time, and keep exploring the world of tech!
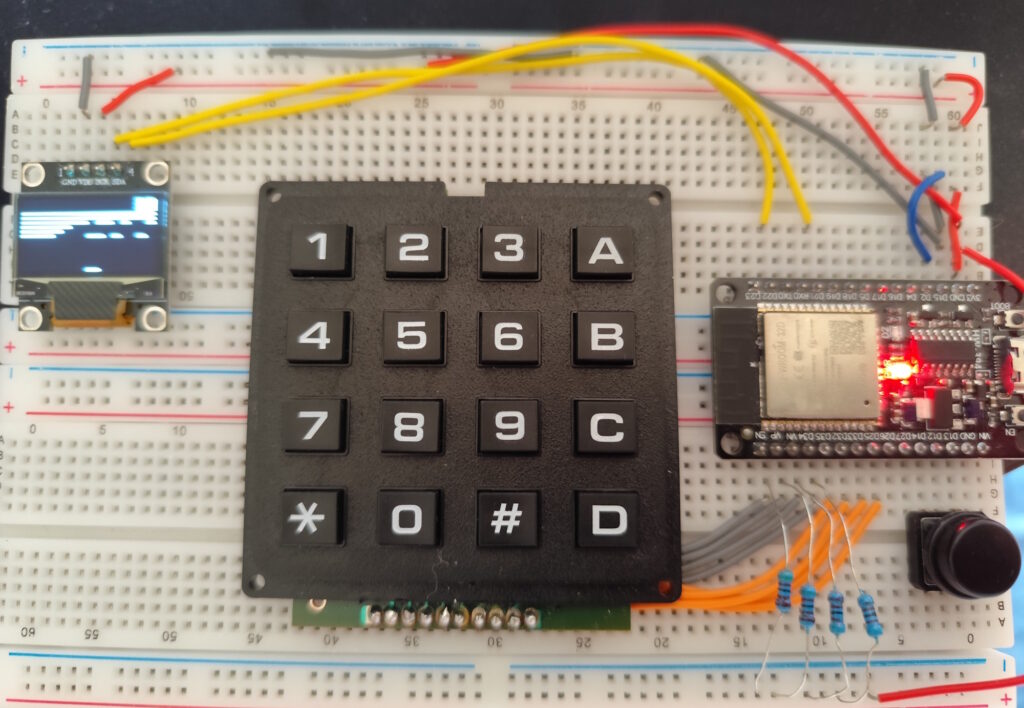
Below you can find the complete ‘main.cpp’ file and some photos:
#include <Arduino.h>
#include <memory>

#include "logger.h"
#include "chip8.h"

#include "espdisplay.h"
#include "espkeyboard.h"
#include "espsound.h"

#define BTN_NEXT_ROM_PIN GPIO_NUM_12

std::shared_ptr<TLogger> logger = TLogger::getInstance();
TChip8 emulator;

// U8g2 driver for the oled display
U8G2_SH1106_128X64_NONAME_F_4W_HW_SPI oled(U8G2_R0, 2, 4, 5);
EspDisplay display(&oled);
// Pins for the keyboard, first 4 are output, other 4 are input
uint16_t kbpins[] = { GPIO_NUM_32, GPIO_NUM_33, GPIO_NUM_25, GPIO_NUM_26,
                     GPIO_NUM_36, GPIO_NUM_39, GPIO_NUM_34, GPIO_NUM_35 };
EspKeyboard keyboard(kbpins);
EspSound sound(15, 4, 500);

void setup()
{
    // Set 'next rom''s button pin as input
    pinMode(BTN_NEXT_ROM_PIN, INPUT_PULLUP);

    // Set log level as info (emulator runs slow in debug)
    logger->setLogLevel(ELogLevel::INFO);
    // Set modules
    emulator.setDisplay(&display);
    emulator.setKeyboard(&keyboard);
    emulator.setSound(&sound);
    // Initialize the emulator with the given rom
    emulator.init(roms[0]);
}

std::string roms[] = {"t", "b", "p", "m"};
uint8_t curr_rom = 0;
void nextRom()
{
    curr_rom++;
    if (curr_rom > sizeof(roms) / sizeof(*roms))
        curr_rom = 0;
    logger->log("Switching to rom " + roms[curr_rom], ELogLevel::WARN);
    emulator.deinit();
    emulator.init(roms[curr_rom]);
}

void loop()
{
    // Check if next rom button is pressed
    if (!digitalRead(BTN_NEXT_ROM_PIN))
        nextRom();

    // Run emulator cycle
    emulator.run();
}
