
0 - Introduction
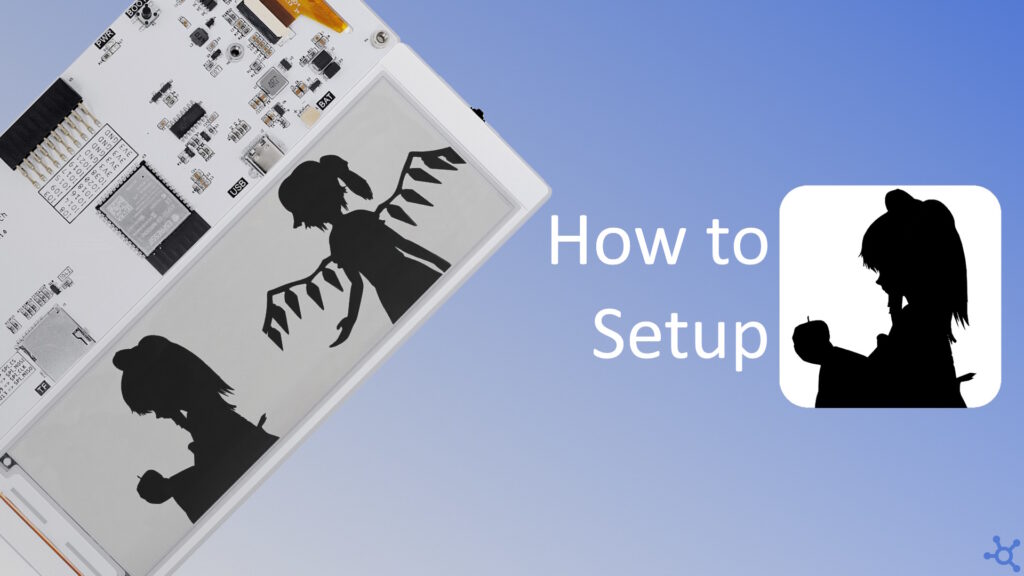
In the world of tech memes, there are a few universal truths: if it has a CPU, it can probably run Doom, and if it has a black and white screen, it can play ‘Bad Apple’. Inspired by this, i decided to test my 5.79” CrowPanel by running this iconic monochrome video. Usually an E-Ink display is not suited for video playback, but that is also where the power of editing comes in, and by speeding up the video we get the following result:
If you want to recreate this project by yourself but do not own a CrowPanel, you can get one here at Elecrow’s store. Besides the panel you will also need micro SD Card with about 100 megabytes of free space, I used this one from Sandisk, but any old micro SD card should work. Besides the hardware, you will also need VSCode and PlatformIO.
1 - Setup
The first step is to get the frames from the video, you can do it yourself with Blender or ffmpeg, but you can also go to this archive in the Internet Archive and get a 7zip file with all the frames in png format, which is what I did.
After getting the frames we will rename them, so that every single one has a name like ‘badapple_0000.png’, this will make our lives a little easier when we move to coding on the Esp32.
Place all your frames in the folder ‘data/in’ and run the script below:
import os

# Define the directory where your files are located
directory = 'data/in'

# Loop through all files in the directory
for filename in os.listdir(directory):
    if filename.endswith('.png'):
        # Split the name into prefix and number part
        name, ext = filename.rsplit('_', 1)
        num = ext.split('.')[0]  # Get the number part before '.png'

        # Pad the number with leading zeros to make it 4 digits
        new_num = num.zfill(4)  # Ensure the number is 4 digits
        new_filename = f'{name}_{new_num}.png'

        # Get the full paths for renaming
        old_file = os.path.join(directory, filename)
        new_file = os.path.join(directory, new_filename)

        # Rename the file
        os.rename(old_file, new_file)

        print(f'Renamed: {filename} -> {new_filename}')
Now that we have all the PNG files with the correct name, we need to write a small program to convert the PNGs to monochrome uncompressed bitmaps, we can do that with the help of the ‘pillow’ library, make sure to install it before running the python script below:
# pip install pillow

dir_in = "data/in"
dir_out = "data/out"
filemin = 1
filemax = 6562

import os
from PIL import Image
from shutil import move

print("Hello")

def image_to_bin(path, w, h):
    with Image.open(path) as img: # open image
        img_resized = img.resize((w, h)) # resize
        img_mono = img_resized.convert("1") # convert to black and white
        raw_data = img_mono.tobytes() # convert to binary
        return bytearray(raw_data) # return byte array

# check if out folder exists
if not os.path.exists(dir_out):
    os.makedirs(dir_out)

# Convert png to bin
for filename in os.listdir(dir_in): # foreach
    if filename.endswith(".png"): # png file
        filepath = os.path.join(dir_in, filename)
        binary_data = image_to_bin(filepath, 368, 272) # get binary
        output_path = os.path.join(dir_out, os.path.splitext(filename)[0] + ".bin")
        with open(output_path, "wb") as f: # save to file
            f.write(binary_data)

# Seperate files into folders
for x in range(filemin, filemax + 1):
    path = os.path.join(dir_out, "bad_apple_" + str(x).zfill(4) + ".bin")
    folder = os.path.join(dir_out, "frames", str(x % 100).zfill(4))
    os.makedirs(folder, exist_ok=True) # create folder if needed
    move(path, folder) # move file

print("Bye")
After converting the images to binary, you will also need this file, paste it in a file named ‘platformio.ini’ at the root of your project and re-open VSCode:
[env:esp32-s3-devkitc-1]
platform = espressif32
board = esp32-s3-devkitc-1
framework = arduino
board_build.arduino.memory_type = qio_opi
board_build.flash_mode = qio
board_build.psram_type = opi
board_upload.flash_size = 8MB
board_upload.maximum_size = 8388608
board_build.extra_flags =
	-DBOARD_HAS_PSRAM
lib_deps = bblanchon/ArduinoJson@^7.2.0
2 - Code
After reloading VSCode to intialize PlatformIO, we can now start to code our program. Create a folder named ‘src’ and, in it, the ‘main.cpp’ file.
For this program we will need to include Arduino, string, SD and the crowpanel headers. You can get the ‘crowpanel_epd.h‘ file here and the ‘crowpanel_pins.h‘ file here.
#include <Arduino.h>
#include <string.h>
#include <SD.h>
#include "crowpanel_epd.h"
#include "crowpanel_pins.h"
Then we define the frame count, which is the total ammount of images to be displayed along with the display buffer, an image buffer, frame index and a bool to handle playing and pausing:
#define FRAME_COUNT 6562

uint8_t drawbuf[27200];
uint8_t imgbuf[12512];
uint32_t framei = 0;
bool playing = false;
The draw function will take the index of the frame and a bool to tell us if we should clear the display before updating it. In this function we make the file path, try to open it, then we try to read it’s contents, if successfull, we clear the display, clear the buffer, draw the image along with the frame number and a ‘paused’ string if currently paused and finally, we send the buffer, update the display and put it to sleep.
void drawFromSD(uint32_t i, bool clear = false)
{
    // make path
    char path[48];
    snprintf(path, 47, "/frames/%04u/bad_apple_%04u.bin", i % 100, i);

    // try open image
    fs::File f = SD.open(path);
    if (!f)
    {
        Serial.println("Can't read image file");
        return;
    }

    // try read image
    size_t readBytes = f.readBytes((char *)imgbuf, 12512);
    if (readBytes != 12512)
    {
        Serial.println("Incorrect image file size");
        return;
    }

    // init and clear display
    EPD_FastMode1Init();
    if (clear)
    {
        EPD_Display_Clear();
        EPD_Update();
    }

    // Clear buffer
    Paint_Clear(WHITE);

    // draw frame, frame index and paused
    EPD_ShowPicture((792 - 368) / 2, 0, 368, 272, imgbuf, BLACK);
    EPD_ShowString(0, 0, (String(i) + "/" + String(FRAME_COUNT)).c_str(), 16, BLACK);
    if (!playing)
        EPD_ShowString(0, 272 - 16 - 1, "paused", 16, BLACK);

    // update display and sleep
    EPD_Display(drawbuf);
    EPD_FastUpdate();
    EPD_DeepSleep();
}
On setup, turn on the power led, initialize the serial port, set the button pins to input, initialize the sd card, initialize the display and draw buffer and finally, draw frame 240 (you can change the number):
void setup()
{
    IO_LED_INIT;
    IO_LED_ON;
    Serial.begin(115200);

    // Set buttons as input
    pinMode(IO_RSW_UP, INPUT);
    pinMode(IO_RSW_DOWN, INPUT);
    pinMode(IO_SW_MENU, INPUT);
    pinMode(IO_SW_EXIT, INPUT);

    // Turn on and begin SD
    pinMode(IO_SD_POWER, OUTPUT);
    digitalWrite(IO_SD_POWER, HIGH);
    vTaskDelay(100 / portTICK_PERIOD_MS);

    SPI.begin(IO_SD_CLK, IO_SD_MISO, IO_SD_MOSI, IO_SD_CS);
    if (!SD.begin(IO_SD_CS))
    {
        Serial.println("SD: Can't begin SD");
        while (1);
    }

    // Turn on and clear display
    pinMode(IO_EPD_POWER, OUTPUT);
    digitalWrite(IO_EPD_POWER, HIGH);
    EPD_GPIOInit();
    EPD_HW_RESET();

    // Init draw buffer
    Paint_NewImage(drawbuf, EPD_W, EPD_H, Rotation, WHITE);
    Paint_Clear(WHITE);

    drawFromSD(240, true);
}
On loop, if the menu button is pressed, we toggle the play status, if we are playing, draw the next frame, then for the up and down button, go up or down a frame and as for the exit button, I made it restart the playback:
void loop()
{
    if (!digitalRead(IO_SW_MENU))
    {
        playing = !playing;
        drawFromSD(framei, false);
    }

    if (playing)
    {
        framei++;
        if (framei >= FRAME_COUNT)
            playing = false;
        drawFromSD(++framei, false);
    }

    if (!digitalRead(IO_RSW_DOWN))
    {
        if (framei > 1)
            framei -= 1;
        else
            framei = FRAME_COUNT;
        drawFromSD(framei, false);
    }

    if (!digitalRead(IO_RSW_UP))
    {
        if (framei < FRAME_COUNT)
            framei += 1;
        else
            framei = 1;
        drawFromSD(framei, false);
    }

    if (!digitalRead(IO_SW_EXIT))
    {
        framei = 1;
        playing = false;
        drawFromSD(framei, false);
    }
}
And that’s it, now copy your binary frames to a SD card, plug it into the CrowPanel and upload your code!
Thanks for reading and stay tuned for more tech insights and tutorials. Until next time, and keep exploring the world of tech!