
0 - Introduction
In some previous articles, we touched on the subject of OLED screens and, with the help of U8g2 lib, we even got SH1106 and SSD1302 screens working. In today’s article though, we won’t get any help from U8g2 because we will make our own SH1106 driver from scratch.
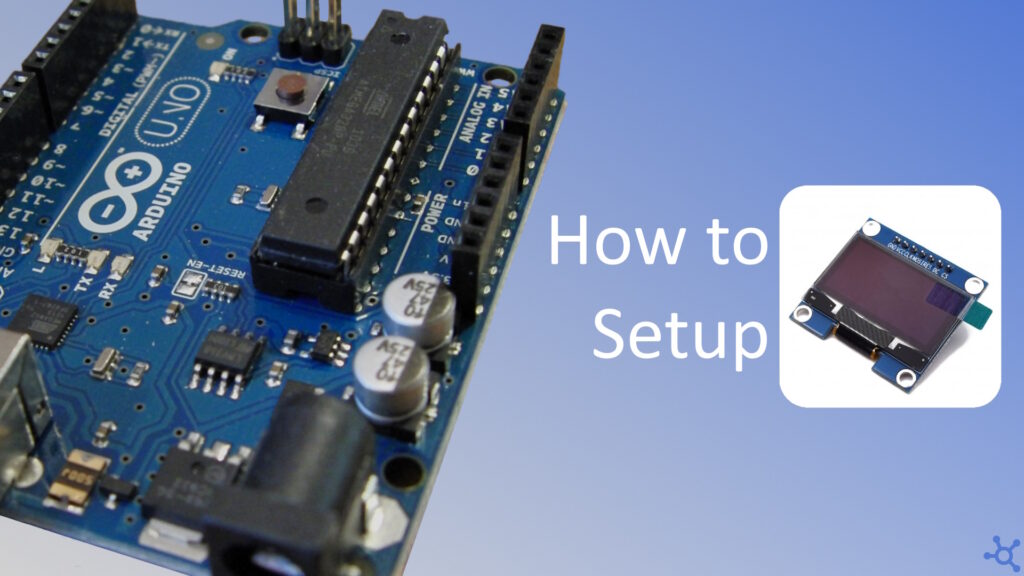
Before starting, you will need the SH1106 SPI screen (buy here) and an Arduino Nano (buy here).
1 - Pins Code
To simplify the usage of pins, we can create a small struct that stores the port, data direction register and bit for the pin we will want to use. Taking inspiration from Arduino’s libraries, we can create a function named ‘set mode’ to set a pin as input or output, and one named ‘set value’ to set the state as either high or low.
We can, lastly, check the Arduino Nano’s schematic (which is the one i am using) and define the pins:
#ifndef _pins_h_
#define  _pins_h_

#include <avr/io.h>

#define PM_HIGH 1
#define PM_LOW  0
#define PM_OUTPUT 1
#define PM_INPUT  1

typedef struct
{
    volatile uint8_t* port;
    volatile uint8_t* ddr;
    uint8_t pin;
} pin_t;

void pin_setmode(pin_t pin, uint8_t mode);
void pin_setval(pin_t pin, uint8_t val);


#ifdef __AVR_ATmega328P__ // Arduino Nano

    #define D0 (pin_t){.ddr = &DDRD, .port = &PORTD, .pin = PD0}
    #define D1 (pin_t){.ddr = &DDRD, .port = &PORTD, .pin = PD1}
    #define D2 (pin_t){.ddr = &DDRD, .port = &PORTD, .pin = PD2}
    #define D3 (pin_t){.ddr = &DDRD, .port = &PORTD, .pin = PD3}
    #define D4 (pin_t){.ddr = &DDRD, .port = &PORTD, .pin = PD4}
    #define D5 (pin_t){.ddr = &DDRD, .port = &PORTD, .pin = PD5}
    #define D6 (pin_t){.ddr = &DDRD, .port = &PORTD, .pin = PD6}
    #define D7 (pin_t){.ddr = &DDRD, .port = &PORTD, .pin = PD7}

    #define D8 (pin_t){.ddr = &DDRB, .port = &PORTB, .pin = PB0}
    #define D9 (pin_t){.ddr = &DDRB, .port = &PORTB, .pin = PB1}
    #define D10 (pin_t){.ddr = &DDRB, .port = &PORTB, .pin = PB2}
    #define D11 (pin_t){.ddr = &DDRB, .port = &PORTB, .pin = PB3}
    #define D12 (pin_t){.ddr = &DDRB, .port = &PORTB, .pin = PB4}
    #define D13 (pin_t){.ddr = &DDRB, .port = &PORTB, .pin = PB5}

    #define A0 (pin_t){.ddr = &DDRC, .port = &PORTC, .pin = PC0}
    #define A1 (pin_t){.ddr = &DDRC, .port = &PORTC, .pin = PC1}
    #define A2 (pin_t){.ddr = &DDRC, .port = &PORTC, .pin = PC2}
    #define A3 (pin_t){.ddr = &DDRC, .port = &PORTC, .pin = PC3}
    #define A4 (pin_t){.ddr = &DDRC, .port = &PORTC, .pin = PC3}
    #define A5 (pin_t){.ddr = &DDRC, .port = &PORTC, .pin = PC5}


#elif __AVR_ATmega2560__ // Arduino Mega

#endif

#endif
In the cpp file we need to implement both ‘set mode’ and ‘set value’.
For ‘set mode’ we need to set the bit in the data direction register if ‘mode’ is non-zero and clear it, if it is zero, ‘set value’ will be pretty similar, as we only change the ‘pin.ddr’ to ‘pin.port’ (and the variable name ‘mode’ to ‘val’):
#include "pins.h"

void pin_setmode(pin_t pin, uint8_t mode)
{
    if (mode)
        *pin.ddr |= _BV(pin.pin);
    else
        *pin.ddr &= ~_BV(pin.pin);
}
void pin_setval(pin_t pin, uint8_t val)
{
    if (val)
        *pin.port |= _BV(pin.pin);
    else
        *pin.port &= ~_BV(pin.pin);
}
2 - SPI Code
One of the requirements for a SH1106 display is to either have SPI or I2C. The display i used uses SPI, so that’s what we will implement.
Start by including the ‘pins’ header file created before, then define the spi pins (check the schematic again) and create 4 functions, ‘init’, ‘begin’, ‘end’ and ‘send’:
#ifndef _spi_sync_h_
#define _spi_sync_h_

#include "pins.h"

#ifdef __AVR_ATmega328P__

    #define SPI_SS D10
    #define SPI_SCK D13
    #define SPI_MOSI D11
    #define SPI_MISO D12

#elif __AVR_ATmega2560__

    // Add pins for Arduino Mega

#endif

void spi_init(pin_t cs);

void spi_begin(pin_t cs);
void spi_end(pin_t cs);

void spi_send(uint8_t data);

#endif
On the cpp file, create the ‘init’ function. In it, set all SPI pins to output except ‘MISO’, which is set to input and also set CS to output and HIGH. The ‘begin’ and ‘end’ functions simply set the CS pin to low and high respectively and, finally, on the ‘send’ function, write the data to ‘SPDR’ and wait until it is sent:
#include "spi_sync.h"

void spi_init(pin_t cs)
{
    pin_setmode(SPI_MOSI, PM_OUTPUT);
    pin_setmode(SPI_SCK, PM_OUTPUT);
    pin_setmode(SPI_MISO, PM_INPUT);
    pin_setmode(cs, PM_OUTPUT);
    pin_setval(cs, PM_HIGH);

    SPCR = _BV(SPE) | _BV(MSTR) | _BV(SPR1) | _BV(SPR0);
}

void spi_begin(pin_t cs) { pin_setval(cs, PM_LOW); }
void spi_end(pin_t cs) { pin_setval(cs, PM_HIGH); }

void spi_send(uint8_t data)
{
    SPDR = data;
    while (!(SPSR & (1 << SPIF)));
}
3 - Display Code
On the display driver’s header file, we will use the spi file we created just now, along with ‘avr/io’. For defines, we need the resolution of the display, page ammount, buffersize and colors (black and white).
In this driver we will use a simple struct to house the display buffer along with the 3 pins required by the display, those will be the chip select (CS), data command (DC) and reset (RES).
As for the functions we will create, we will need ‘init’, ‘update’, one to ‘draw_fill’ the screen and one to ‘draw_pixel’ (‘draw_box is optional’ and was just used for testing):
#ifndef _sh1106_sync_h_
#define _sh1106_sync_h_

#include <avr/io.h>
#include "spi_sync.h"

#define SH1106_WIDTH 128
#define SH1106_HEIGHT 64
#define SH1106_PAGES (SH1106_HEIGHT / 8)
#define SH1106_BUFSIZE (SH1106_WIDTH * SH1106_PAGES)
#define SH1106_WHITE 1
#define SH1106_BLACK 0

typedef struct
{
    uint8_t buf[SH1106_BUFSIZE];
    pin_t cs;
    pin_t dc;
    pin_t res;
} sh1106_t;

sh1106_t sh1106_init(pin_t cs, pin_t dc, pin_t res);
void sh1106_update(sh1106_t* oled);

void sh1106_draw_fill(sh1106_t* oled, uint8_t color);
void sh1106_draw_pixel(sh1106_t* oled, uint8_t x, uint8_t y, uint8_t color);
void sh1106_draw_box(sh1106_t* oled, uint8_t x, uint8_t y, uint8_t w, uint8_t h, uint8_t color);

#endif
As for the cpp file, we will need ‘util/delay’ from the avr libs, and all the commands copied from the SH1106’s datasheet:
#include "sh1106_sync.h"
#include <util/delay.h>

// Define SH1106 commands
#define SH1106_DISPLAY_OFF              0xAE
#define SH1106_DISPLAY_ON               0xAF
#define SH1106_SET_DISPLAY_CLOCK        0xD5
#define SH1106_SET_MULTIPLEX            0xA8
#define SH1106_SET_DISPLAY_OFFSET       0xD3
#define SH1106_SET_START_LINE           0x40
#define SH1106_SET_CHARGE_PUMP          0xAD
#define SH1106_SET_MEMORY_ADR           0x20
#define SH1106_SET_SEGMENT_REMAP        0xA1
#define SH1106_SET_COM_SCAN_DEC         0xC8
#define SH1106_SET_COM_PINS             0xDA
#define SH1106_SET_CONTRAST             0x81
#define SH1106_SET_PRECHARGE            0xD9
#define SH1106_SET_VCOM_DESELECT        0xDB
#define SH1106_DISPLAY_ALL_ON_RESUME    0xA4
#define SH1106_NORMAL_DISPLAY           0xA6
For sending data to the display we will need two functions. The first one will be named ‘send command’ and it will set the dc pin to low before sending data to the display, and after the transfer is complete, it will set it to high again. The second function is also optional as it is just calling the spi send function:
void sh1106_sendCmd(pin_t dc, uint8_t val)
{
    pin_setval(dc, PM_LOW);

    spi_send(val);

    pin_setval(dc, PM_HIGH);
}
void sh1106_sendData(uint8_t val)
{
    spi_send(val);
}
We will now create the initialization sequence for the display, keep in mind that every display model is a little different and your brand might require a different sequence than mine does. The following sequence worked on 3 different displays i tested, so it probably will work on your display as well.
We start setting up the pins by setting both dc and reset as output, and setting them high by default, then initialize the spi by passing in the cs pin.
The next step is to reset the display, we do that by setting ‘res’ as low for a little while and then setting back to high.
Now we are ready to send the intialization sequence begin a spi transmission and start sending the commands, once again, keep in mind that this sequence has a chance to not work perfectly on your display.
And, finally, we end the transmission and return the struct with the display buffer and pins:
sh1106_t sh1106_init(pin_t cs, pin_t dc, pin_t res)
{
    pin_setmode(dc, PM_OUTPUT); pin_setmode(res, PM_OUTPUT);
    pin_setval(dc, PM_HIGH);    pin_setval(res, PM_HIGH);
    spi_init(cs);

    pin_setval(res, PM_LOW);
    _delay_ms(10);
    pin_setval(res, PM_HIGH);
    _delay_ms(10);

    spi_begin(cs);

    sh1106_sendCmd(dc, SH1106_DISPLAY_OFF);
    _delay_ms(50);

    sh1106_sendCmd(dc, SH1106_SET_DISPLAY_CLOCK);
    sh1106_sendCmd(dc, 0x80);

    sh1106_sendCmd(dc, SH1106_SET_MULTIPLEX);
    sh1106_sendCmd(dc, 0x3F);

    sh1106_sendCmd(dc, SH1106_SET_DISPLAY_OFFSET);
    sh1106_sendCmd(dc, 0x00);

    sh1106_sendCmd(dc, SH1106_SET_START_LINE);

    sh1106_sendCmd(dc, SH1106_SET_CHARGE_PUMP);
    sh1106_sendCmd(dc, 0x8B);

    sh1106_sendCmd(dc, SH1106_SET_MEMORY_ADR);
    sh1106_sendCmd(dc, 0x00);

    sh1106_sendCmd(dc, SH1106_SET_SEGMENT_REMAP);
    sh1106_sendCmd(dc, SH1106_SET_COM_SCAN_DEC);

    sh1106_sendCmd(dc, SH1106_SET_COM_PINS);
    sh1106_sendCmd(dc, 0x12);

    sh1106_sendCmd(dc, SH1106_SET_CONTRAST);
    sh1106_sendCmd(dc, 0x7F);

    sh1106_sendCmd(dc, SH1106_SET_PRECHARGE);
    sh1106_sendCmd(dc, 0xF1);

    sh1106_sendCmd(dc, SH1106_SET_VCOM_DESELECT);
    sh1106_sendCmd(dc, 0x30);

    sh1106_sendCmd(dc, SH1106_DISPLAY_ALL_ON_RESUME);
    sh1106_sendCmd(dc, SH1106_NORMAL_DISPLAY);

    sh1106_sendCmd(dc, SH1106_DISPLAY_ON);
    _delay_ms(150);

    spi_end(cs);

    return (sh1106_t)
    {
        .dc = dc,
        .cs = cs,
        .res = res,
        .buf = {0}
    };
}
The update function requires us to divide the buffer in pages, and sending them one by one so, we begin the spi transmission, send the commands 0x00 and 0x10, then we send 0xB0 plus the page number we are going to send, and then the 128 bytes of the page and, lastly, end the transmission:
void sh1106_update(sh1106_t* oled)
{
    spi_begin(oled->cs);

    for (uint8_t page = 0; page < SH1106_PAGES; page++)
    {
        sh1106_sendCmd(oled->dc, 0x00);
        sh1106_sendCmd(oled->dc, 0x10);
        sh1106_sendCmd(oled->dc, 0xB0 + page);

        for (uint8_t c = 0; c < SH1106_WIDTH; c++)
            sh1106_sendData(oled->buf[page * SH1106_WIDTH + c]);
    }

    spi_end(oled->cs);
}
The ‘fill’ function will either set all pixels to white or to black by filling the buffer with 255s or zeros:
void sh1106_draw_fill(sh1106_t* oled, uint8_t color)
{
    color = (color) ? 0xFF : 0x00;
    for (uint16_t i = 0; i < SH1106_BUFSIZE; i++)
        oled->buf[i] = color;
}
Lastly on the driver, we create the draw pixel and draw box functions:
void sh1106_draw_pixel(sh1106_t* oled, uint8_t x, uint8_t y, uint8_t color)
{
    /*// wrap
    x = x % SH1106_WIDTH;
    y = y % SH1106_HEIGHT;*/
    if (x >= SH1106_WIDTH || y >= SH1106_HEIGHT)
        return;

    uint16_t i = (y / 8) * SH1106_WIDTH + x;
    if (color)
        oled->buf[i] |= (1 << (y % 8));
    else
        oled->buf[i] &= ~(1 << (y % 8));
}

void sh1106_draw_box(sh1106_t* oled, uint8_t x, uint8_t y, uint8_t w, uint8_t h, uint8_t color)
{
    for (uint8_t xx = 0; xx < w; xx++)
        for (uint8_t yy = 0; yy < h; yy++)
            sh1106_draw_pixel(oled, xx + x, yy + y, color);
}
3 - main.cpp
On main, we initalize the display, create a variable to keep track of the pixel we will paint and, in an infinite loop, update the pixel position, fill the screen with black, draw the new pixel and update the screen:
#include <avr/io.h>
#include "sh1106_sync.h"

int main()
{
    sh1106_t oled = sh1106_init(D10, A2, A1);

    uint8_t x = 0;
    while (1)
    {
        x = (x + 1) % SH1106_WIDTH;
        sh1106_draw_fill(&oled, SH1106_BLACK);
        sh1106_draw_pixel(&oled, x, 10, SH1106_WHITE);
        sh1106_update(&oled);
    }
}
And that’s all. Thanks for reading and stay tuned for more tech insights and tutorials. Until next time, and keep exploring the world of tech!