Are you the ‘friend who runs all servers’, a LAN center owner, or just want a way to easely host servers for your kids at your home? Pterodactyl is one, if not the best server manager I have recently used. The UI is very good and easy to use, the security also deserves praise as you can set up 2FA, it has captcha and runs all servers on their own containers, separating them from each other and from the host system.
And even though the setup is a little longer than most of our previous articles, I really believe that your effort pays off.
For this article we will use two machines with Ubuntu Server 24 running docker, but you can use a couple of different distros and only need one machine, see the supported distros here. I will also, in this article, setup Pterodactyl panel for local use only, but you can easely host it to the public with the use of NGINX Proxy Manager. If you are really into security, then instead of opening your panel to the public you can use Wireguard to access it.
To host only the game servers to the public, simply forward the server ports and use your public ip (or domain) plus port to connect to it, you do not need a reverse proxy for it.
1 - Setting up the Panel
The panel is the Web App you will use to manage all your servers and services, and is required before we can setup the nodes (machine that will host the game servers). Let’s start by creating a folder for it:
mkdir pterodactyl-panel
cd pterodactyl-panel
nano docker-compose.yml
In the ‘docker-compose.yml’ file you will paste the following, replacing the ‘APP_URL’ with your own, and also replacing the database passwords:
x-common:
  database:
    &db-environment
    # Do not remove the "&db-password" from the end of the line below, it is important
    # for Panel functionality.
    MYSQL_PASSWORD: &db-password "CHANGE_ME"
    MYSQL_ROOT_PASSWORD: "CHANGE_ME_TOO"
  panel:
    &panel-environment
    # This URL should be the URL that your reverse proxy routes to the panel server
    APP_URL: "https://pterodactyl.example.com"
    # A list of valid timezones can be found here: http://php.net/manual/en/timezones.php
    APP_TIMEZONE: "UTC"
    APP_SERVICE_AUTHOR: "noreply@example.com"
    TRUSTED_PROXIES: "*" # Set this to your proxy IP
    # Uncomment the line below and set to a non-empty value if you want to use Let's Encrypt
    # to generate an SSL certificate for the Panel.
    # LE_EMAIL: ""
  mail:
    &mail-environment
    MAIL_FROM: "noreply@example.com"
    MAIL_DRIVER: "smtp"
    MAIL_HOST: "mail"
    MAIL_PORT: "1025"
    MAIL_USERNAME: ""
    MAIL_PASSWORD: ""
    MAIL_ENCRYPTION: "true"

#
# ------------------------------------------------------------------------------------------
# DANGER ZONE BELOW
#
# The remainder of this file likely does not need to be changed. Please only make modifications
# below if you understand what you are doing.
#
services:
  database:
    image: mariadb:10.5
    restart: always
    command: --default-authentication-plugin=mysql_native_password
    volumes:
      - "./data/database:/var/lib/mysql"
    environment:
      <<: *db-environment
      MYSQL_DATABASE: "panel"
      MYSQL_USER: "pterodactyl"
  cache:
    image: redis:alpine
    restart: always
  panel:
    image: ghcr.io/pterodactyl/panel:latest
    restart: always
    ports:
      - "80:80"
      - "443:443"
    links:
      - database
      - cache
    volumes:
      - "./data/var/:/app/var/"
      - "./data/nginx/:/etc/nginx/http.d/"
      - "./data/certs/:/etc/letsencrypt/"
      - "./data/logs/:/app/storage/logs"
    environment:
      <<: [*panel-environment, *mail-environment]
      DB_PASSWORD: *db-password
      APP_ENV: "production"
      APP_ENVIRONMENT_ONLY: "false"
      CACHE_DRIVER: "redis"
      SESSION_DRIVER: "redis"
      QUEUE_DRIVER: "redis"
      REDIS_HOST: "cache"
      DB_HOST: "database"
      DB_PORT: "3306"
networks:
  default:
    ipam:
      config:
        - subnet: 172.20.0.0/16
After saving the file you can run the container with the following command:
docker compose up -d
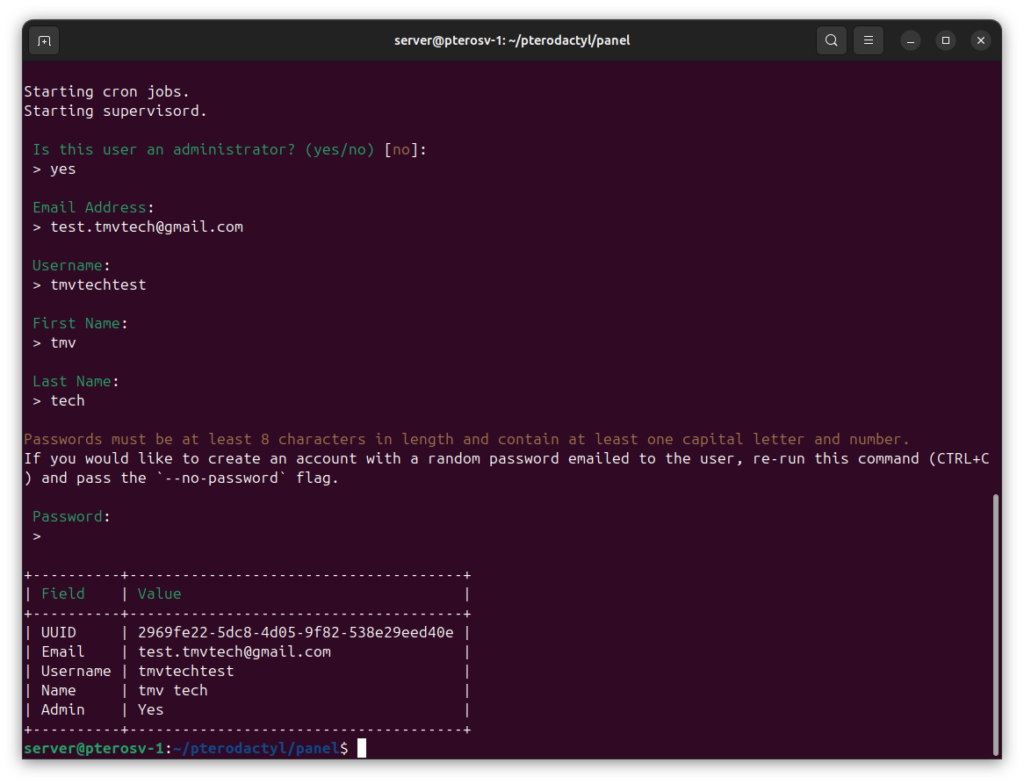
With the container up and running you can open your browser and access it with your machines ip. After the pages loads you will be greeted with a login screen, but you have no user created, you can create a user with the following command:
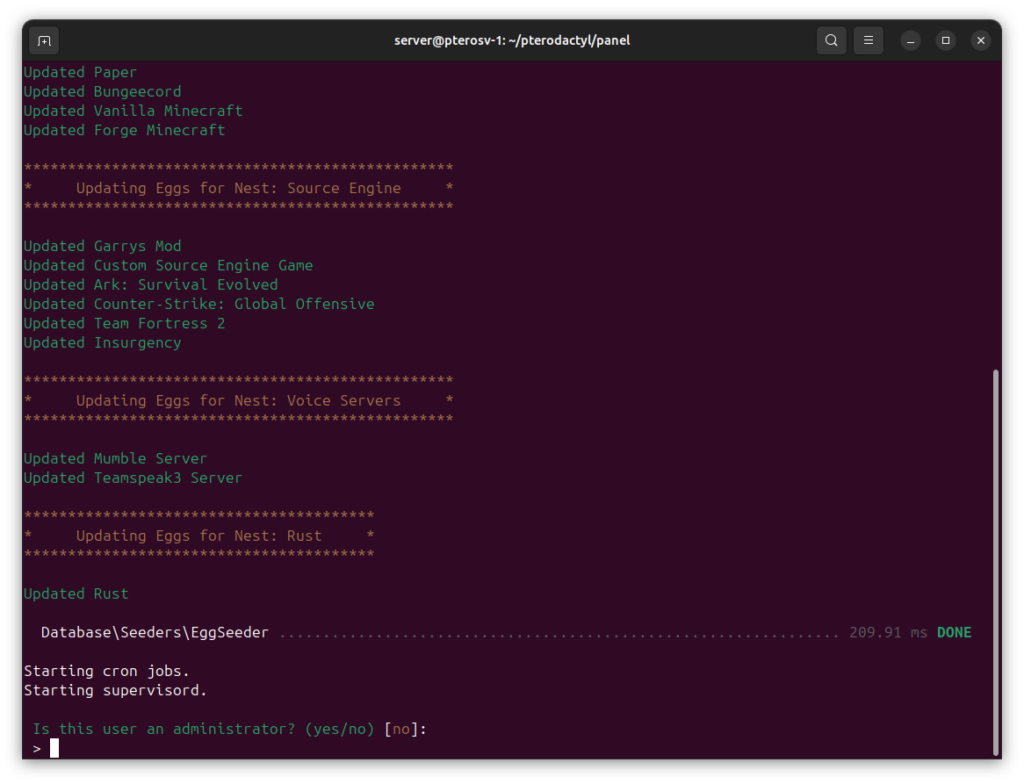
docker compose run --rm panel php artisan p:user:make
You can follow the following screenshots to create a new user:
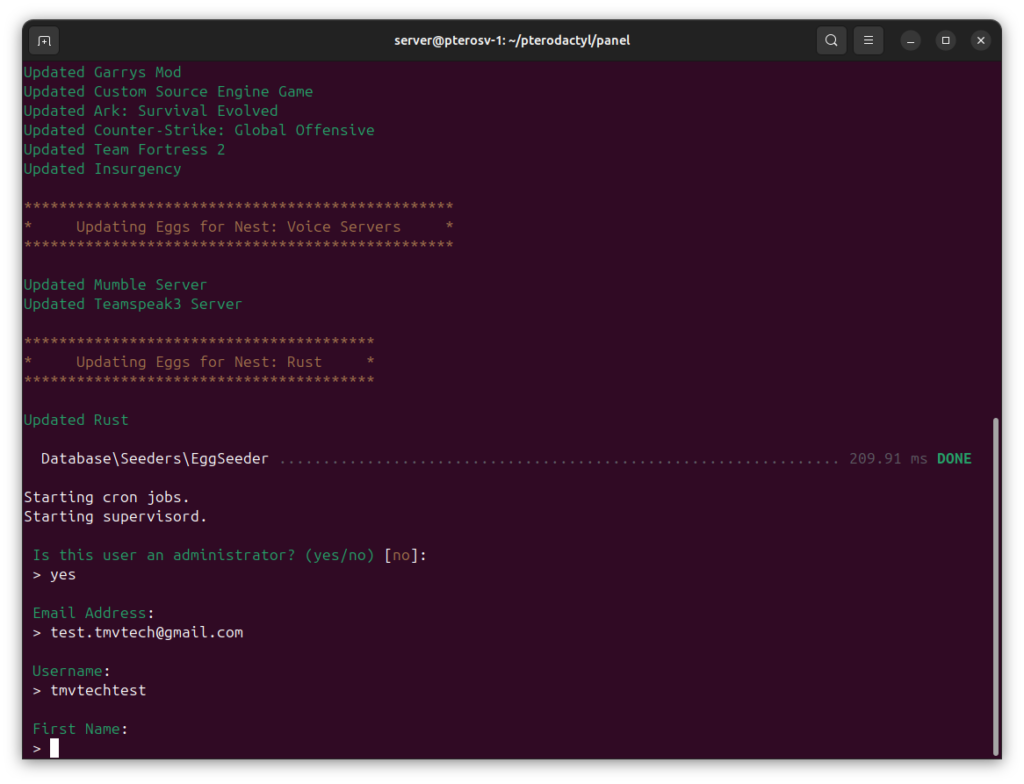
First you need to type 'yes' to become an admin.
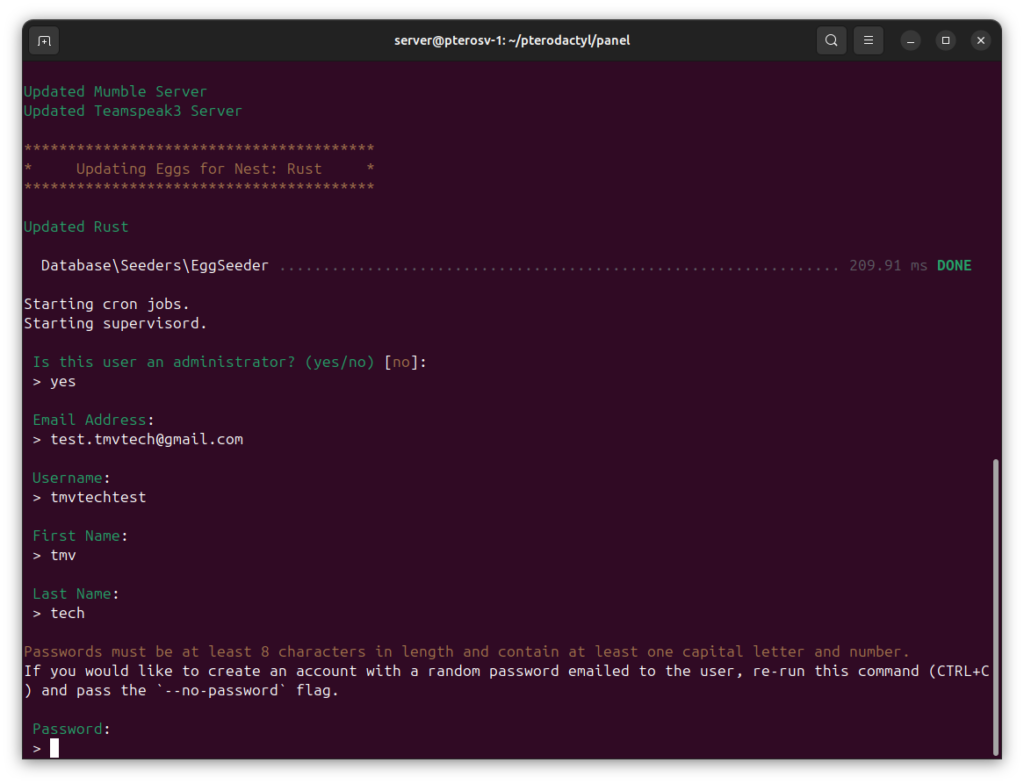
Then you can type your mail, username, and name.
Finally type a password.
And you will have a new user created!
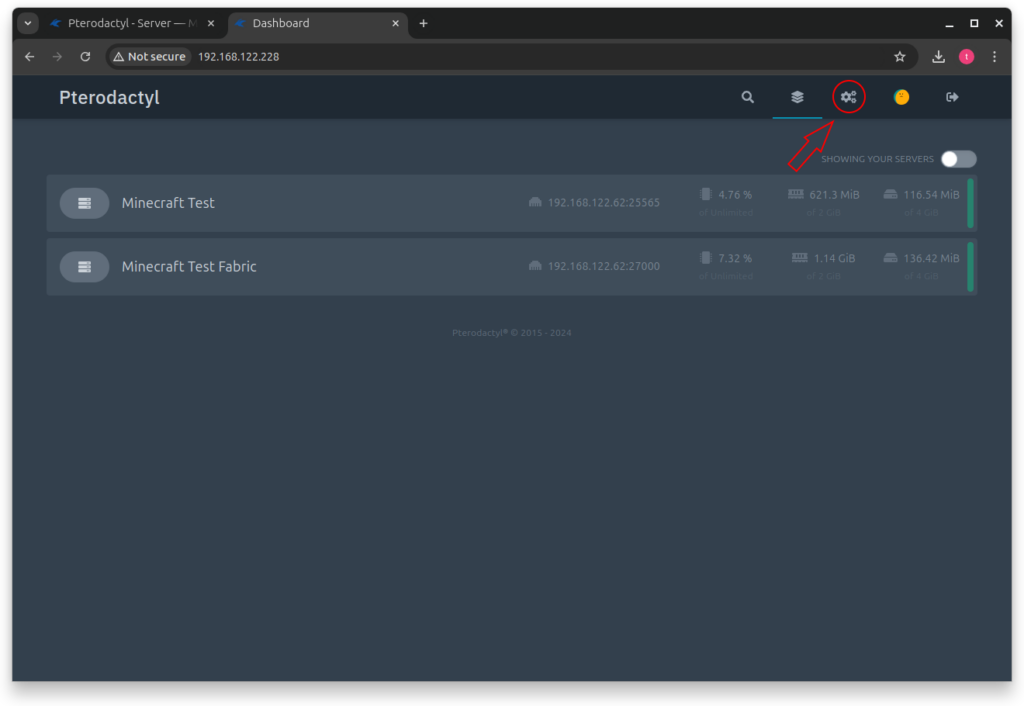
Now, after logging in you can press the ‘Cogs’ icon in the dashboard to access the admin panel.
Note: This screenshot was taken after the installation was complete, you will not see any servers in this list the first time you login.
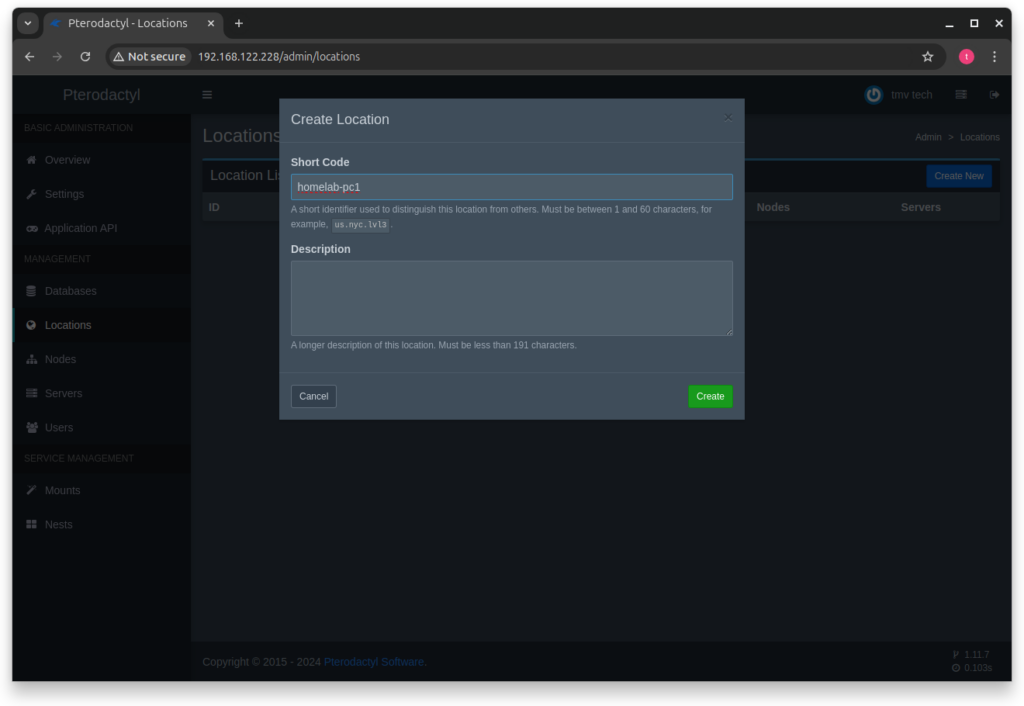
The first step inside this panel will be to create a ‘Location’ in the ‘Locations’ tab.
You can easely do it by clicking the blue ‘Create New’ button.
A location only needs a ‘Short Code’ to be created, the description is optional.
Example: You can have one location called ‘home’ with two wings (machines / nodes) called ‘homelab-XeonServer’ and ‘bedroom-CarlsDesktop’.
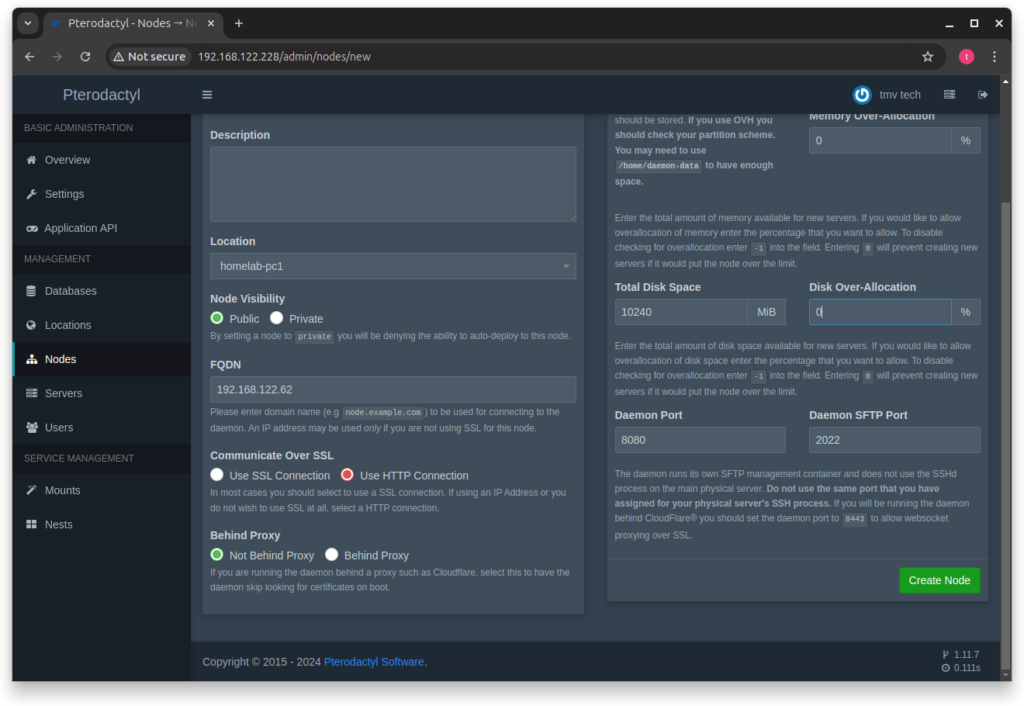
After having a location, we can now create a node. Go to the ‘Nodes’ tab and click on ‘Create New’.
In it, set a name, location, make it public and on ‘FQDN’ either write your local ip or your domain.
On the right side, don’t change the ‘Server File Directory’, set the ammount of ram and the storage you want to use.
Scrolling a bit downwards, on the left you can set:
If local: ‘Use HTTP Connection’ and ‘Not Behind Proxy’
If public: ‘Use SSL Connection’ and ‘Behind Proxy’ (Use NGINX!)
On the right, keep the ‘SFTP Port’ and the ‘Daemon Port’:
If local: keep port 8080
If public: change port to 443
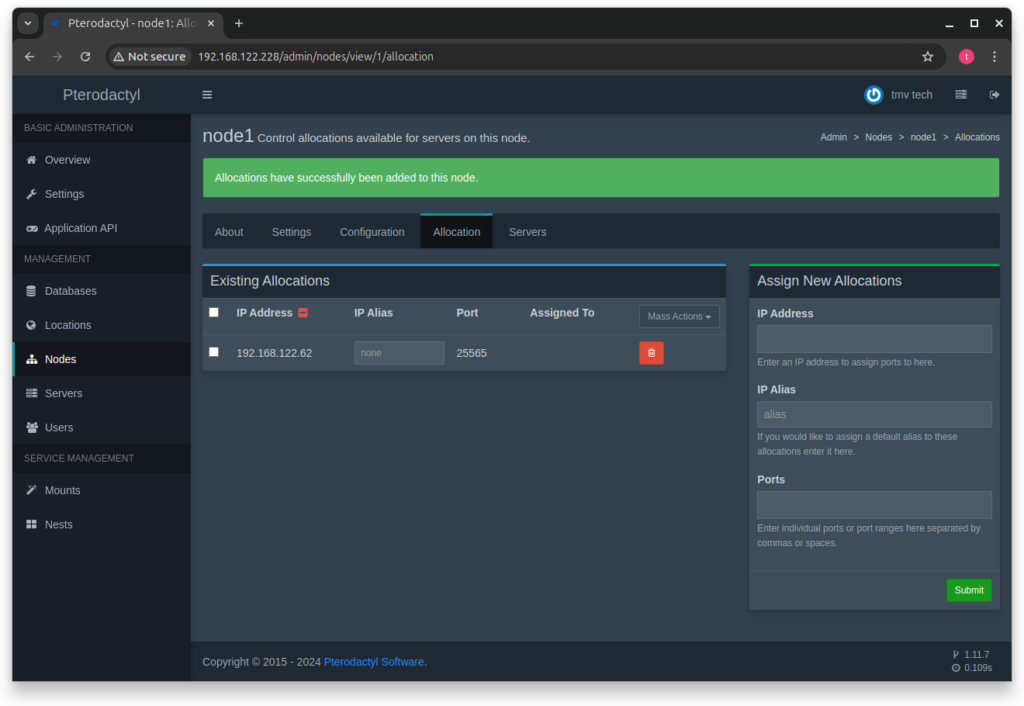
When the node is created you can then select the ‘Allocations’ tab and add the ports you will want this node to use.
In this article we will be hosting two minecraft servers, so one will be on the default one, and the other on a custom one.
You can add ports by using your local IP, keep alias empty and specifying the ports in one of the following ways:
‘25565’: adds the specified port
‘25565, 25566’: adds the specified ports
‘27000-27099’: adds all ports between the given two (including them)
2 - Setting up one Node
To setup a node you will need to create a folder for it.
Note: the server data will not be saved in this folder, only the wing’s config.
mkdir pterodactyl-node1
cd pterodactyl-node1
nano docker-compose.yml
Inside the ‘docker-compose.yml’ file, you can paste the following:
Start the container once using the following command:
docker compose up
You will notice, in the logs, a lot of errors related to the config. That is because we don’t have one.
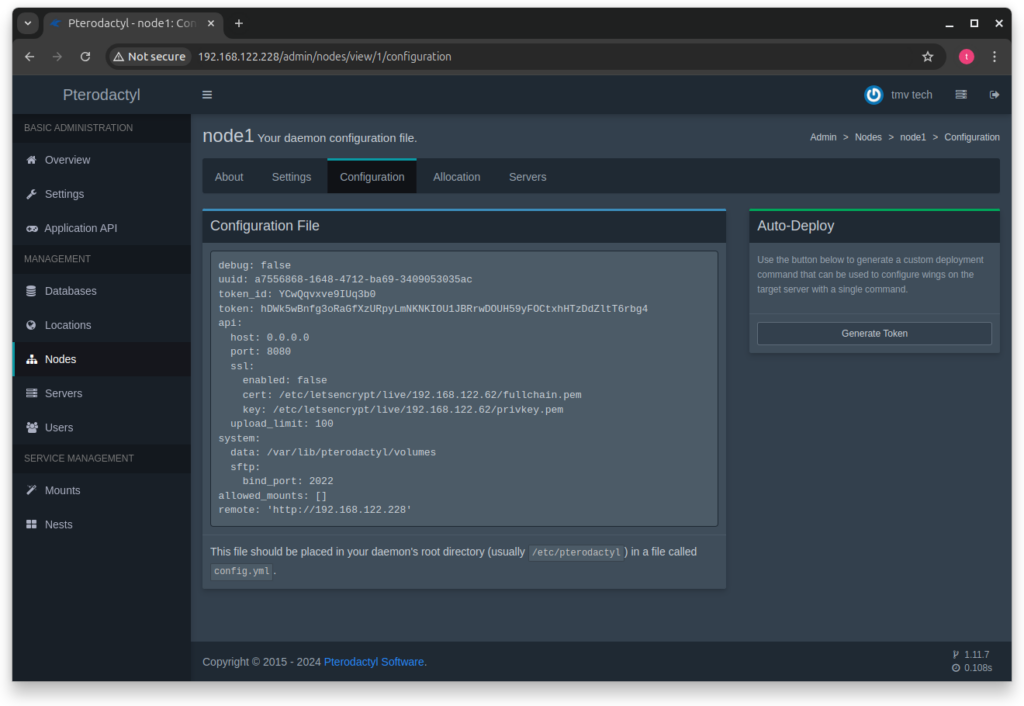
You can copy the config in the ‘Configuration’ tab of the node you created before.
Use this command to create a config file and paste the configuration you copied before into it:
sudo nano ./data/config.yml
With the config saved, we can now run the following command to start the container:
docker compose up -d
3 - Creating your first server (Minecraft)
I chose Minecraft for this article because of it’s popularity and ease to set it up in pterodactyl. Almost every game will be as easy as this to set up, but some require you to mess with config files.
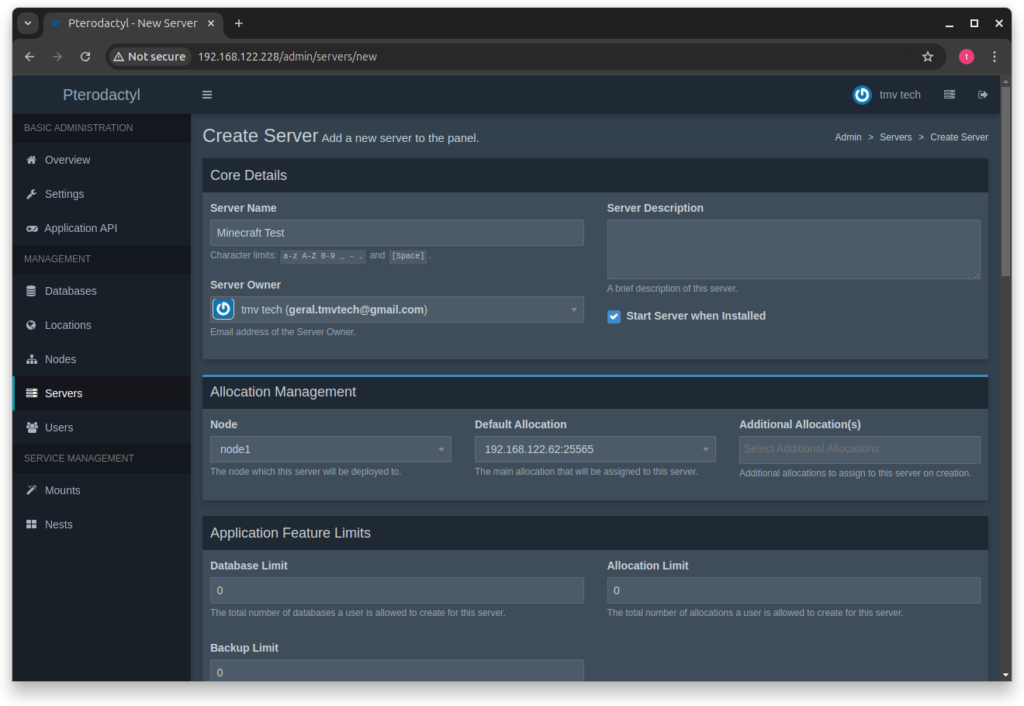
We will start by going into the ‘Servers’ tab and clicking ‘Create New’.
After that we give a name to our server (ex: ‘Minecraft-Vanilla-1.21.1) and set ourselves as the owner.
In ‘Allocation Management’ we will select our node and the ‘Default’ port (Minecraft does not need any additional ports), 25565 is the easiest one, as you will not need to specify it when joining, but you can use any one you want (that is not being used).
You can skip ‘Application Feature Limits’ as Minecraft does not use Databases and Backups are outside the scope of this article.
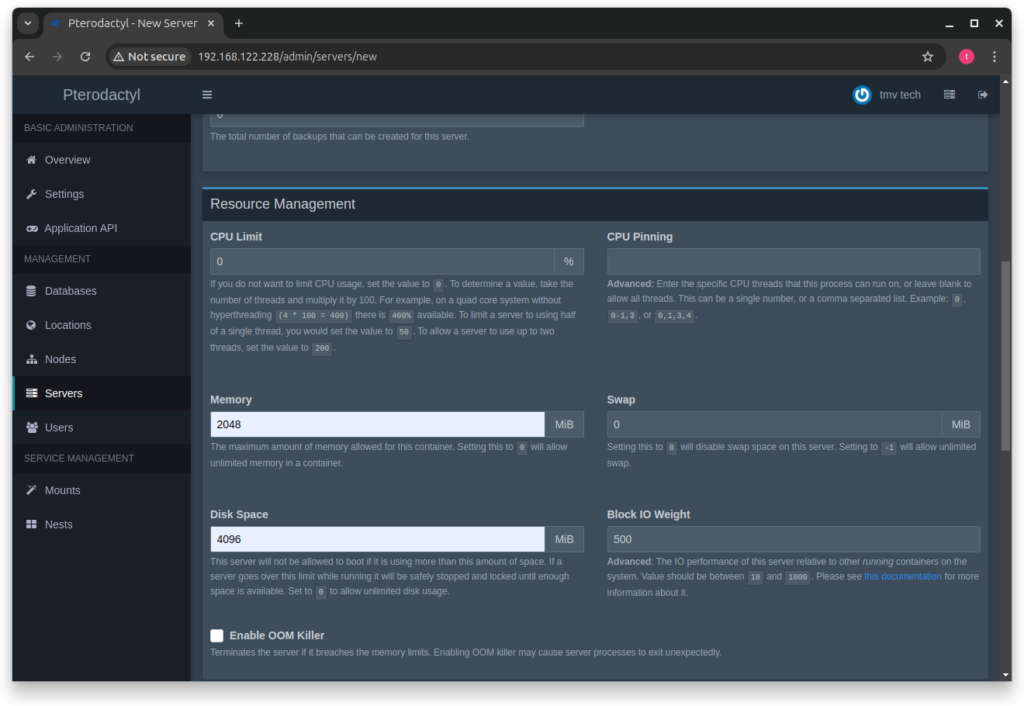
Then you can specify which CPU cores to use and how much of it you want to use. Most of the time I don’t pin CPU cores, but i set the CPU Limit to 75% to 95%.
For RAM, Vanilla Minecraft works with 1GB (1024MB) but I gave it 2GB to have a better experience (more RAM for more players).
As for storage, 200MBs is enough to store the game, but you need some space for the save files. If you play for a while with a couple friends, i suggest 1 to 4GBs.
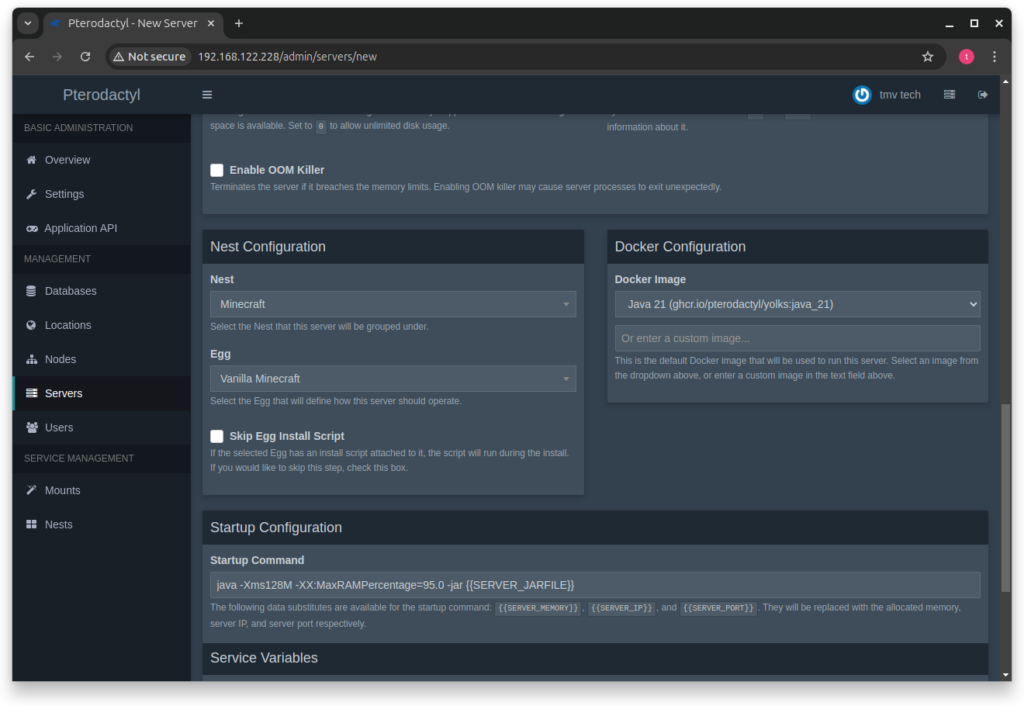
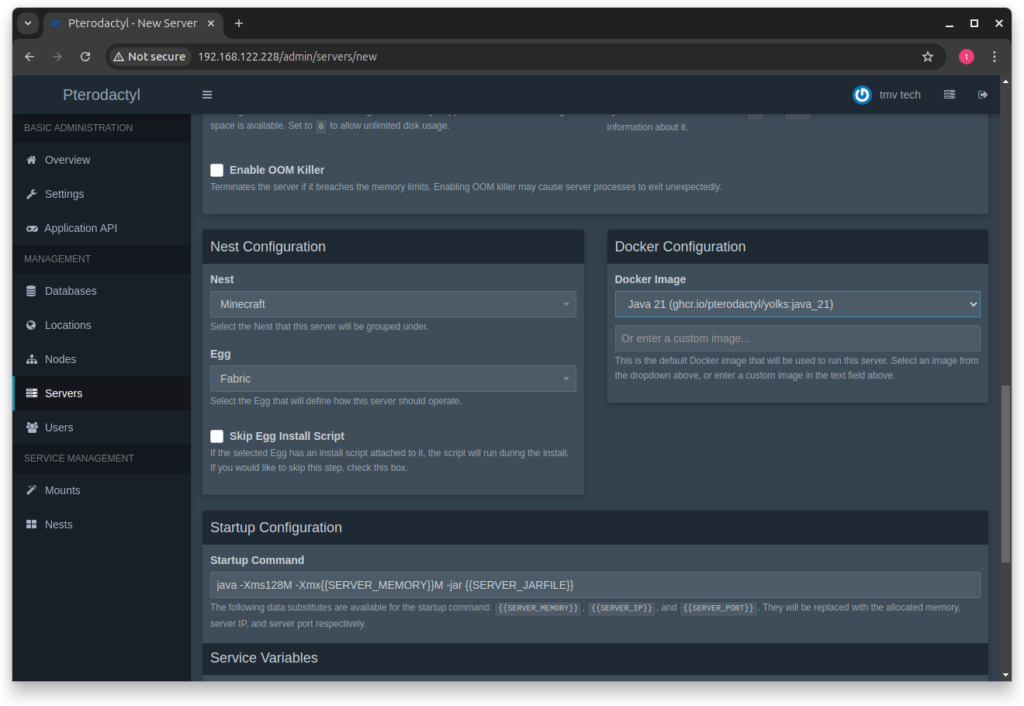
In the ‘Nest Configuration’ you can choose the ‘Nest’ and the ‘Egg’. ‘Nests’ are groups of games and ‘Eggs’ are the games or game versions.
In this example we will use the ‘Minecraft’ ‘Nest’ and the ‘Vanilla Minecraft’ ‘Egg’.
On the right you can see ‘Docker Configuration’ in this you can choose which container to use, in this case, we will use ‘Java 21’ as it is required for the most recent versions.
If you, for example, were to play from version 1.12 to 1.16.5 you would use ‘Java 8’.
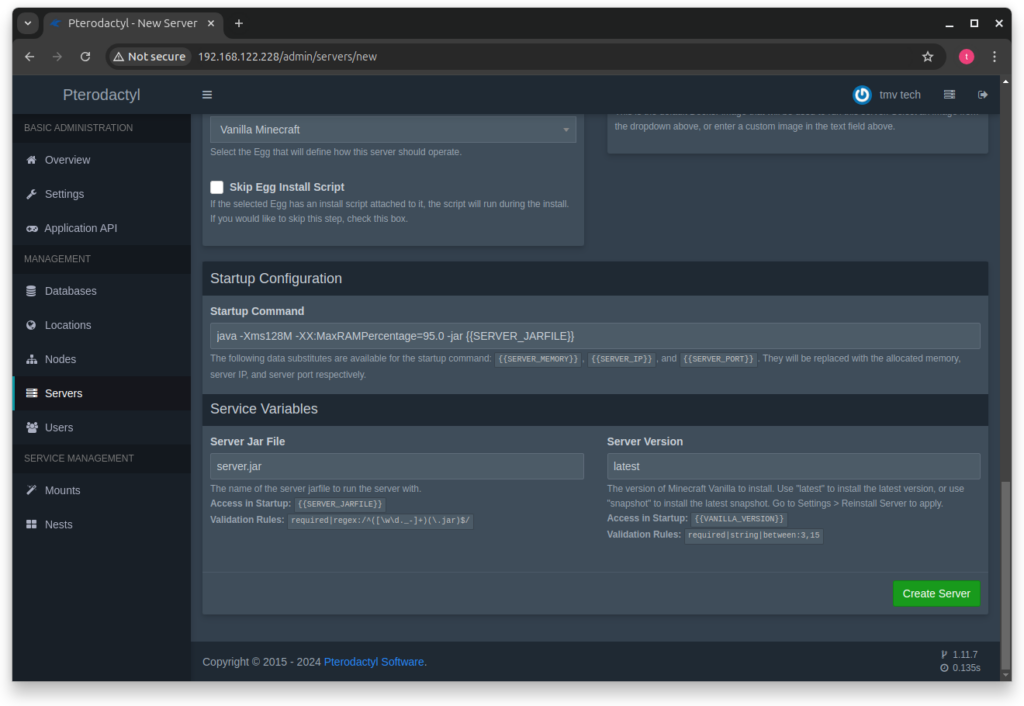
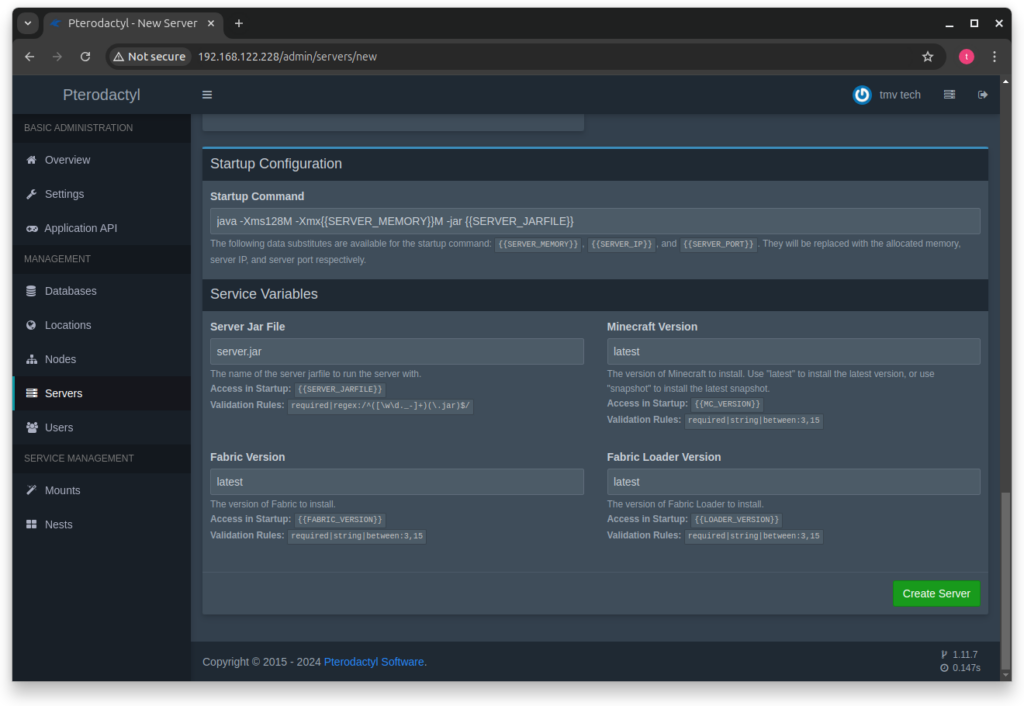
Usually, you do not need to edit the ‘Startup Configuration’.
In ‘Service Variables’ you can select the ‘Server Version’ here, you can either specify a version (ex: 1.21.1 or 1.16.5) or latest to use the most recent version of the game.
I recommend specifying a version, in this article i will use 1.21.1.
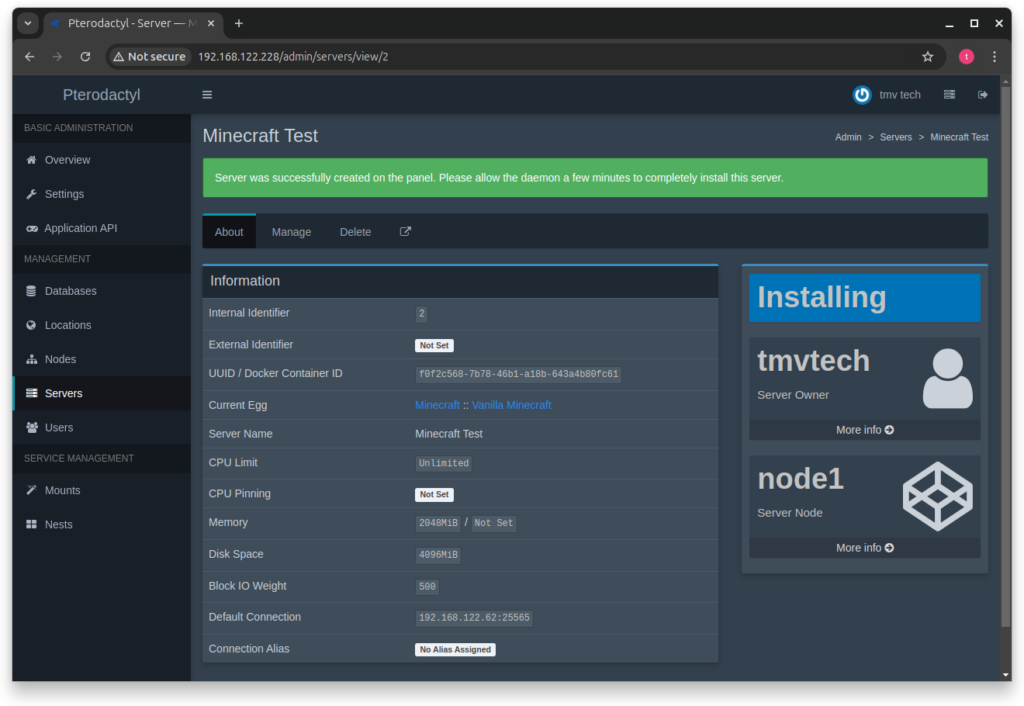
After clicking ‘Create Server’ you will be redirected to it’s tab, in it you can press the ‘Square with an arrow button’ to be taken to it’s console.
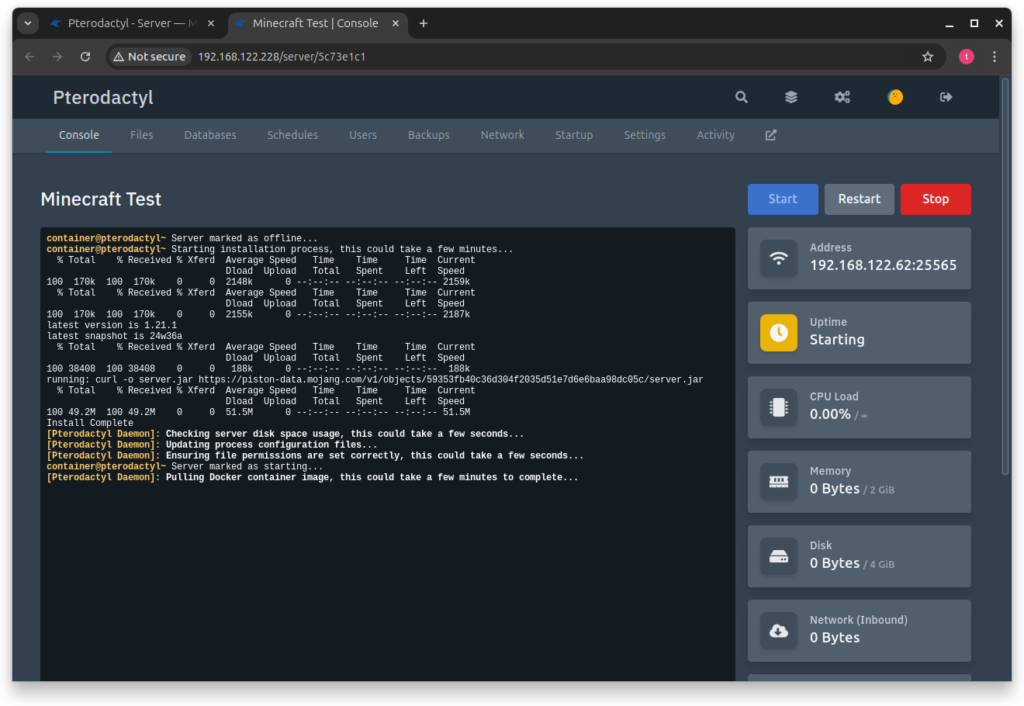
In this tab you will be able to see the server installing.
You won’t be able to interact with anything while the installation takes place.
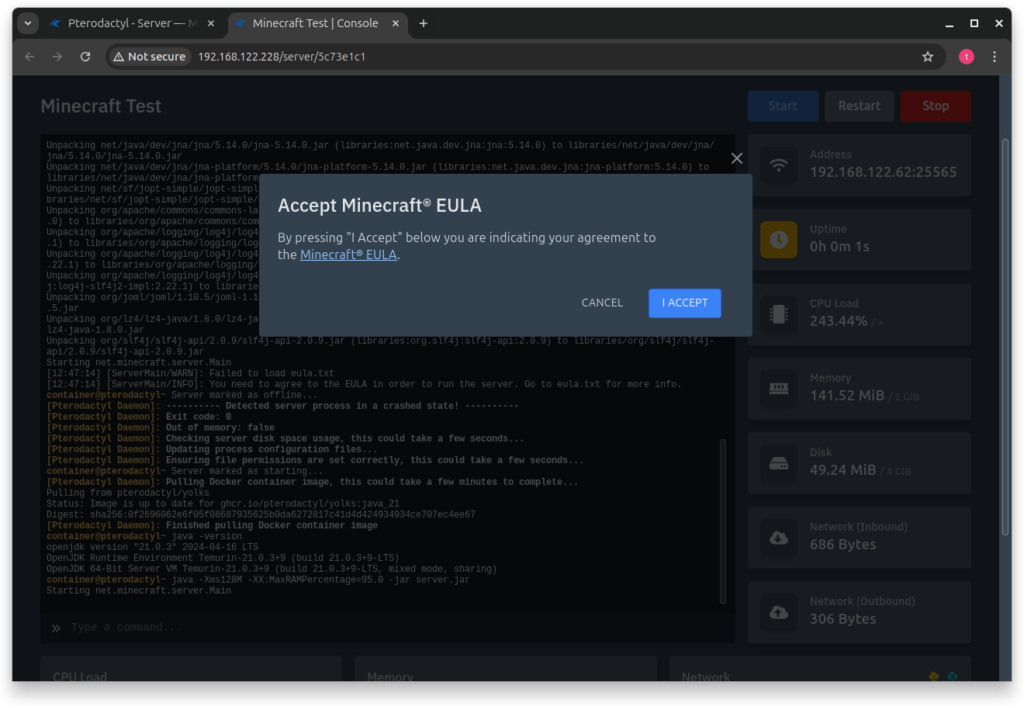
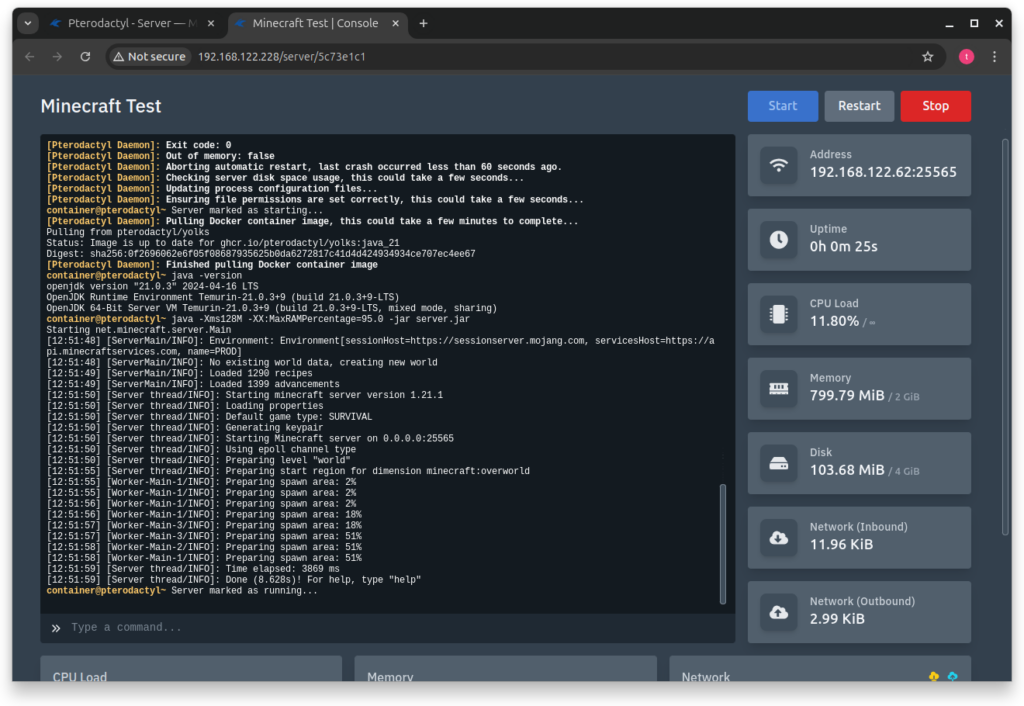
Mid install, you will be prompted to accept the Minecraft EULA, do it.
If your server crashes after accepting the EULA, click the blue ‘Start’ button.
After a while the server should start and you will get a message in the console telling you the ‘Server marked as running…’.
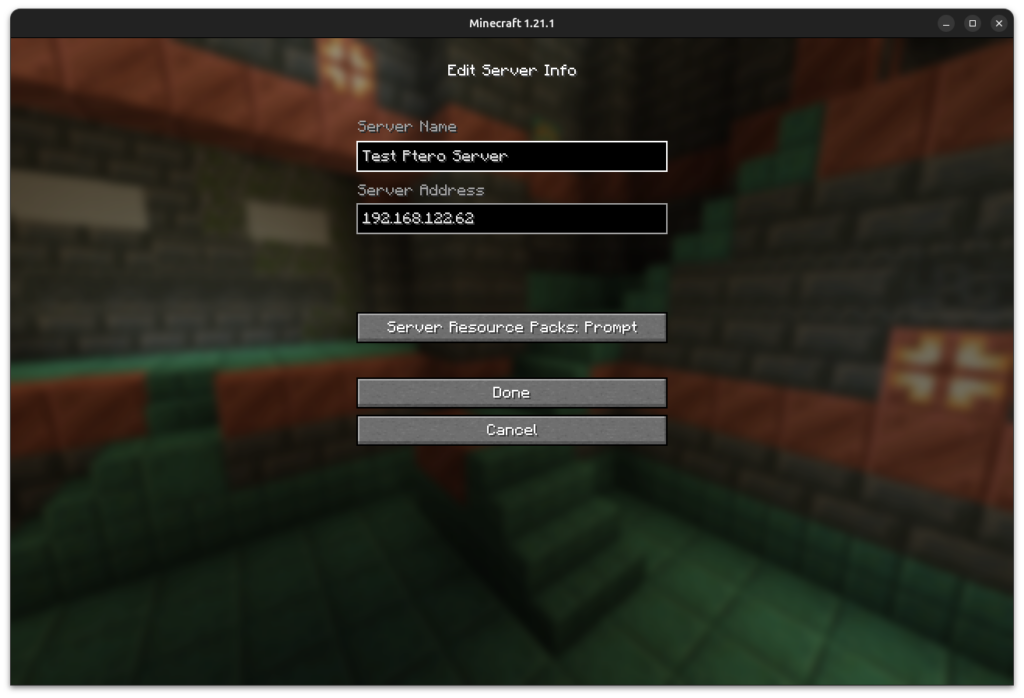
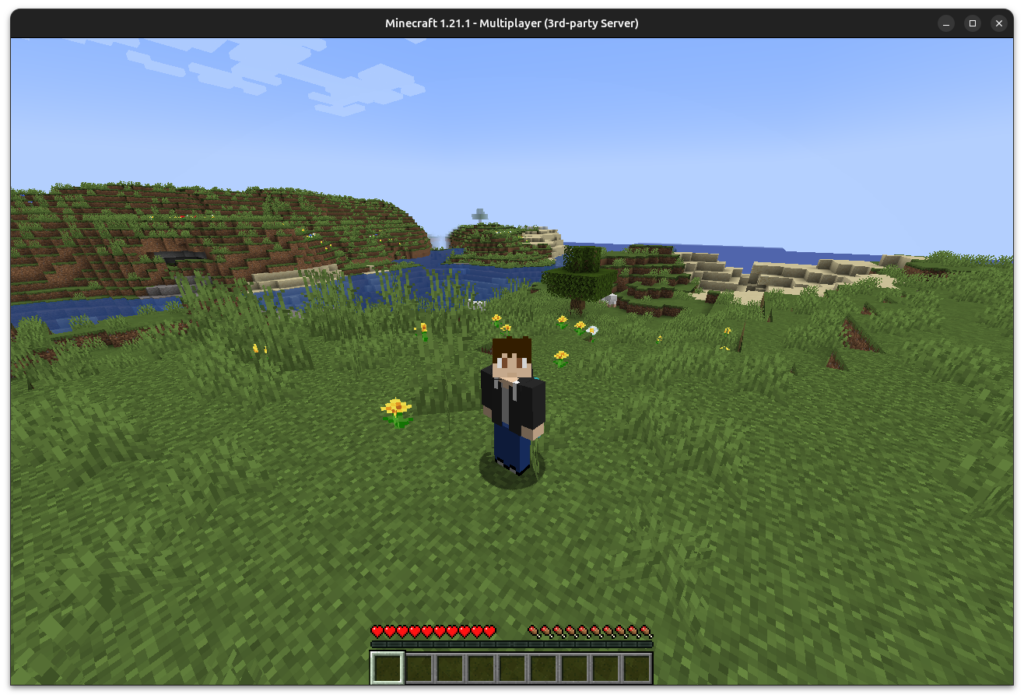
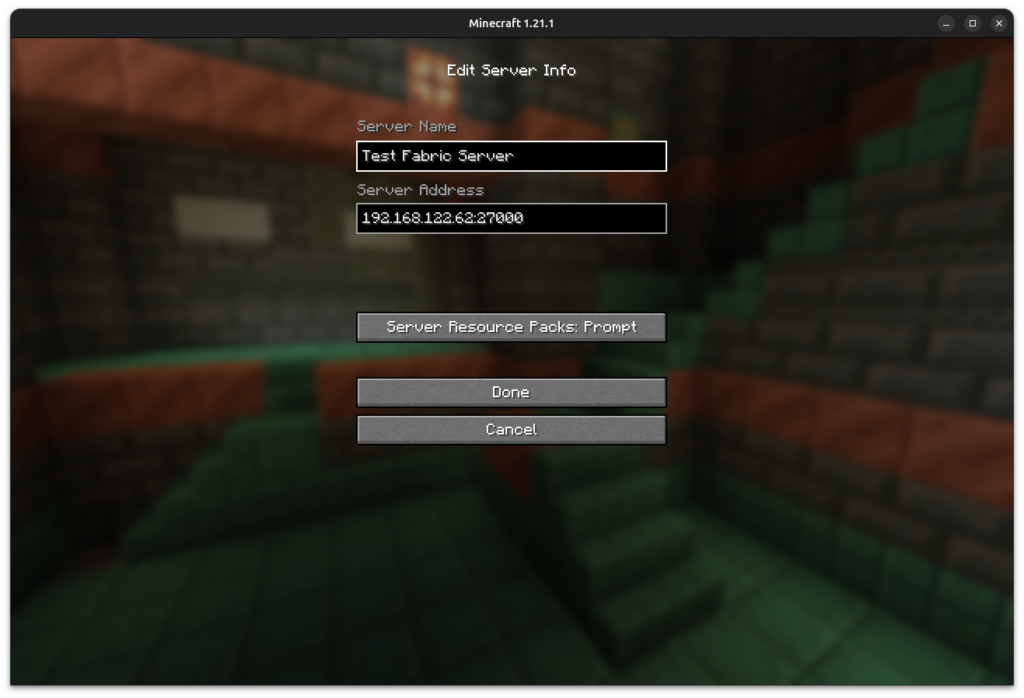
Now ingame, we add the server by typing it’s ip in the ‘Server Address’ and giving it a name that is meaningfull to you (ex: 1.21 Server with friends).
Click ‘Done’ after.
Note: you do not need to type the port if you server uses ‘25565’.
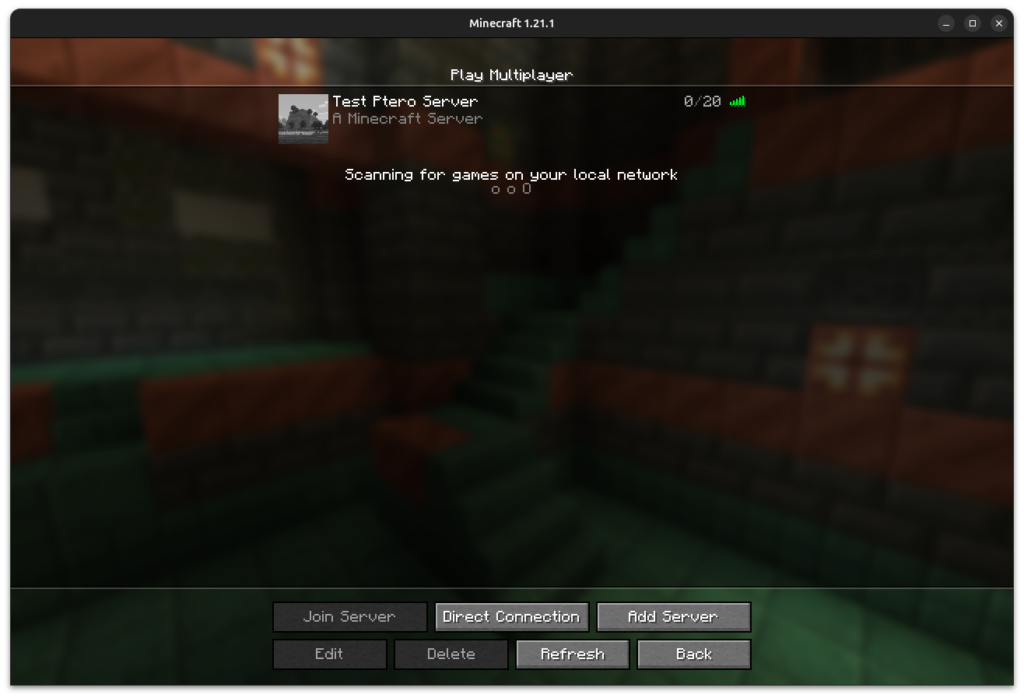
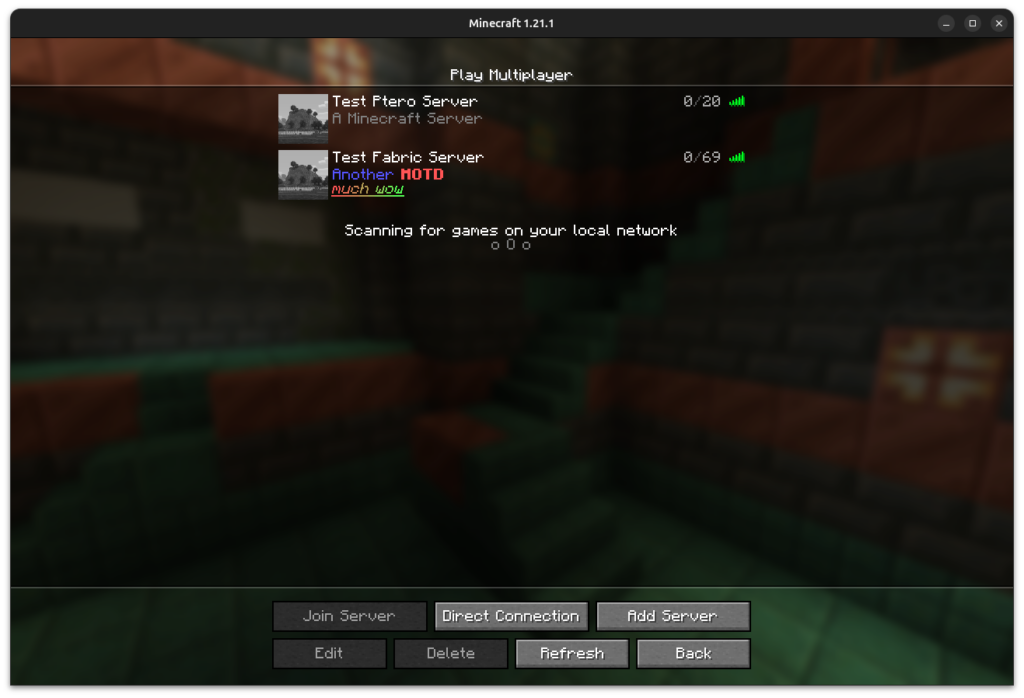
You should be able to see the server running now in the server list!
You can join it by double clicking or pressing it once and ‘Join Server’.
And that’s it! You have your first game server!
Now you can forward the server port and give your external IP to your friends and they can join you.
4 - Adding other Eggs (Games / Versions / Mod Loaders)
You can get more game eggs in this github repo and most steam games will be inside the steam_cmd folder. You can also host bots and other services. The default Minecraft eggs are also not the only ones available (for example, the fabric loader and bedrock edition are not available by default), you can get more Minecraft eggs inside the same repo.
As an example, i will add Fabric to the list of Minecraft eggs. You can download the egg json here.
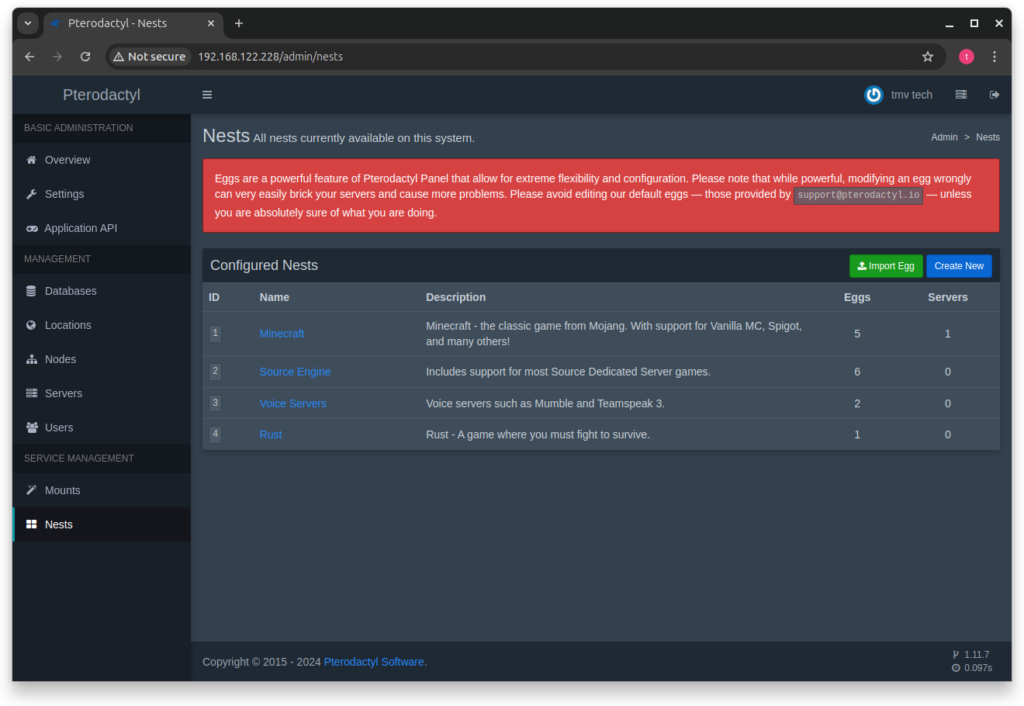
Start by going to the ‘Nests’ tab in your Admin panel.
In it, click the green ‘Import Egg’ button.
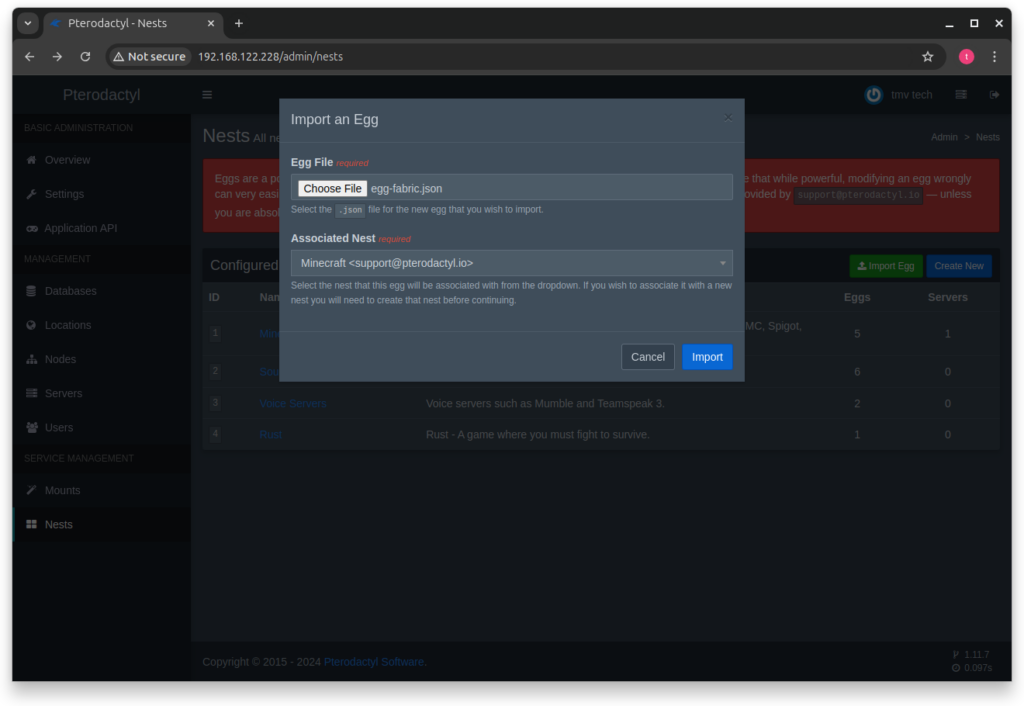
In this menu choose the json file you want to import, in this case ‘egg-fabric.json’.
For the ‘Associeted Nest’ I will choose ‘Minecraft’. If you are importing a steam game you can add them to the ‘Source Engine‘ nest or you could create a new one.
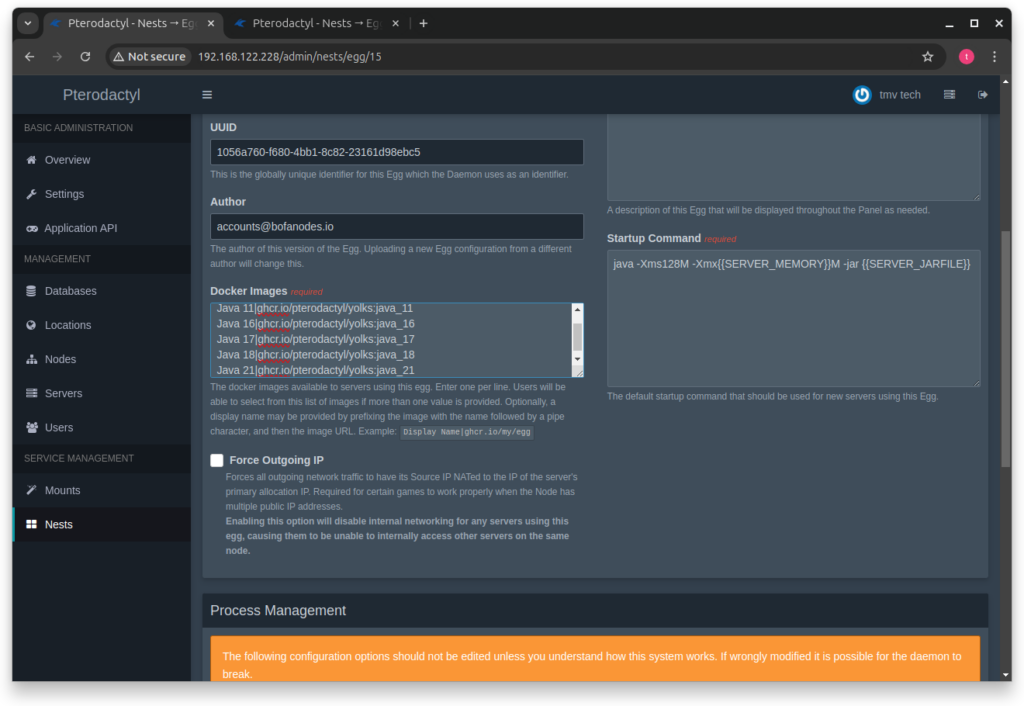
This egg has a problem though, as it does not give you the Java 21 version that is required to play the more recent versions of the game.
On ‘Docker Images’ add the following line:
Java 21|ghcr.io/pterodactyl/yolks:java_21
Now, when creating a new Server, you will see the imported egg in the ‘Nest Configuration’.
After selecting the ‘Fabric’ egg you will need to select the ‘Docker Image’, in my case i will use the one i just added (Java 21).
At the bottom of this page you will also see new variables in the ‘Service Variables’.
In them you can specify which versions you want to use for the loader and game.
After creating the server you can easely add mods by going to ‘Files’ -> ‘mods’ and uploading the ones you want to use.
To remove a file you can press the three dots and click ‘Delete’.
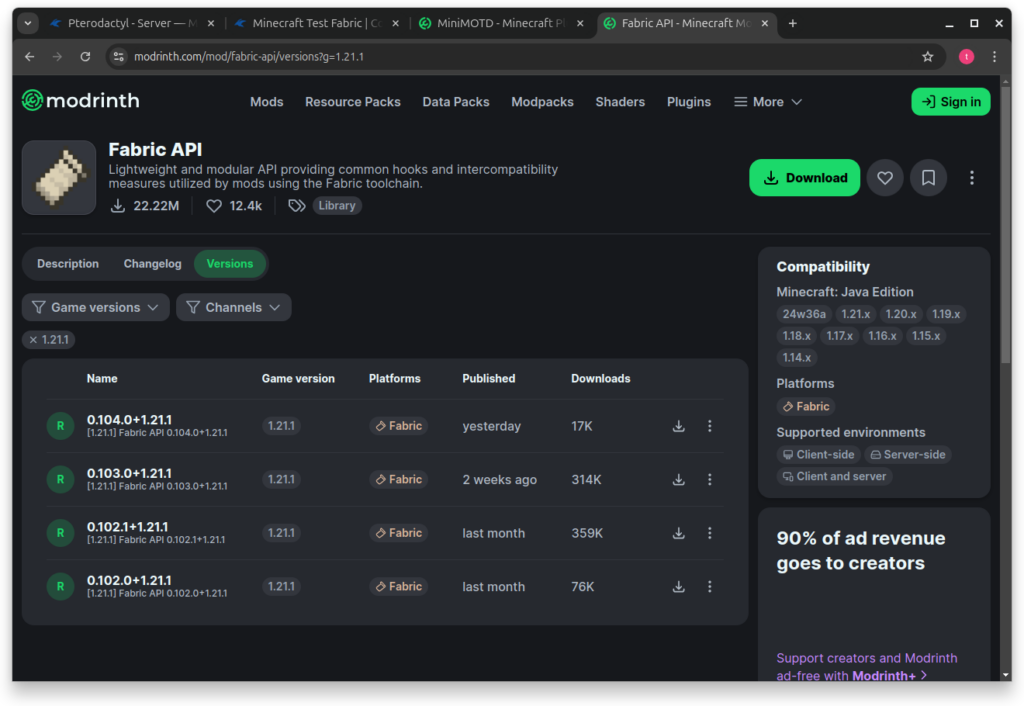
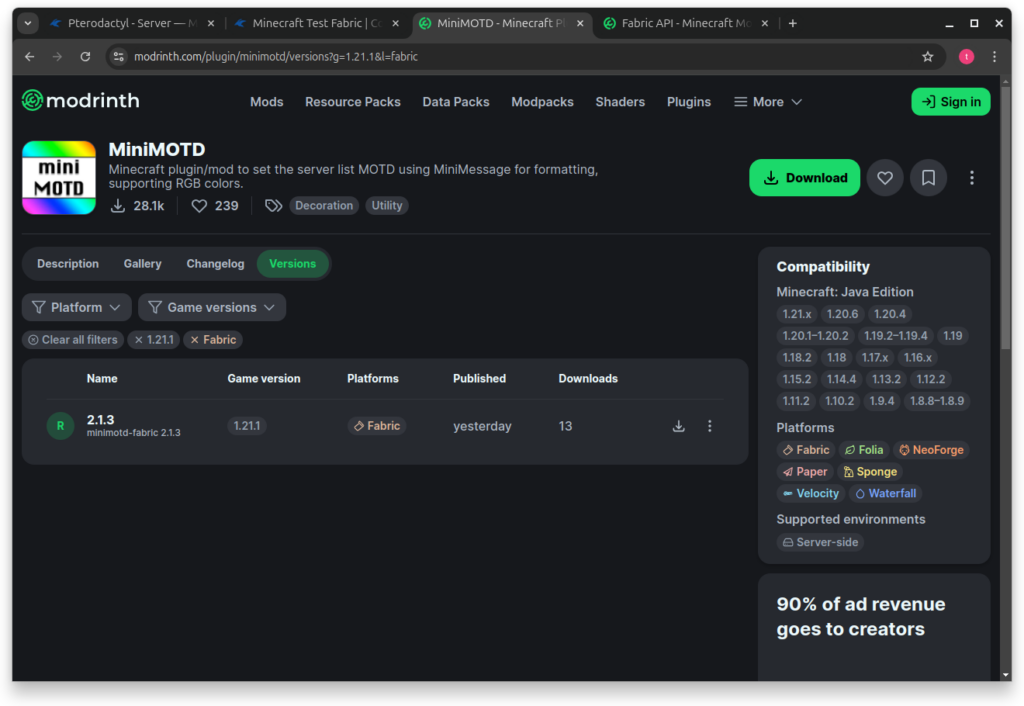
Here you can see the mods I added for testing (click the images to go to their page):
Needed to use Fabric.
Mod that lets you configure the message in the server list.
Inside the game you can add the new server specifying the IP and port.
Note: You can’t have two servers on the same port, so, for this one, i have to specify on which port the server is hosted at.
Click ‘Done’.
As you can see, both servers are online and the one we just created is using the mod we uploaded.
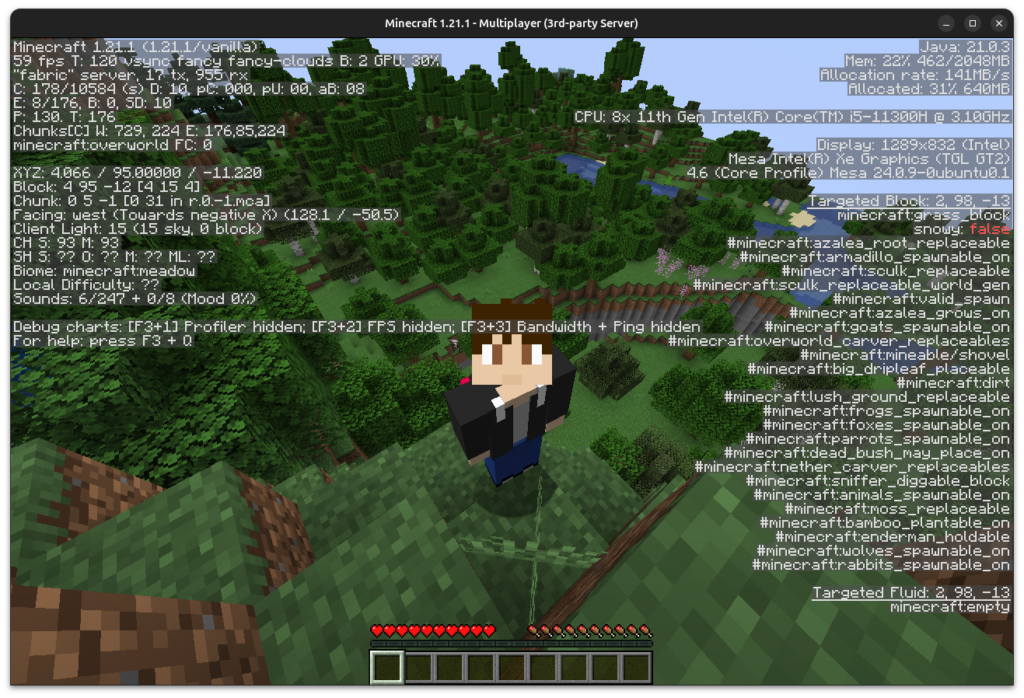
Let’s join it to see if it is really working.
If you look on the third line on the left you should see that, indeed, we are playing on a modded ‘Fabric’ server!
5 - Metrics Graph fix
If you used Ubuntu like I did you shouldn’t need to do this fix, but if the graphs in your servers tab do not work you might need to run this command to edit grub’s config: