
0 - Introduction
With the current state of the world of tech, AI is an enormous player in almost every company, or even, every person. If you don’t want to train your own AI and you also don’t want to give your data to other AI companies, then you can self-host your own.
In this article we will be using docker to host InvokeAI, and in it, we will be able to choose a variety of AI models to download and use.
1 - Installing
Setting up an InvokeAI container is pretty easy thanks to AI-Dock. You just need to have docker and git installed on your machine. If you don’t have git installed, you can easely install it by running this command:
sudo apt install gitNow you can create a folder for your docker containers, and in it, you will clone AI-Dock‘s git repository.
git clone https://github.com/ai-dock/invokeai.git invokeaiNow, inside the ‘invokeai’ folder, you need to create a file named ‘.env’ with the following contents, changing the comments to your desired values:
# portal
WEB_USER=username # change to your username
WEB_PASSWORD=password # change to a better password
DIRECT_ADDRESS=192.168.1.100 # change to your local ip
SERVICEPORTAL_PORT_HOST=1111 # only change if needed
SERVICEPORTAL_URL=https://192.168.1.100:1111 # change to match your DIRECT_ADDRESS and port
# invoke
INVOKEAI_PORT_HOST=9090 # only change if needed
INVOKEAI_METRICS_PORT=9091 # only change if needed
INVOKEAI_URL=http://192.168.1.100:9090 # change to match your DIRECT_ADDRESS and INVOKEAI_PORT_HOST

# FOR AMD only
#IMAGE_TAG=v2-rocm-5.7-runtime-22.04-v4.2.5
#IMAGE_BASE=ghcr.io/ai-dock/python:3.10-v2-rocm-5.7-runtime-22.04
If you have an AMD gpu you also need to open the ‘docker-compose.yml’ file and change the following lines:
# For NVIDIA
devices:
    - "/dev/dri:/dev/dri"
    # For AMD GPU
    #- "/dev/kfd:/dev/kfd"
# For AMD
devices:
#- "/dev/dri:/dev/dri"
# For AMD GPU
- "/dev/kfd:/dev/kfd"Some AMD users might be missing some drivers and kernel modules, you can install them with the following commands:
sudo apt update
sudo apt install "linux-headers-$(uname -r)" "linux-modules-extra-$(uname -r)"
sudo usermod -a -G render,video $LOGNAME # Add the current user to the render and video groups
# For ubuntu 22
#wget https://repo.radeon.com/amdgpu-install/6.2/ubuntu/jammy/amdgpu-install_6.2.60200-1_all.deb
# For ubuntu 24
wget https://repo.radeon.com/amdgpu-install/6.2/ubuntu/noble/amdgpu-install_6.2.60200-1_all.deb
sudo apt install ./amdgpu-install_6.2.60200-1_all.deb
sudo apt update
sudo apt install amdgpu-dkms rocm
# restart your machine after the installation
You can now, in the ‘invokeai’ folder, run docker compose, and the service will start:
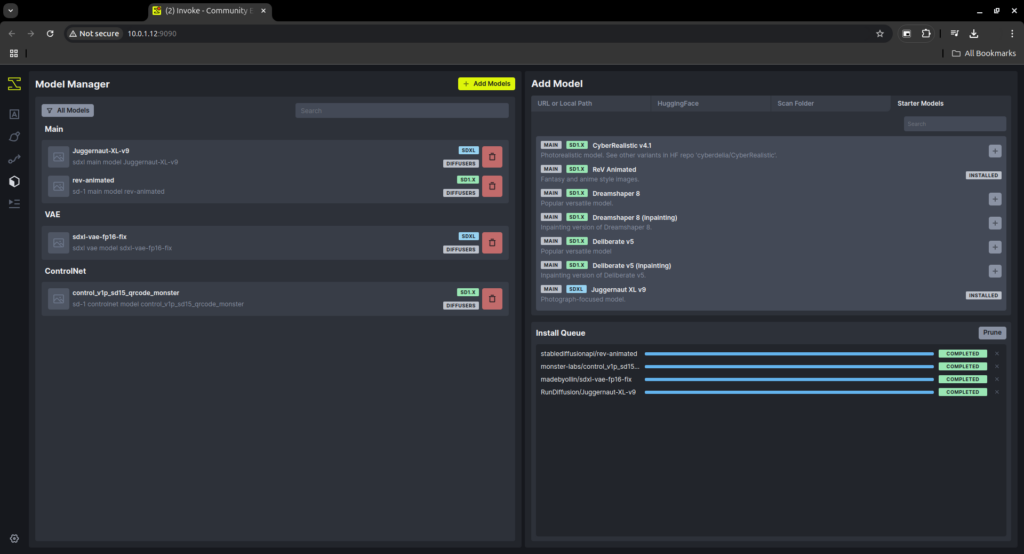
docker compose up -dAfter a couple of seconds, you can access your website using the ‘INVOKEAI_URL’ you set before, use HTTP for local networks. In it, we can go to models, on the left, and download some models. I tested the ‘Juggernaut-XL-v9’, ‘rev-animated’ and ‘control_v1p_sd15_qrcode_monster’. You can test other models to see which one is more appropriate to your use case.
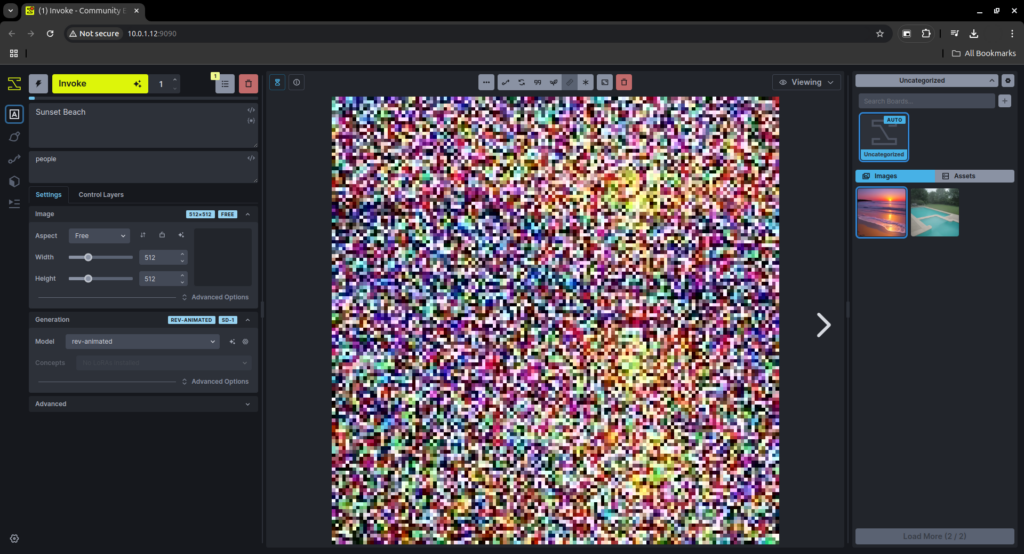
After choosing a model and, optionally, control nets, you can then go to the ‘Generation’ tab or the ‘Canvas’ tab:
- In ‘Canvas’ you will be given tools to edit images, or generate new part’s for one.
- In the ‘Generation’ tab you can either write a text prompt or give an initial image for the model to use.
After choosing a prompt or an image and the control layers, you can then press the yellow ‘Invoke’ button to start the generation.
Also, if you go to the following address, using your machine’s ip, you can access a portal that contains all services in the container:
http://yourip:1111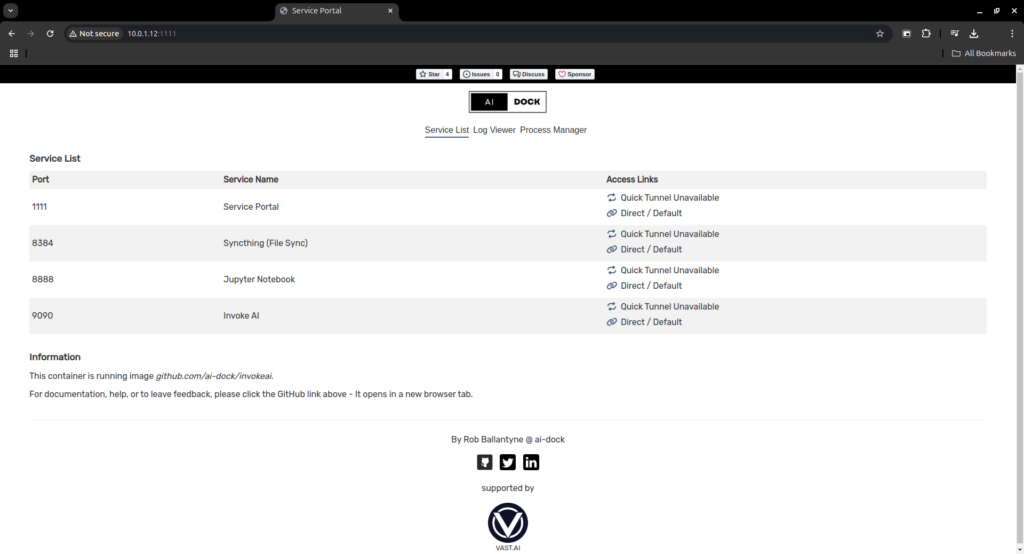
And that’s it, you now have everything ready to generate and edit images with the power of AI! Thanks for reading and stay tuned for more tech insights and tutorials. Until next time, keep exploring the world of tech!