
0 - Introduction
Training a tflite model in python is pretty easy, the problem is setting up your environment. ‘tflite-model-maker’ has very specific dependency versions that can be hard to figure out, and that’s why you are here. In this article we will setup the environment and train a simple model that detects pens. And I should also warn you that this article will be a little longer than usual.
As for the requirements, you need:
- Ubuntu 20.04 machine with a decent graphics card and atleast 16GBs of ram, or a VM, but if you can’t use a gpu in a vm you will notice an increase in training time to more than double, or even triple with larger datasets sometimes.
- A Webcam (like this one)
- And Time…
1 - Setup Trainer Machine
Let’s start with the harder part, setting up your machine for training. I really recommend you use a VM with a GPU or a separate pc that you don’t care too much about, as there will be a lot of older libraries and drivers installed, so I will assume you are running a fresh install of Ubuntu 20.04.
Start by updating, and if prompted do NOT update to Ubuntu 22, the CUDA drivers NEED Ubuntu 20.04!!!:
sudo apt update
sudo apt upgrade
If you have installed any Nvidia driver, it has to be removed. You can do that with this script:
#!/bin/bash
# nano remove-nvcuda.sh
sudo apt-get purge nvidia* -y
sudo apt remove nvidia-* -y
sudo rm /etc/apt/sources.list.d/cuda*
sudo apt-get autoremove -y && sudo apt-get autoclean -y
sudo rm -rf /usr/local/cuda*
After updating, and if needed, removing drivers, we will then install the NVIDIA drivers, in our case, it will be version 535. Why version 535? Because that is the version that gave us the best results (no crashes).
sudo apt install nvidia-driver-535Attention: You need to reboot your pc after installing your drivers and before proceeding!
We will now setup a folder with all install scripts to setup our environment, the names of the files are important if you plan to just copy and paste the scripts:
- yourfolder:
    - scripts:
        - setup-cuda.sh
        - setup-python.sh
        - setup-tflite.sh
    - main.py
    - run.sh
    - setup.sh
You can change ‘yourfolder’ for anything else, but ‘scripts’ should remain with the same name.
mkdir yourfolder
mkdir yourfolder/scriptsAttention: These scripts are not to be pasted in the terminal! You need to create files with the given names and paste the script in there.
We will start with the smaller and easier script, ‘setup-tflite.sh’, in this script we will delete any old environments in this folder, create a new one and install the needed packages in it using pip:
#!/bin/bash
# nano scripts/setup-tflite.sh
# Remove the current virtual environment
rm -rf venv

# Create a new virtual environment
python3.9 -m venv venv

# Activate the new virtual environment
source venv/bin/activate

# Update pip
pip install --upgrade pip
# Install the required packages
pip install "numpy==1.23.4"
pip install "tensorflow-datasets==4.9.1"
pip install "pycocotools"
pip install "tensorflow-addons==0.16.1"
pip install "tensorflow==2.8.0"
pip install "tflite-model-maker==0.4.3"
Now we will make the script that downloads, compiles and installs python 3.9. This script is also pretty easy to understand but it is a little longer due to the dependencies:
#!/bin/bash
# nano scripts/setup-python.sh
# install dependencies
sudo apt update
sudo apt upgrade -y
sudo apt install build-essential -y # make and gcc
sudo apt install libssl-dev -y
sudo apt install zlib1g-dev -y
sudo apt install libbz2-dev -y
sudo apt install libreadline-dev -y
sudo apt install libsqlite3-dev -y
sudo apt install wget -y
sudo apt install curl -y
sudo apt install llvm -y
sudo apt install libncurses5-dev -y
sudo apt install ibncursesw5-dev -y
sudo apt install xz-utils -y
sudo apt install tk-dev -y
sudo apt install liblzma-dev -y
sudo apt install tk-dev -y

# remove old folder if it exists
sudo chmod -R 777 source-3.9
rm -r source-3.9
# make new folder and move into there
mkdir source-3.9
cd source-3.9

# download and extract python source
wget https://www.python.org/ftp/python/3.9.0/Python-3.9.0.tar.xz
tar -xf Python-3.9.0.tar.xz # decompress
mv ./Python-3.9.0/* ./ # move files to source folder
rm -r ./Python-3.9.0 # delete extract folder
rm -r Python-3.9.0.tar.xz # delete compressed file

# configure (config given by google on the tf docs)
sudo ./configure --enable-optimizations --with-lto --with-computed-gotos --with-system-ffi
sudo make # compile
sudo make altinstall # install

# delete folder
cd .. # move out of source folder
sudo chmod -R 777 source-3.9 # remove restrictions
sudo rm -r source-3.9 # delete it
As for cuda it is, in my opinion, the harder script to understand, but a good chunk of it is copied directly from nvidia’s website.
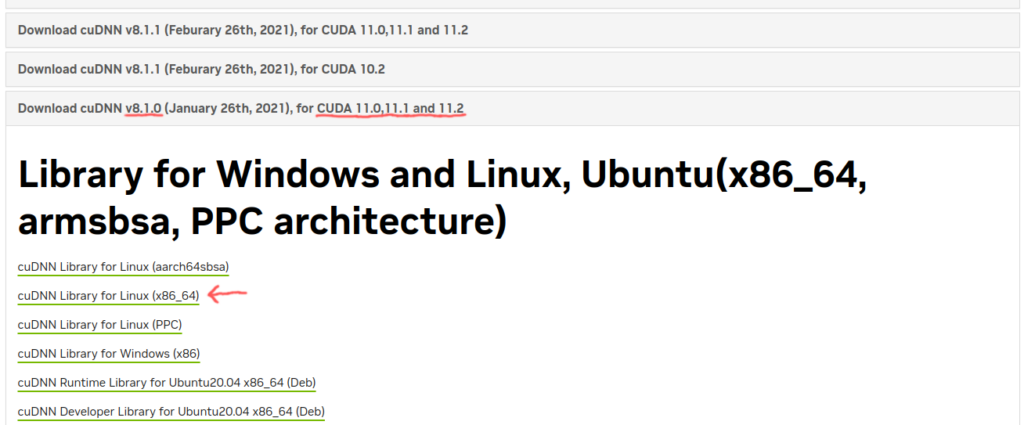
You will have to go to Nvidia’s cudnn archive and download version 8.1.0 for cuda 11.0, 11.1 and 11.2. Be advised that you will have to create or login with an nvidia developer account. After that, place the downloaded file in the ‘root’ of your project, with ‘main.py’ and ‘run.sh’. After installing everything you can delete it.
#!/bin/bash
# nano scripts/setup-cuda.sh
# to verify that your gpu can use cuda
lspci | grep -i nvidia

# delete old temp folder if it exists
sudo chmod -R 777 cuda
rm -r cuda
# create temp folder
mkdir cuda
cd cuda

# CUDA
wget https://developer.download.nvidia.com/compute/cuda/repos/wsl-ubuntu/x86_64/cuda-keyring_1.0-1_all.deb
sudo dpkg -i cuda-keyring_1.0-1_all.deb
sudo apt-get update
sudo apt-get install cuda-11.2 -y

# cudnn
cp ../cudnn-11.2-linux-x64-v8.1.0.77.tgz ./
tar -zvxf cudnn-11.2-linux-x64-v8.1.0.77.tgz
sudo cp -P cuda/include/cudnn.h /usr/local/cuda/include
sudo cp -P cuda/lib64/libcudnn* /usr/local/cuda/lib64/
sudo chmod a+r /usr/local/cuda/include/cudnn.h

# remove folder
cd ..
sudo chmod -R 777 ./cuda
sudo rm -r cuda

#checks
echo
echo 'Running checks...'
nvidia-smi  #check cuda
nvcc -V  #check cudnn

echo
echo 'Add this to ~/.bashrc'
echo 'export PATH=/usr/local/cuda/bin:$PATH'
echo 'export LD_LIBRARY_PATH=/usr/local/cuda/lib64:$LD_LIBRARY_PATH'
And with all our scripts ready, we can now make the ‘setup.sh’ script that will install everything. Remember that ‘setup.sh’ is not in the ‘scripts’ folder, but in the ‘root’ folder of the project:
#!/bin/bash
# nano setup.sh
echo '💾═════════════════╗'
echo '║ TfLite Env Setup ║'
echo '╚══════════════════╝'
read -p "Press Y for full setup, any other for venv only: " -n 1 -r
if [[ $REPLY =~ ^[Yy]$ ]]
then
    echo
    echo
	echo 'This script will install cuda, python 3.9 and setup a virtual environment with tflite-model-maker ready to use.'
	echo
	echo '⚠️═════════════════════════════════╗'
	echo '║ Before running this script run  ║'
	echo '║ scripts/setup-nvidia-drivers.sh ║'
	echo '║ and reboot your machine!!       ║'
	echo '╚═════════════════════════════════╝'
	read -p "Are nvidia drivers installed? [Y/N] " -n 1 -r
	if [[ $REPLY =~ ^[Yy]$ ]]
	then
	    echo
	    echo
	    echo 'Installing cuda drivers...'
	    ./scripts/setup-cuda.sh
	    echo 'Installing python3.9...'
	    ./scripts/setup-python.sh
	    echo 'Setting up environment...'
	    ./scripts/setup-tflite.sh
	    echo
	    echo '⚠️════════════════════════════════════════════════════════════════╗'
	    echo '║ For cuda, Add this to ~/.bashrc                                ║'
	    echo '║  export PATH=/usr/local/cuda/bin:$PATH                         ║'
	    echo '║  export LD_LIBRARY_PATH=/usr/local/cuda/lib64:$LD_LIBRARY_PATH ║'
	    echo '╚════════════════════════════════════════════════════════════════╝'
	    echo 'End of script.'
	    exit 0
	fi
	echo
	echo 'Setup aborted!'
	exit 0
fi
echo
echo
echo '⚠️════════════════════════════════╗'
echo '║ This script will delete any    ║'
echo '║ libraries in this environment! ║'
echo '╚════════════════════════════════╝'
read -p "Are you sure? [Y/N] " -n 1 -r
if [[ $REPLY =~ ^[Yy]$ ]]
then
    echo
    echo
    echo 'Setting up environment...'
    ./scripts/setup-tflite.sh
    echo 'End of script.'
    exit 0
fi
echo
echo
echo 'Setup aborted!'
exit 0
This script sould be fairly easy to understand as it only asks you a couple of questions and runs every script, only the tflite setup or none, depending on your answers.
You will then have to give permission to execute the scripts, you can do that with these commands:
chmod +x setup.sh
chmod +x scripts/setup-cuda.sh
chmod +x scripts/setup-python.sh
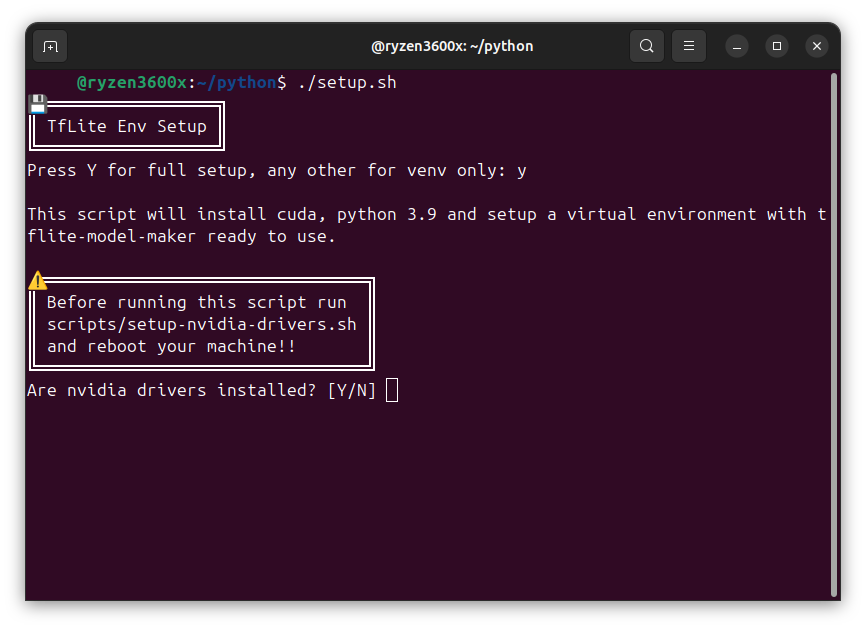
chmod +x scripts/setup-tflite.shAfter having everything ready, it is now time to run the ‘setup.sh’, in the following screenshots you can see how the script looks when ran in the terminal:
Be advidsed that this process will take quite a while to complete, and depending on your machine, it can take between 15 minutes and almost two hours.
In my experience, it took 15 minutes on a machine with an amd ryzen3600x, a little over half an hour on my laptop with a i5-11300, and almost 2 hours on the raspberry pi 5 (without the cuda part).
And finally, like the script says, you will have to edit your ‘.bashrc’ file to add the path to cuda:
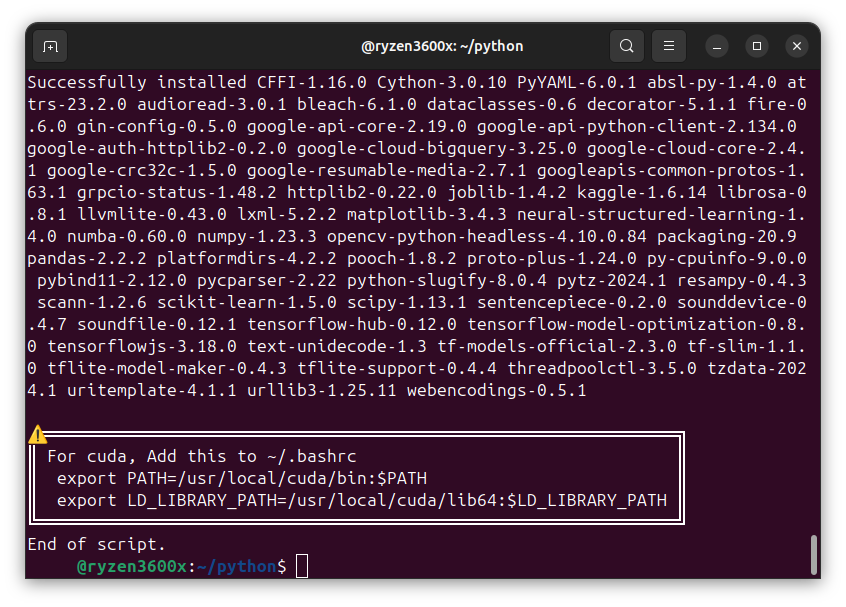
nano ~/.bashrcexport PATH=/usr/local/cuda/bin:$PATH
export LD_LIBRARY_PATH=/usr/local/cuda/lib64:$LD_LIBRARY_PATH2 - Write python model maker
Now with an environment ready, we can create our ‘main.py’ file and write the program that will train our model, starting with the imports:
import os
import numpy as np
import tensorflow as tf

from absl import logging
from tflite_model_maker import model_spec
from tflite_model_maker import object_detector
from tflite_model_maker.object_detector import DataLoader
from tflite_model_maker.config import QuantizationConfig
from tflite_model_maker.config import ExportFormat
After the imports we set our log level, and load our data:
# you can notice that we start with id 1
# that is because the id 0 is for the background
label_map = {1:'Pen'}

# load data
train_data = DataLoader.from_pascal_voc(
    'data/train/images',
    'data/train/Annotations',
    label_map
)
valid_data = DataLoader.from_pascal_voc(
    'data/valid/images',
    'data/valid/Annotations',
    label_map
)
You can then configure and train your model with the data loaded:
# customize and train tf model
spec = model_spec.get('efficientdet_lite0') # 0 to 4
model = object_detector.create(
    train_data, # should be 90% of all data
    model_spec = spec,
    batch_size = 8,
    epochs = 30,
    validation_data = valid_data, # should be 5 to 10%
    train_whole_model = False, # set to true for accuracy
)
And finally, with our model trained, we can export it:
# export
model.export(export_dir='./out/')
3 - Get your data
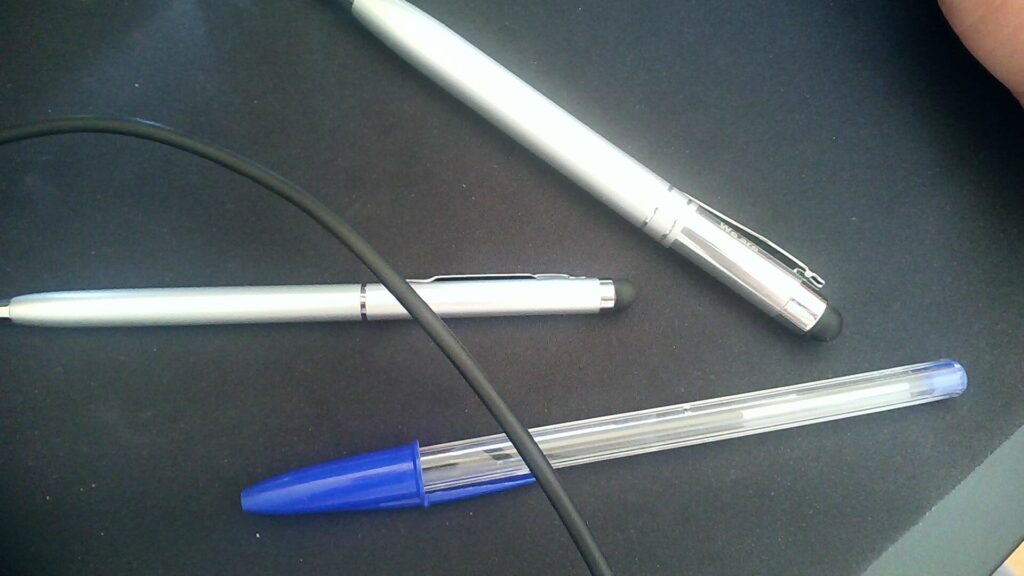
As for getting your data i really recommend you use the same camera you will use to run the model, as that will make it more accurate, please do not take your photos with an Iphone 16 Pro Max and then run your model in a 240p camera you found in the dump, it will not work. If possible, use the same camera for training and running, which should be at least 720p or 1080p (HD or Full HD), if not possible, use a similar camera.
As for the ammount of data needed, everybody has their opinion, but in general, for a test model, most people suggest a minimum of 200 photos in various angles, light settings and focus (for example, photos taken with the camera static and with the camera moving).
In my case, i will be using a Logitech C920e to take the photos and run the model.
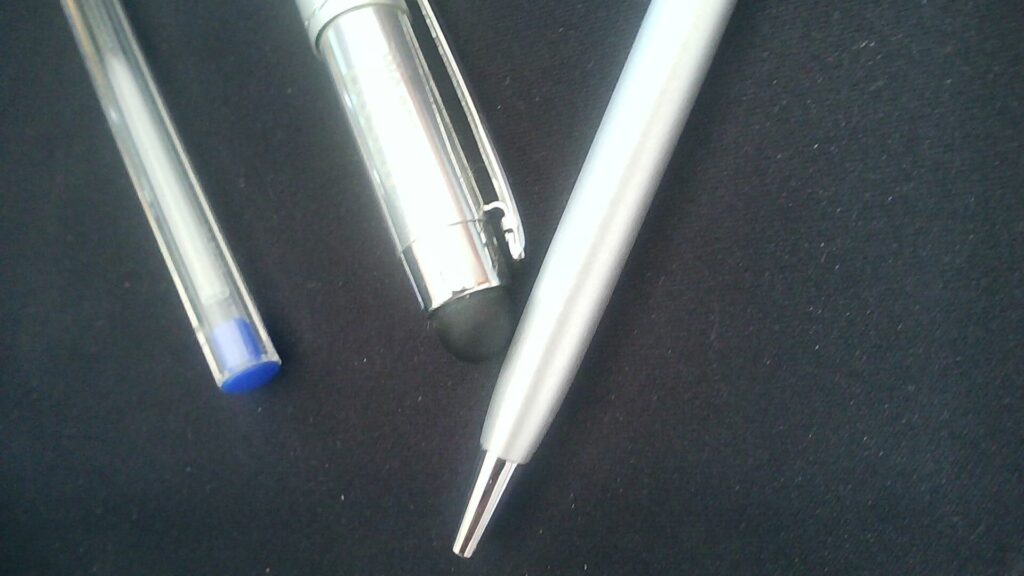
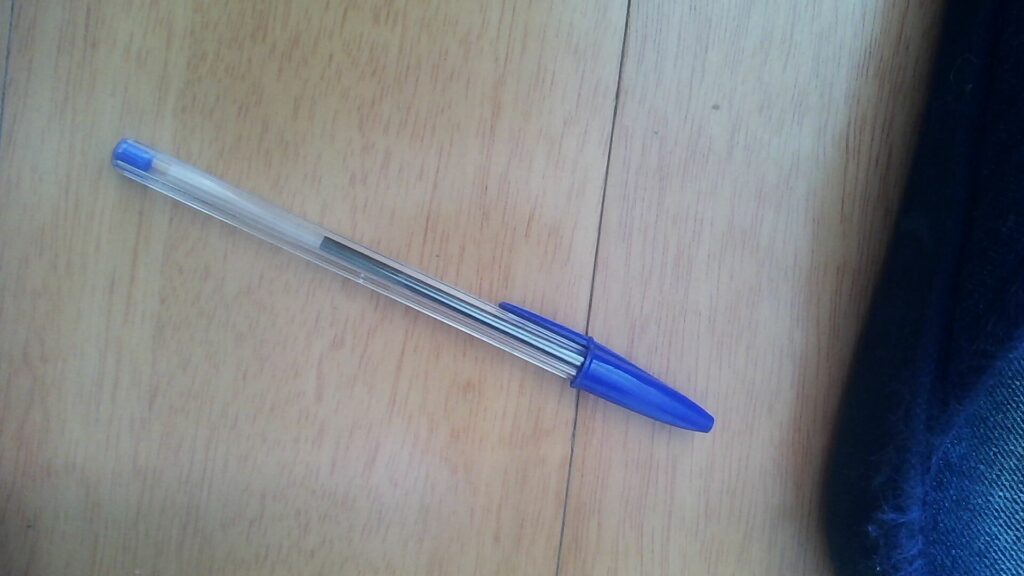
Here you have an example of how varied the photos should be: sharp and unfocused, black background and other colors, fully in frame and only part of the object visible, one object and many objects… The more varied your dataset, the better your results will be.

After having all your data we need to annotate it, and we can do that with label studio. I will be using docker to host a container with labelstudio, you can check how to setup docker in this article.
Create a folder for your container and inside create a ‘docker-compose.yml’ file:
services:
    lblstudio:
        image: heartexlabs/label-studio:latest
        container_name: lblstudio
        restart: unless-stopped
        environment:
            - LABEL_STUDIO_DISABLE_SIGNUP_WITHOUT_LINK=false
        volumes:
            - ./data:/label-studio/data
        ports:
            - "8080:8080"
You should run your container once, create your account, shut it down and set ‘LABEL_STUDIO_DISABLE_SIGNUP_WITHOUT_LINK=true’ for security reasons. To start the container run the following command, and to stop it switch ‘up’ with ‘down’, you can also add ‘-d’ at the end to make it run ‘detatched’ (you can close the terminal without the container stopping).
docker compose upNow before you start uploading all your photos to Label Studio, separate 10% of your photos and store them for later (ex: 200 * 0.1 = 20 photos) as those will become your validation data.
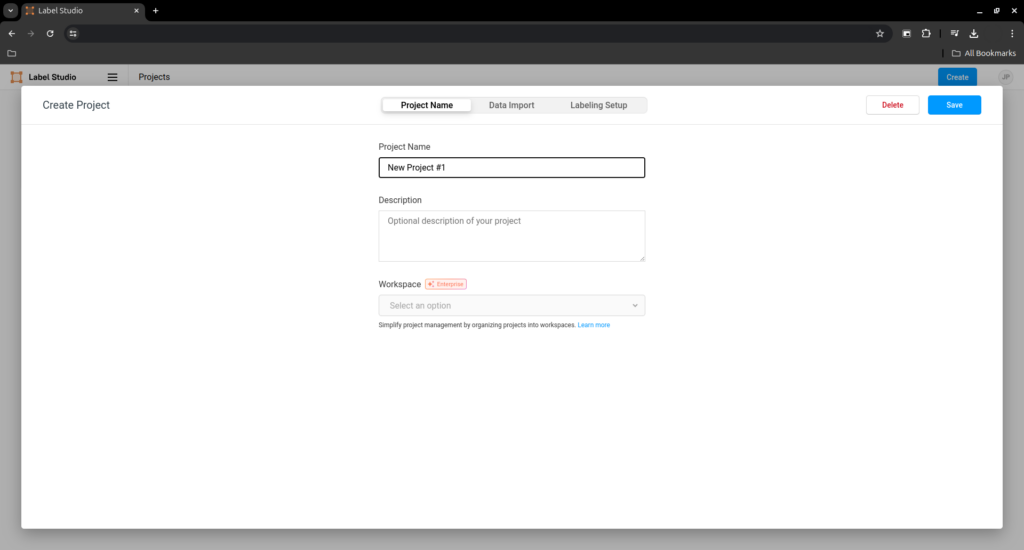
After logging in to Label Studio you should be able to see a ‘Create’ button at the top right, press it to create a new project.
Give it a name and press ‘Save’.
Once inside your project press ‘Settings’ on the top right and go to ‘Labeling interface’. In there you can press ‘Code’ and paste the xml bellow.
After you pasted the xml, you can then go to ‘Visual’ to add new layers, or remove them.
Just remember that ‘background’ has to always be present.
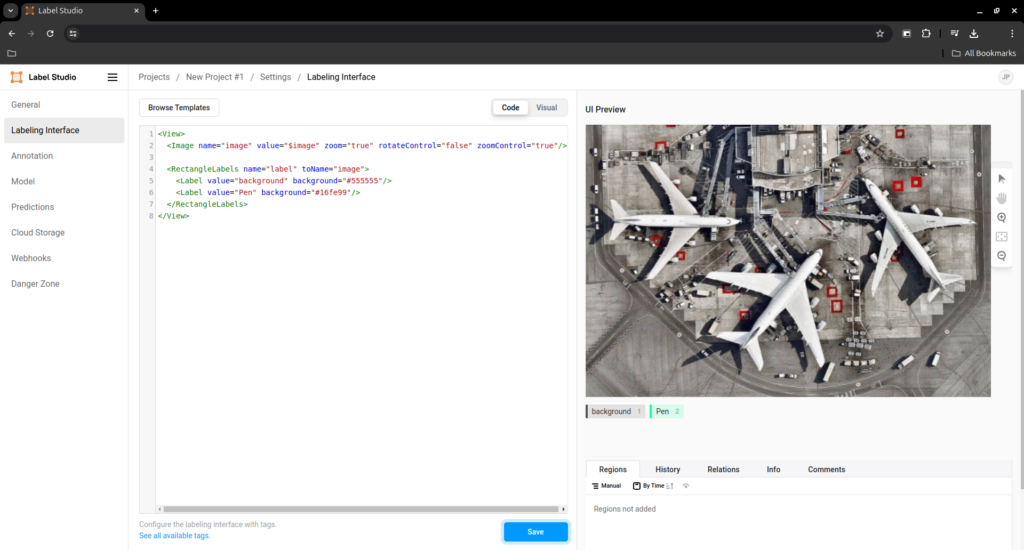
<View>
  <Image name="image" value="$image" zoom="true" rotateControl="false" zoomControl="true"/>

  <RectangleLabels name="label" toName="image">
    <Label value="background" background="#555555"/>
    <Label value="Pen" background="#16fe99"/>
  </RectangleLabels>
</View>
You can now return to your project’s dashboard and press the white ‘Import’ button and start importing images.
After you are done, you should see all the images in a list, press the blue ‘Label All Tasks’ button and start annotating every image.
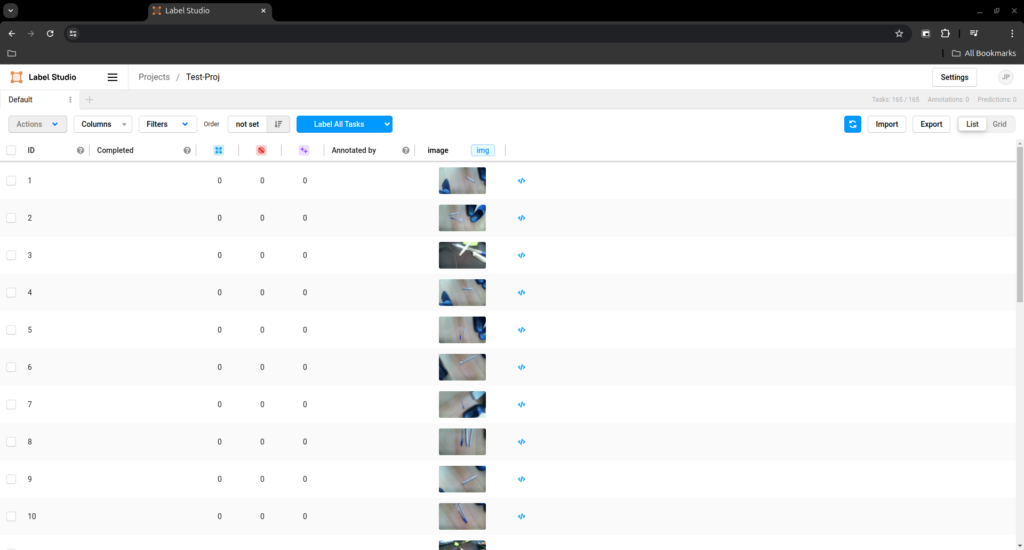
Attention: Label studio as an import limit of 100 photos at a time, so I found this script to split the files into folders of 100 photos each:
#!/bin/bash
dir_size=100
dir_name="data"
n=$((`find *.jpg -maxdepth 1 -type f | wc -l`/$dir_size+1))
for i in `seq 1 $n`;
do
mkdir -p "$dir_name$i";
find *.jpg -maxdepth 1 -type f | head -n $dir_size | xargs -i mv "{}" "$dir_name$i"
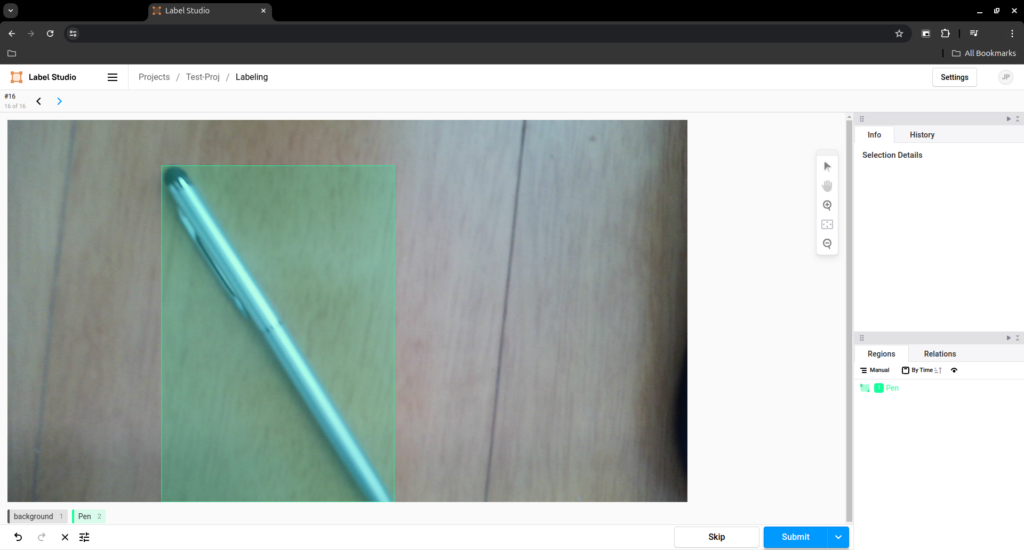
doneTo annotate an image press a number button to select the layer, in my case 2 for pen, and then drag select the pen on the image.
Be strict to try to get the square as accurate as possible.
Do not annotate anything with the background layer.
After you are done, press the blue ‘Submit’ button.
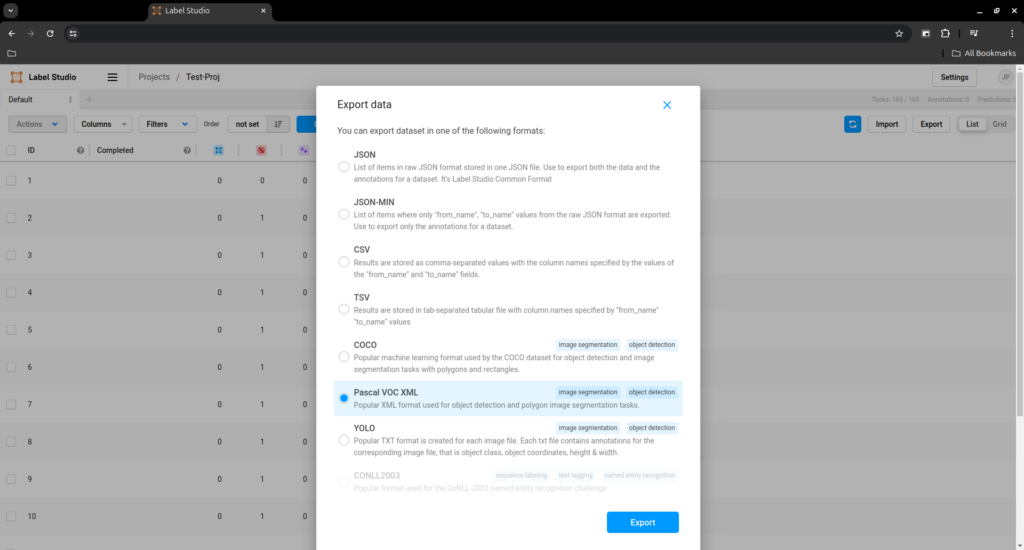
After you are done annotating every image in your data set press export and select ‘Pascal VOC xml’, save the downlaoded zip and extract it.
But the data is still not ready to be used, you have to remove the first line of every file in ‘data/Annotations/*.xml’.
For that reason I made this python script, you just run it with a path (example: ‘./fix.py data’) and the files are fixed:
#!/usr/bin/python3
import os
import sys

# check argv size
argc = len(sys.argv)
if argc < 2:
    print("No path given.\nFormat: " + sys.argv[0] + " [path]")
    exit(1)
elif argc > 2:
    print("Too many arguments.\nFormat: " + sys.argv[0] + " [path]")
    exit(1)
# chech path to 'Annotations' exists
givenpath = sys.argv[1]
annotpath = givenpath + "/Annotations"
if not os.path.exists(annotpath):
    print("Path is not PascalVoc export.\nFormat: " + sys.argv[0] + " [path]")
    exit(1)
# get file paths
files = [f for f in os.listdir(annotpath) if os.path.isfile(os.path.join(annotpath, f))]
for file in files:
    file = annotpath + "/" + file
    with open(file, 'r+') as fp:
        lines = fp.readlines()
        if len(lines) < 1:
            continue
        firstline = lines[0]
        if firstline.startswith('<?'):
            fp.seek(0)
            fp.truncate()
            for n in range(1, len(lines)):
                fp.write(lines[n])
print("Files fixed")
After fixing your files, you now need to repeat this whole process on the 10% of photos you left on the side to generate our validation data.
After you are done, store you training data in ‘project/data/train’ and your validation data in ‘project/data/valid’:
- yourfolder:
    - scripts:
        - setup-cuda.sh
        - setup-python.sh
        - setup-tflite.sh
    - data:
        - train:
            - images
            - Annotations
        - valid:
            - images
            - Annotations
    - main.py
    - run.sh
    - setup.sh
4 - Train your model
We are now ready to train our model! Activate the virtual environment in the project folder and run the main script:
source ./venv/bin/activate
python3.9 main.py
You should now see the training starting and you can see the progress as ‘Epoch 1/30’.
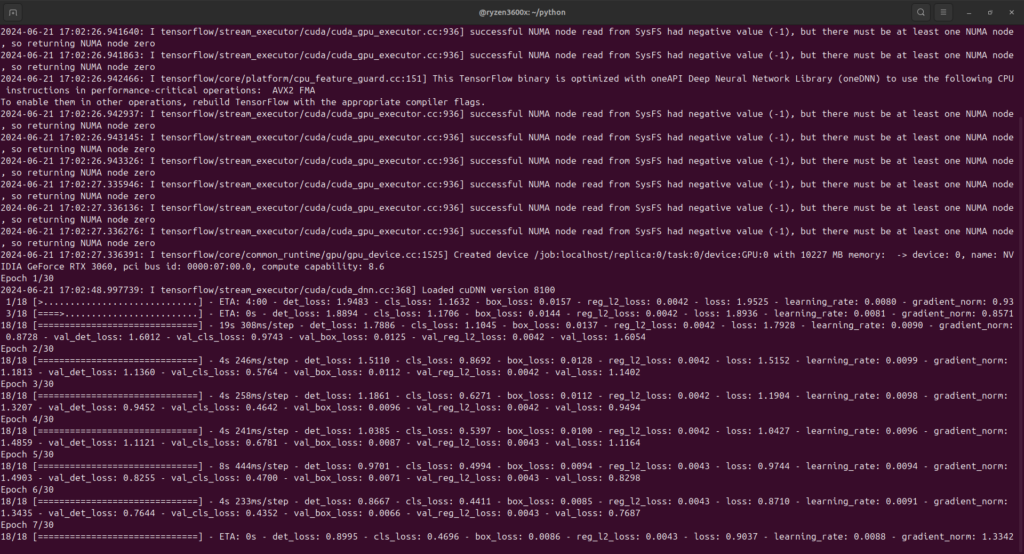
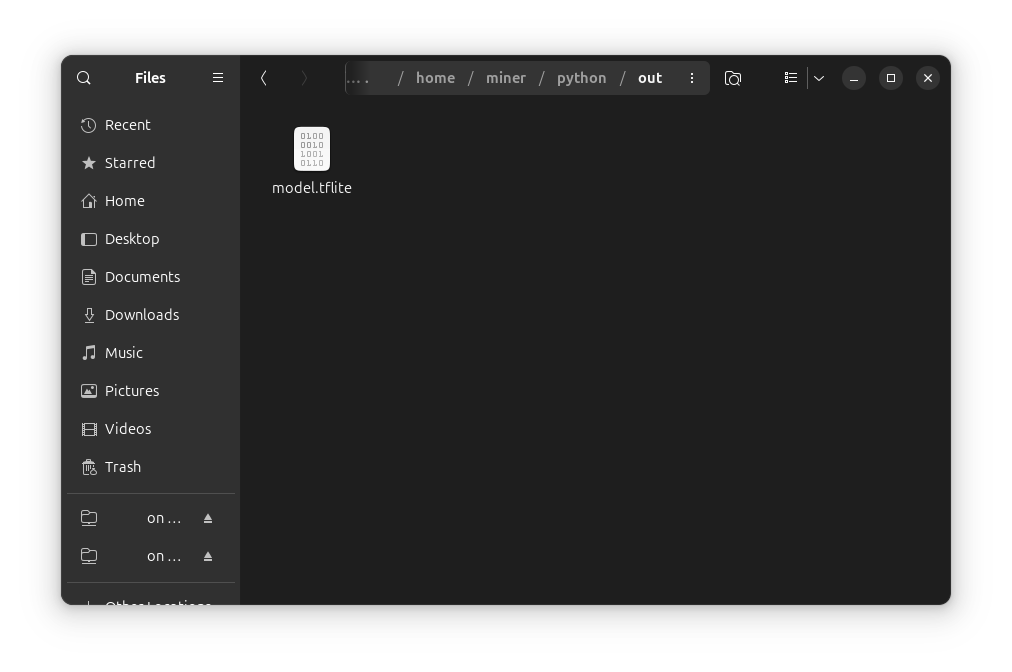
When the training ends you will see the model in the ‘out’ folder, you can now take it and use it in the raspberry pi, a mobile app on Android or IOS or even on a web browser app.
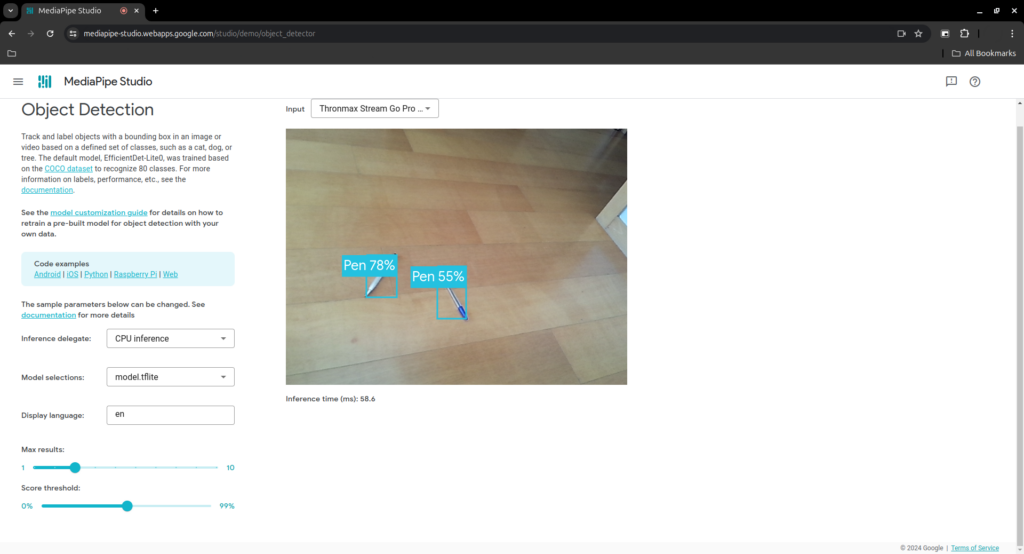
You can also test your model with MediaPipe Studio.
In here change ‘Inference delegate’ to CPU and up the ‘Score Threshold’ to about 50%, then go to ‘Model selections’ scroll down and ‘Choose a model file’.
And that’s it, you should now be able to train your own model with tflite-model-maker.
To learn how to run it on the raspberry pi check this article and, if you want to buy one, you can do it here.
As always thanks for reading and stay tuned for more tech insights and tutorials. Until next time, keep exploring the world of tech!