
0 - Introduction
In this article we will be using the Esp32 board we reviewed to make the onboard LED blink and also to send a ‘Hello World’ message via Serial. All that using VsCode and PlatformIO.
Hardware needed:
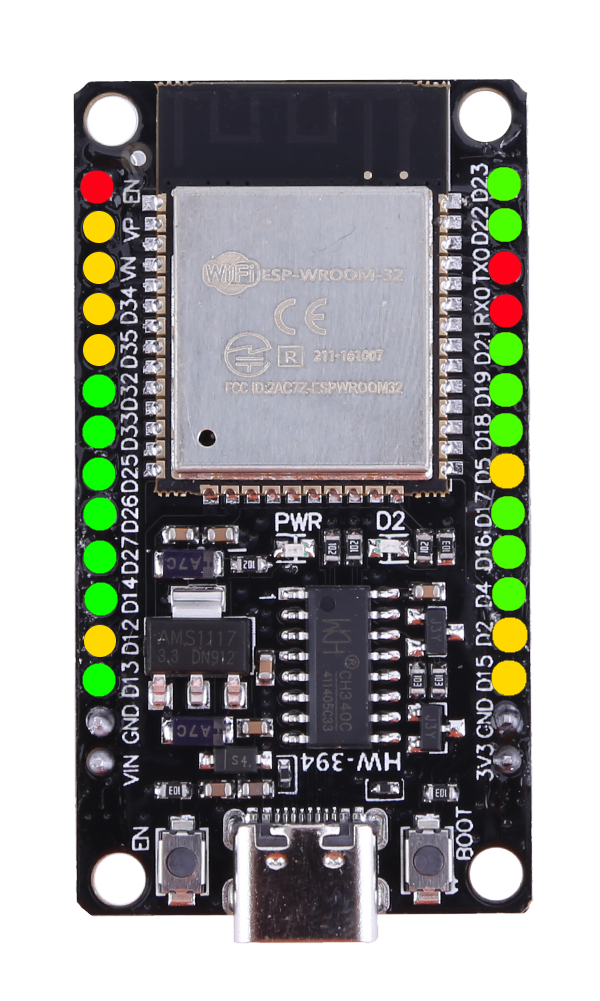
- 1x Esp32 (like this one)
- 1x Usb Cable (type a to type c in our case)
- Any computer with a USB port
1 - Install PlatformIO
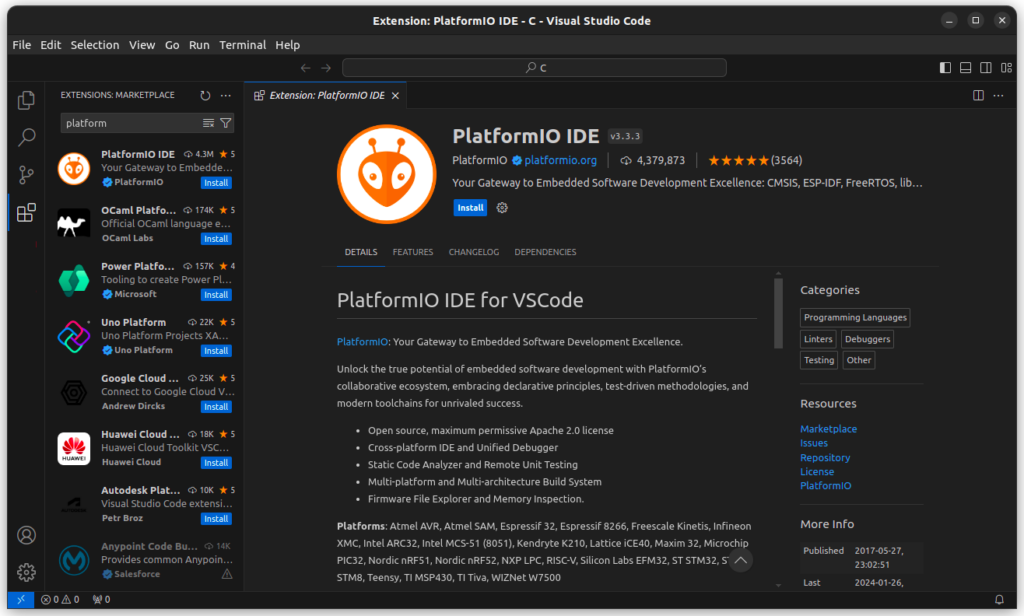
Let’s start by opening VsCode and going to extensions. In there search ‘PlatformIO IDE’ and download it.
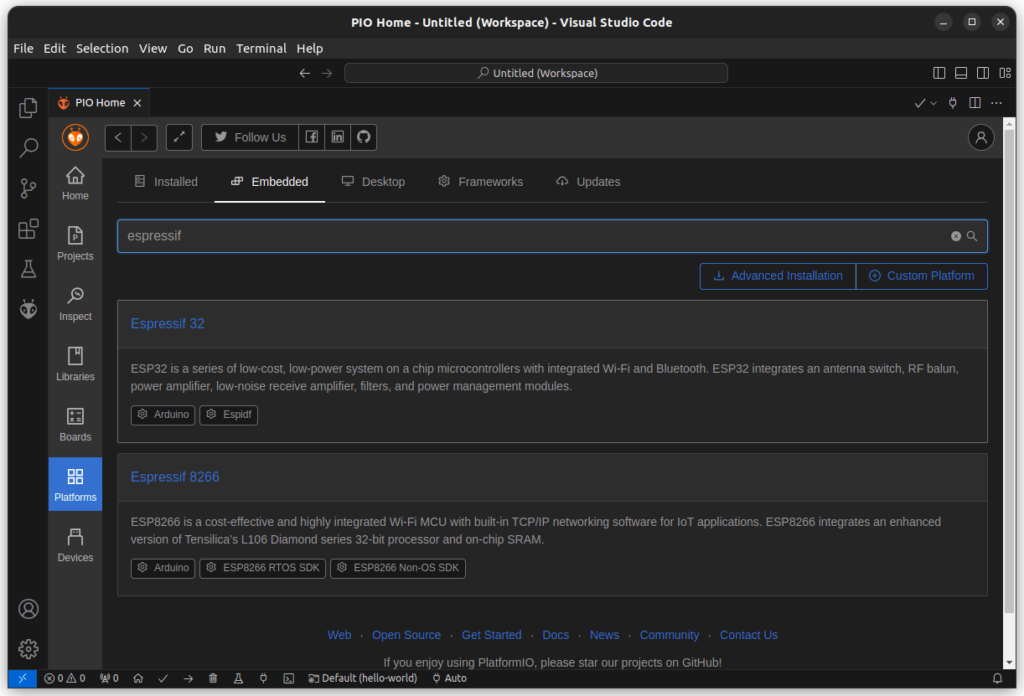
After it installs you will be prompted to reload the window, do it. You can then open the PlatformIO tab on the left and then ‘PIO Home – Open’ or, in the bottom, the house icon. It’s in here that we will have to go to platforms, press ‘Install Embedded Platform’, search for ‘Espressif 32’ and install it.
2 - Create Project
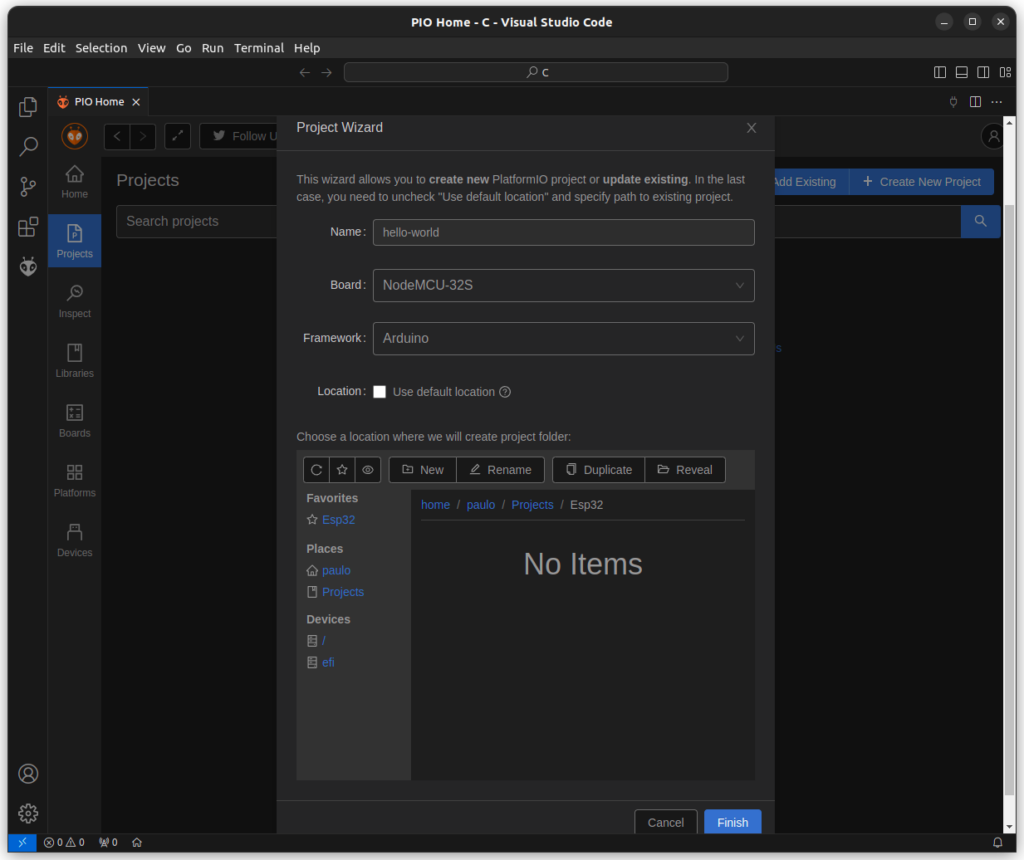
After installing the platform, you can then go to ‘Projects’ and ‘Create new Project’. In here you can name your project and select your board (if you are using the same board as we, choose ‘NodeMCU-32S’ as it is the most similar), for framework, we will use Arduino, and finally, choose your location and click ‘Finish’.
After the project is created you will see some folders and files already in there.
- ‘.pio’ and ‘.vscode’ should be left alone, unless you know what you are doing.
- ‘include’ will be where you put your ‘.h’ and ‘.hpp’ files.
- ‘lib’ is where you will paste any library you want to use.
- ‘src’ is where you will put your ‘.cpp’ and ‘.c’ files.
- and in ‘test’ you can put unit test files.
And almost all of those folders have a ‘README’ file telling you what goes in there.

3 - Making it Blink
To make the onboard LED blink, let’s start by removing the example function, leaving only ‘setup’, ‘loop’ and the include.
#include <Arduino.h>

void setup() {
    // put your setup code here, to run once:
}

void loop() {
    // put your main code here, to run repeatedly:
}
Now we need to know in which pin the onboard LED is. In our case, above the led, you can read D2, that means we will be using ‘GPIO_NUM_2’. If your board does not have it written, you can try gpio 2 because it is the norm, but you can also check your manufacturer.
Now we need to set gpio 2 as an output, and we can do that with the function ‘pinMode’. After that we change the pin state with ‘digitalWrite’ and add a little delay with ‘delay’. And that’s it, the code to make the onbard LED blink is ready.
#include <Arduino.h>

void setup() {
    pinMode(GPIO_NUM_2, OUTPUT);
}

void loop() {
    digitalWrite(GPIO_NUM_2, 1);
    sleep(1);
    digitalWrite(GPIO_NUM_2, 0);
    sleep(1);
}
The last step is to upload our program to the Esp32. You can choose the port at the bottom where you should see a ‘plug’ icon with ‘auto’ in front of it, click there and choose the port of the Esp (if you are using the same esp as us, you should see ‘ttyCH341’ in the ‘LINK’). If you, for some reason, do not see the esp port, take a look at this thread.
At the bottom left of your screen you will see a lot of buttons related to platformIO, one of them is a right arrow, press that button to upload your code to the Esp.

And, after uploading, you should see the blue led blinking in your Esp.
4 - Saying Hi to the world
To be able to read the ‘Hello’ from the esp we first need to setup a serial monitor, we can do that by opening ‘platformio.ini’ and adding ‘monitor_speed’.
[env:nodemcu-32s]
platform = espressif32
board = nodemcu-32s
framework = arduino
; add this
monitor_speed = 115200
Why 115200 if you can configure it in the Arduino code? That’s because the Esp32 outputs some data outside of the Arduino thread, and that data is only readable if we use 115200. If that data is not relevant to you just choose any other baudrate, but you will see some ‘random characters’ every time you restart your esp.
Now, to open the serial monitor, look at the bottom of the window for the other ‘plug’ icon. If you hover it, you should read ‘PlatformIO: Serial Monitor’, when you click it, it opens a ‘terminal’, now press the ‘EN’ or ‘Reset’ button on your esp and you should be able to read something like in this picture:
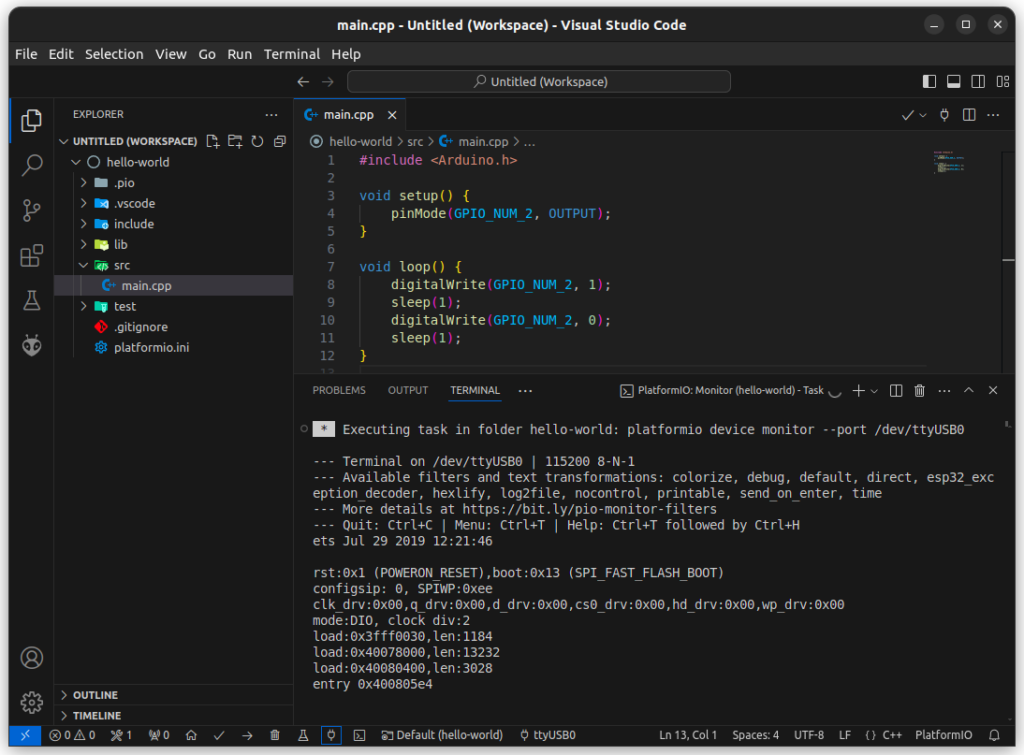
Now that we are able to read what the Esp outputs, we can start by initializing the Serial, and then printing the hello message:
void setup() {
    pinMode(GPIO_NUM_2, OUTPUT);
    Serial.begin(115200);
    Serial.println("Hello World");
}
We can also print some messages in the loop function to tell us the state of the LED:
void loop() {
    digitalWrite(GPIO_NUM_2, 1); // turn on led
    Serial.println("LED: ON"); // print led state
    sleep(1); // wait 1 sec

    digitalWrite(GPIO_NUM_2, 0);
    Serial.println("LED: OFF");
    sleep(1);
}
And, after uploading, you should now be able to see the LED state in the monitor!
Attention: You might not be able to upload to the esp with the serial monitor open! Press the ‘trash’ button to close it.
5 - Extra Tip
If you chose an esp you probably will want to use either bluetooth or wifi, and to use them you need to be carefull with ‘sleep’ in your arduino code. There is a better way to sleep the thread while also letting other esp functions work in the background, and we do that with FreeRTOS’s ‘vTaskDelay’ function, but it accepts ticks and not seconds, so we give it our time in milliseconds and divide it with a macro named ‘portTICK_PERIOD_MS‘ to get our time in ticks.
You can see here how the ‘loop’ function would look like if we made it ‘the right way for the Esp’:
void loop() {
    digitalWrite(GPIO_NUM_2, 1); // turn on led
    Serial.println("LED: ON"); // print led state
    vTaskDelay(1000 / portTICK_PERIOD_MS); // wait 1 sec

    digitalWrite(GPIO_NUM_2, 0);
    Serial.println("LED: OFF");
    vTaskDelay(1000 / portTICK_PERIOD_MS);
}
And that’s it, you should now be able to both see the led blink, and read the state in the serial monitor.
If you need an Esp32 you can buy one here, or if you want to know about it before buying, you can read our review here.
Thanks for reading and stay tuned for more tech insights and tutorials. Until next time, and keep exploring the world of tech!